Flange Joint Errors shutdowns root cause analyzed and eliminated.
Crews committed Flange Joint Errors shutdown an NH3 plant 2-days after TA started.
| Article Type: | Root Cause Analysis (RCA) |
| Category: | Mechanical |
| Equipment Type: | Pipelines and Miscellaneous Problems |
| Author: | S. Raghava Chari |
Note: This root cause analysis (RCA) is from real-time scenarios that happened in industries during the tenure of two or three decades ago. These articles will help you to improve your troubleshooting skills and knowledge.
Flange Joint Errors Problem
Flange joint errors committing is easy and are extremely harmful; the below given two case studies illustrate it:
Case Study 1
Crew blind flanged the CO2 absorber 18” 300 # blinded man-way after completing repairs during a TA.
The blind flange joint developed heavy 35 bars potassium carbonate solution leaks rush shut down a production stabilized ammonia plant within two days.
Root Cause
The crew had mistakenly put 150# spiral wound gasket instead of 300#. This simple mistake cost 2 days lost production, cost of venting upstream intermediate products, lost catalytic carbonate solution and spill cleanup costs running into thousands of rupees.
Case Study 2
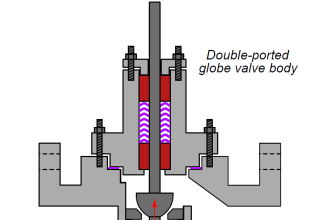
Pipefitters bolted a 6” 1500 RTJ flange control valve to pipeline flanges during the same TA. An alert instrument supervisor brought to the author’s attention the practically no flange face gap.
The author got the joints opened and found the crew had wrongly used 6” 900 # Octagonal Ring Gasket in place of the correct 6” 1500 # Ring because both are of the same OD. Since the 900# gasket is thinner than 1500 flange gap was near nothing.
The author complemented the alert engineer. Had the plant started with the wrong gasket, immediately on pressuring or few days after the start rush shutdown an even uncontrollable fire could have happened.
Often many such incorrect gaskets leaks do not show up during operators checking under full line pressure. They suddenly show and shut down the plants a few days later at inconvenient poor maintenance resource times.
Hence, crew, supervisors, and even operation engineers shall remember and check their requested joints gaskets using the below given simple checks to ensure correct gaskets are in a position to avert after start-up disasters.
Flange Joints check simple steps
Flange Joints check simple steps follow:
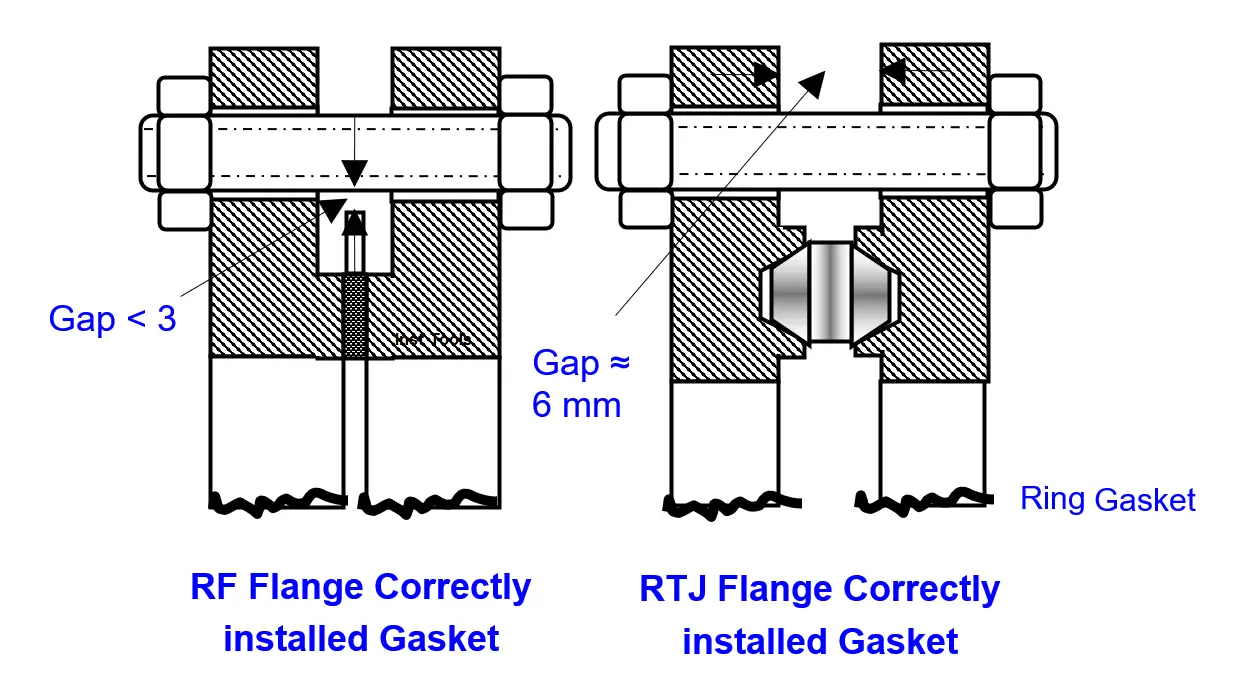
For Raised Face Flange Joints (Left Figure)
Never use used gaskets. Carefully note the gasket size and rating engraved on the retainer ring and use proper gaskets only.
After insertion and hand-tightening 2 diametrically opposite bolts measure the gap between the retainer periphery and bolt periphery. A 2 to 3 mm gap is OK.
A larger gap surely shows an underrated gasket. After ensuring the correct gasket, tighten the flange joint taking care of the usual steps.
For RTJ Flange Joints (Right Figure)
The Flange faces axial gap shall be around 6 mm. To low gap surely points out an underrated gasket in position.
Unfortunately, the same flange size but different ratings RTJ gaskets ODs are the same; hence, errors committing is easy. Therefore, do not go by OD alone. Be sure of OD and Rating.
Author: S. Raghava Chari
Do you face any similar issues? Share with us through the below comments section.
If you liked this article, then please subscribe to our YouTube Channel for Instrumentation, Electrical, PLC, and SCADA video tutorials.
You can also follow us on Facebook and Twitter to receive daily updates.
Read Next:
- Dozing System Problems
- Pump Low throughput Eliminated
- Fan Motor Journal Bearing Failures
- Turbine to Gearbox Alignment Drifts
- Storage Tanks Ammonia Gas Venting Issue