This article is about communication between Siemens TIA PORTAL and Factory IO. You can use actual PLC to check your logic. You can also create an animation as per your actual layout and test the logic.
Here, I don’t have actual PLC so, I will use Siemens simulator to test the logic.
Factory IO and Siemens Tia Portal
I will explain communication with a simple example that contains START, STOP switches as inputs, and conveyor as OUTPUT which is to be controlled from inputs. I will also light the lamp to indicate the START and STOP status of the conveyor, lamps are OUTPUTs here.
So, I will use two INPUTs and three OUTPUTs in my example. Let’s begin with communication.
Step 1:
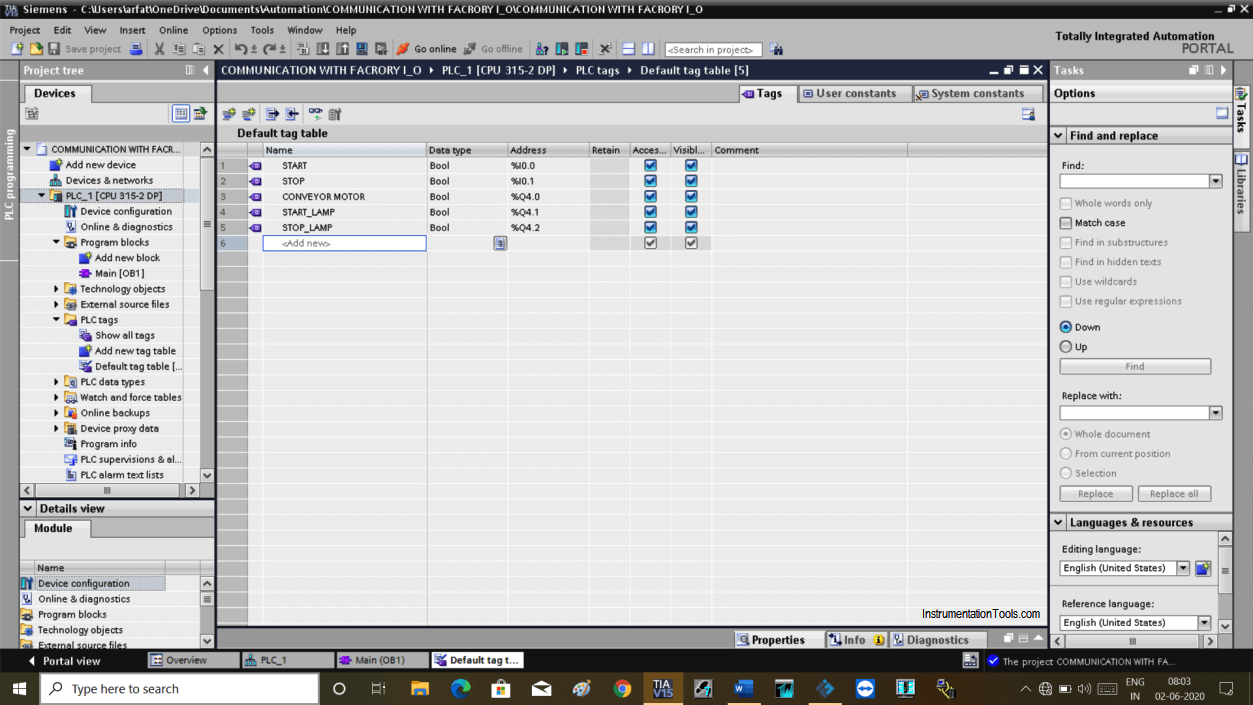
First, open the TIA portal. Enter into the Programming environment.
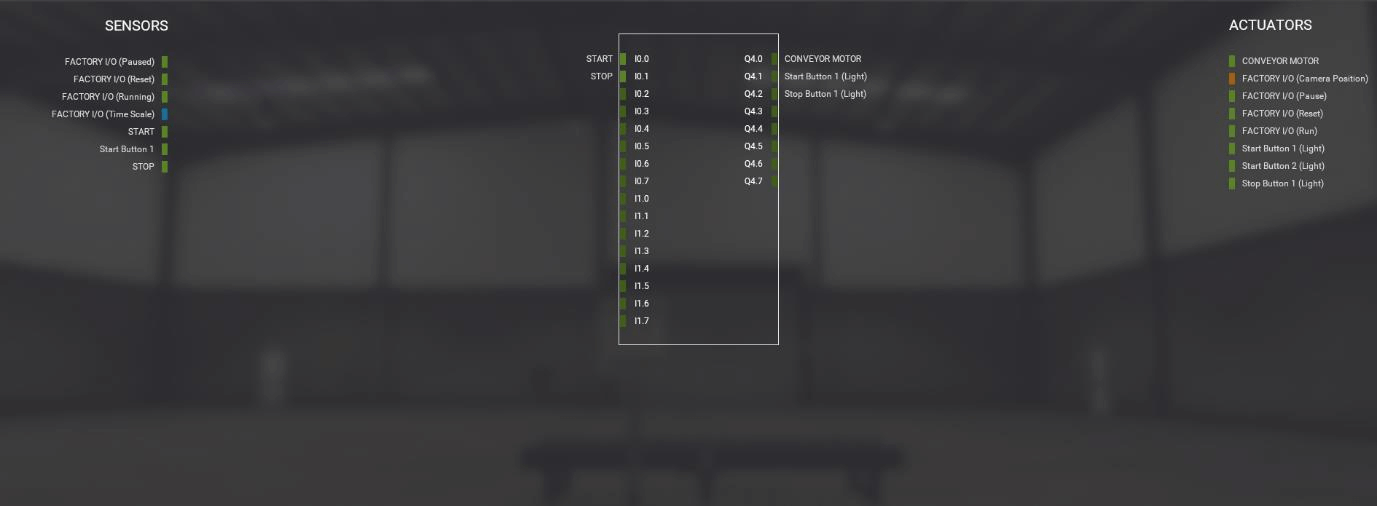
First, I will create a symbol table to define Input and Output tags as shown in the below window.
Step 2:
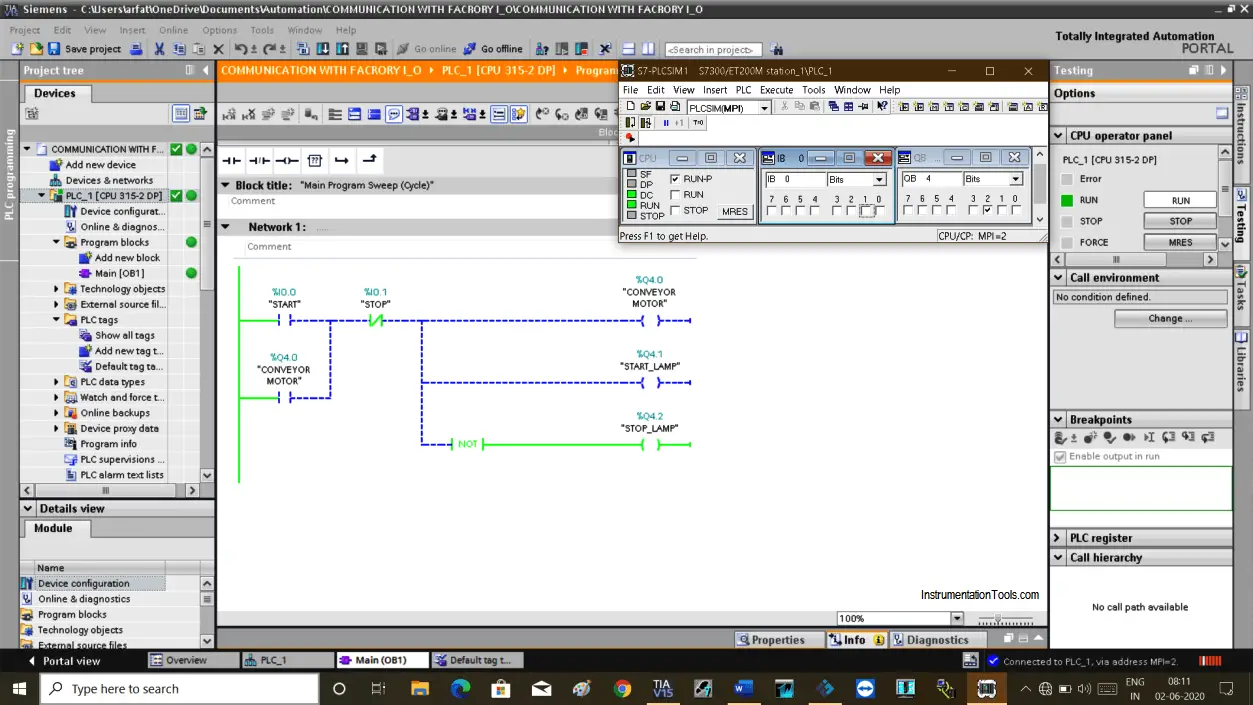
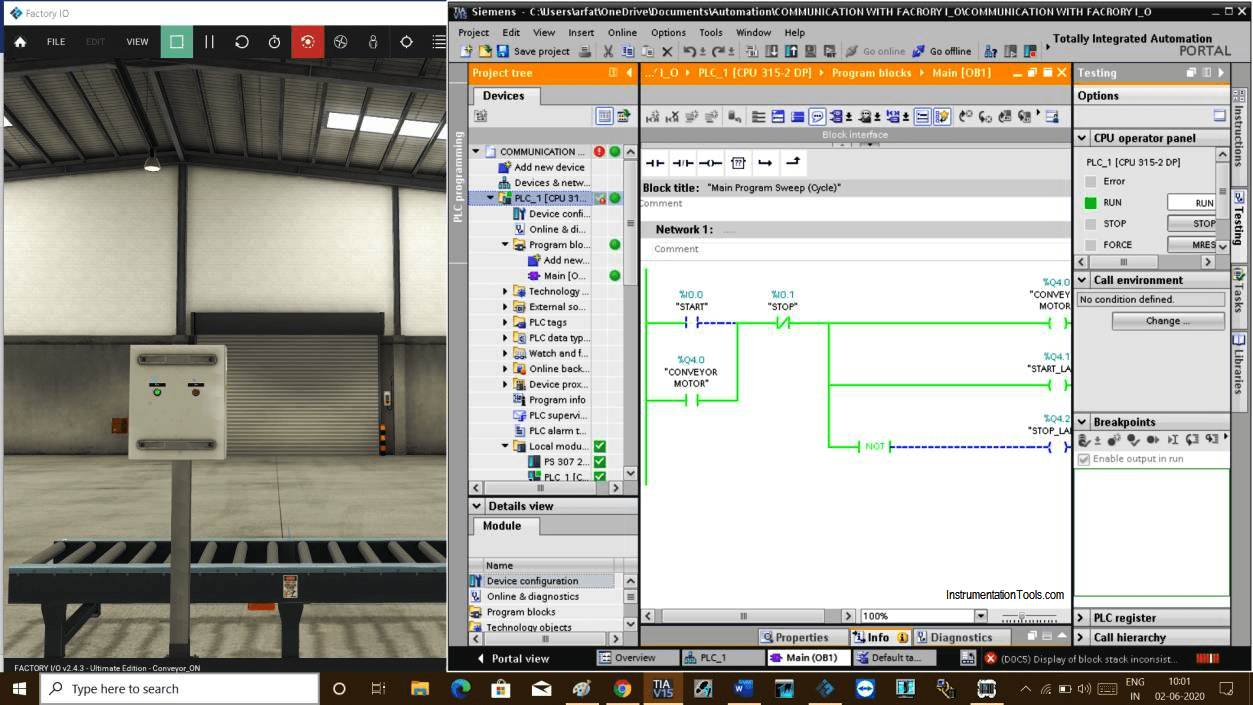
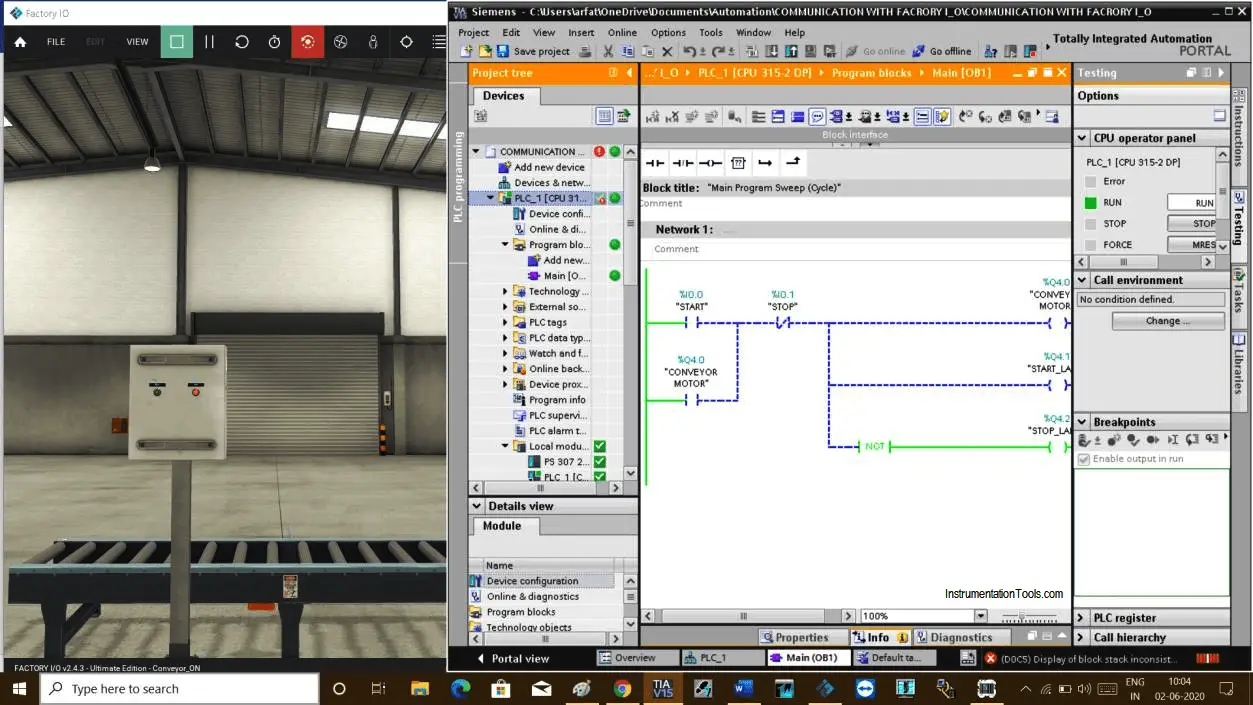
Now write the PLC program shown below to turn ON the conveyor motor.

Step 3:
Now, load this program in a simulator and put it in to run mode.
Step 4:
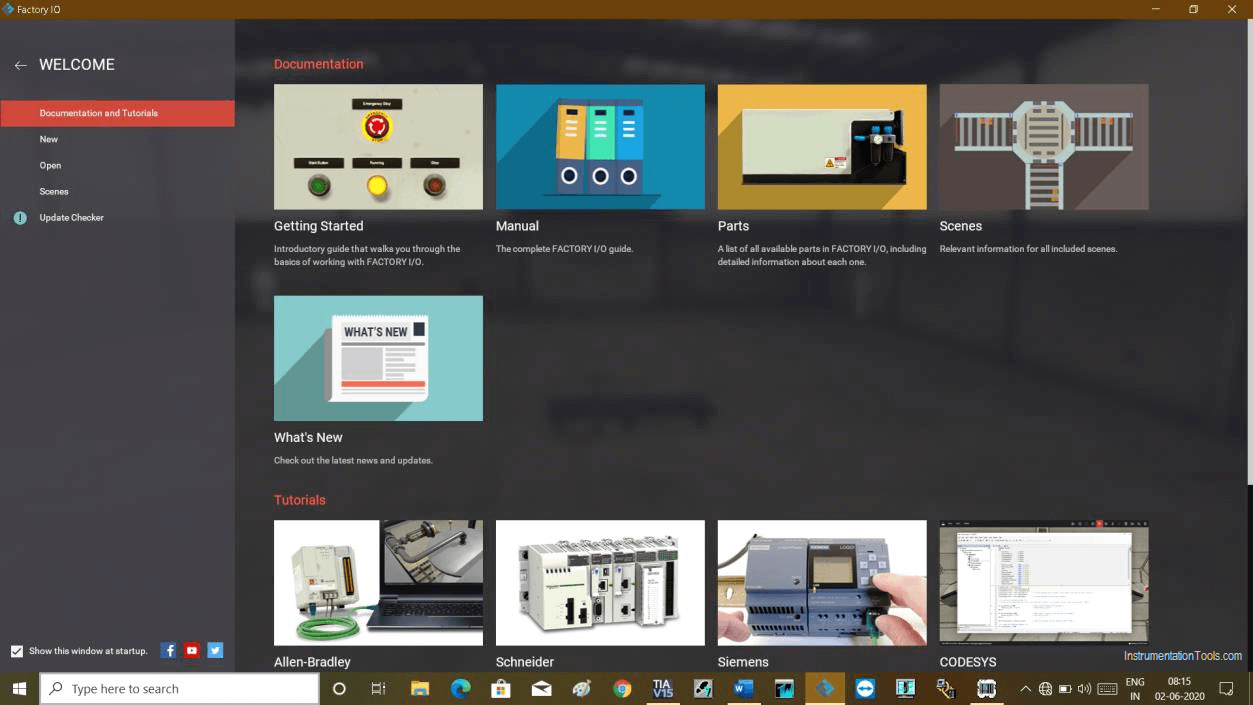
Now, open Factory I/O software.
You can create a new scene or can use a scene that is already created in the factory I/O.
Step 5:
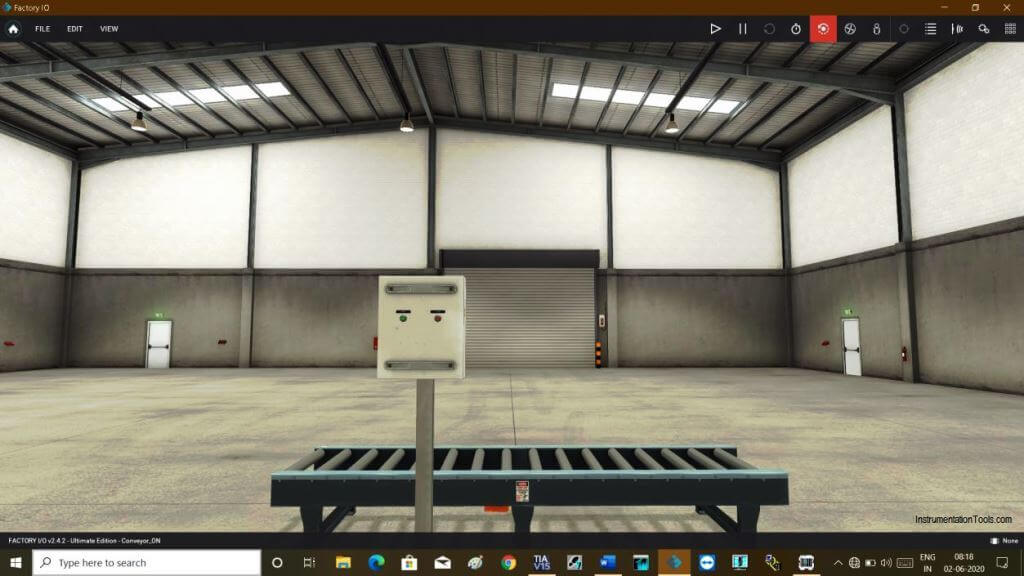
Here, as I want to turn ON conveyor, I have to create a new scene as shown in the below figure.
As I aim to show you communication my animation is too simple.
I have added START, STOP pushbutton, and conveyor as per Input and Output, which are used in my PLC programming.
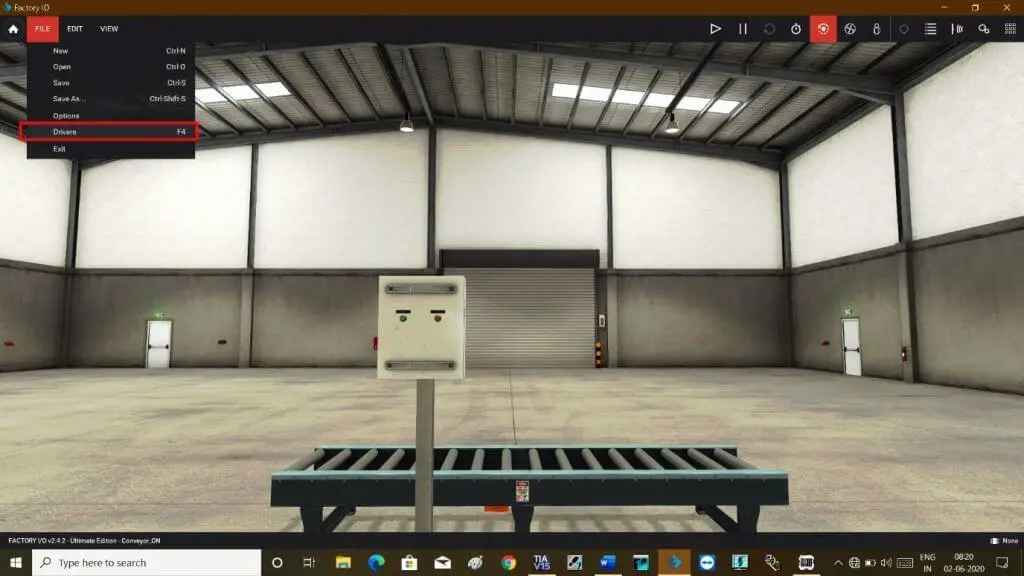
Step 6:
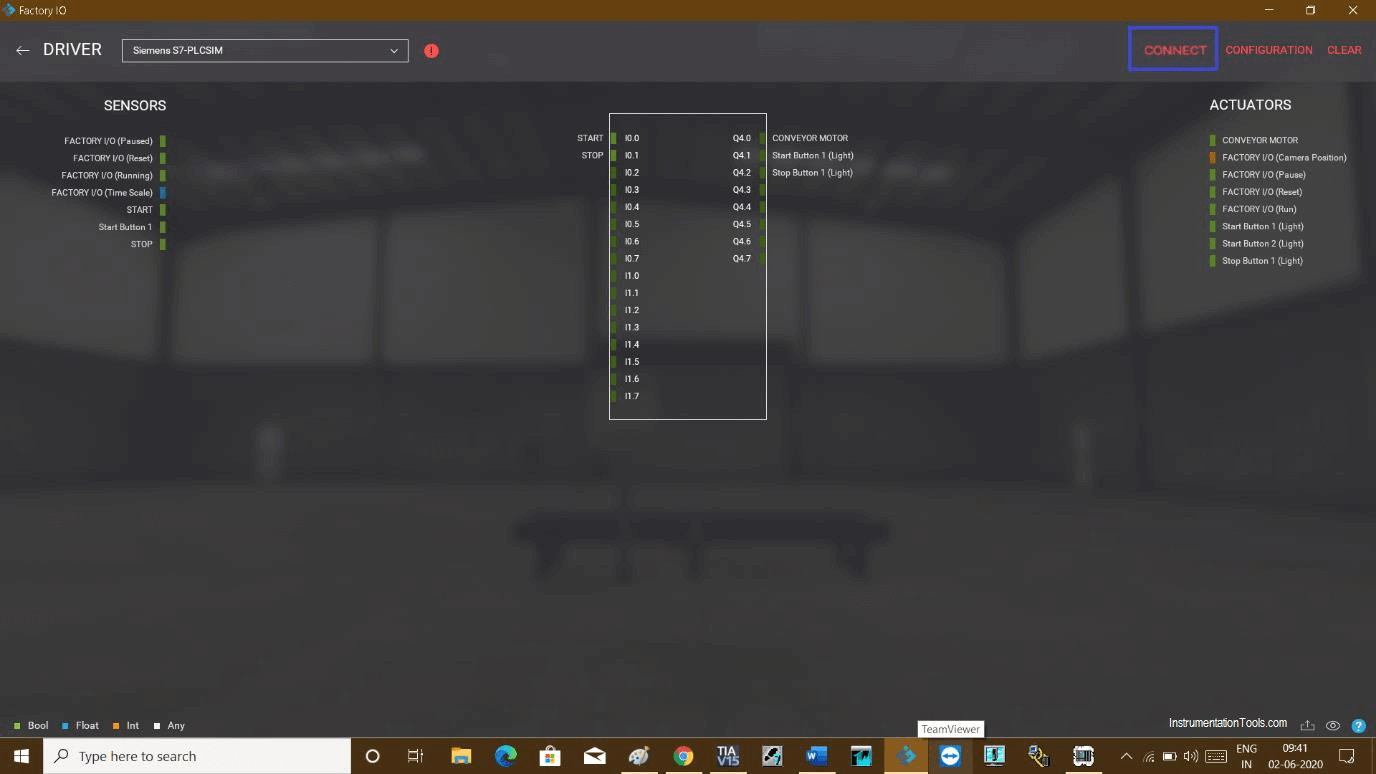
Now, Go to the file menu and select the driver to configure the simulator.
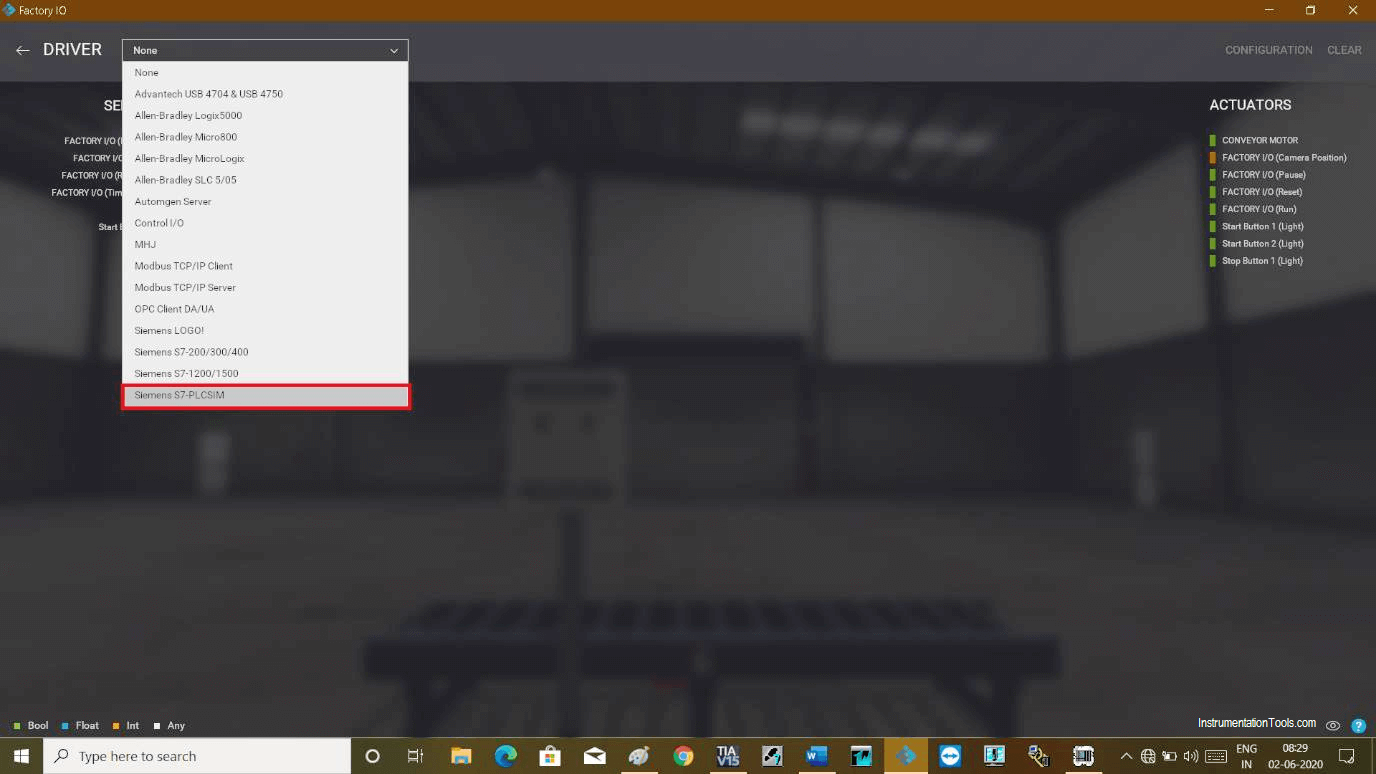
Step 7:
Open the drop-down menu and select “Siemens S7 PLCSIM”. Click on it to add the I/O module.
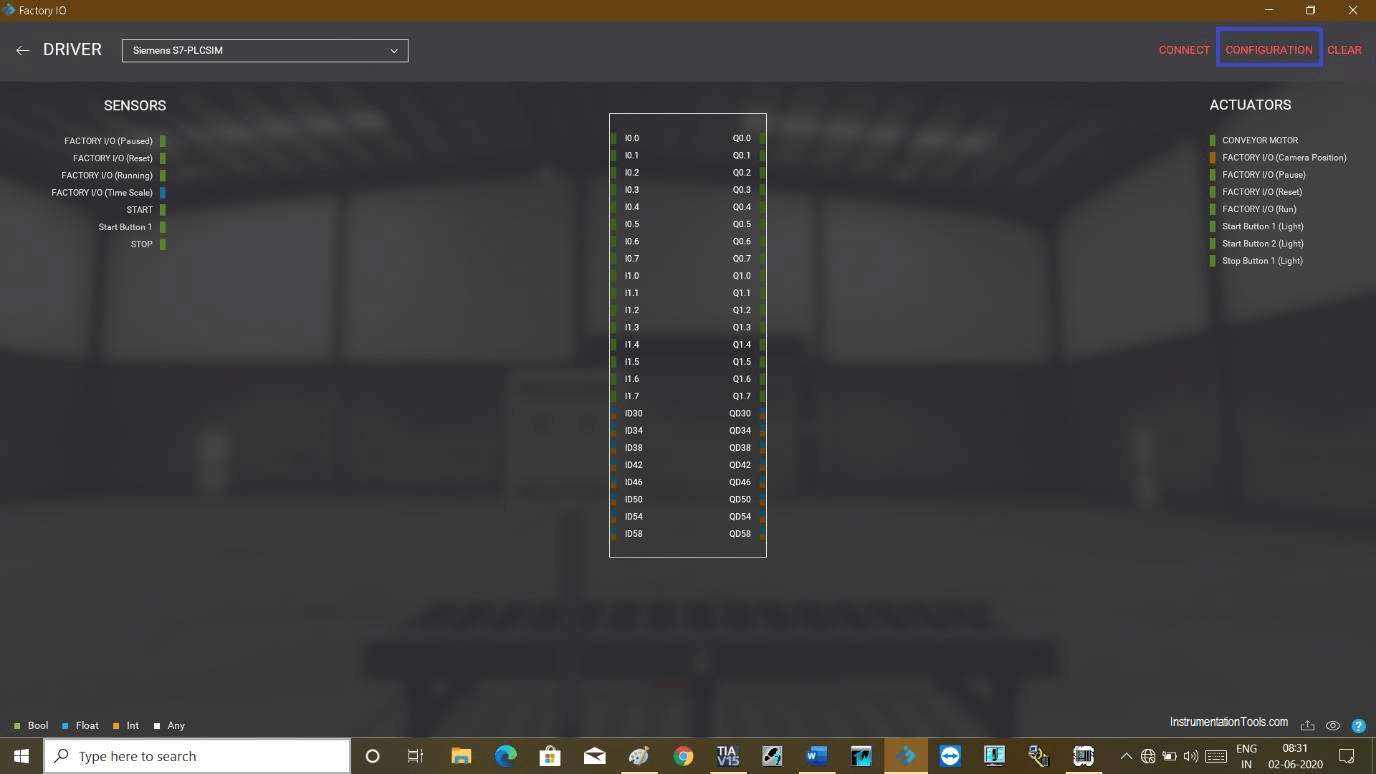
Step 8:
The following module will be added. Now, click on “configuration” to configure module which we have used in our PLC program.
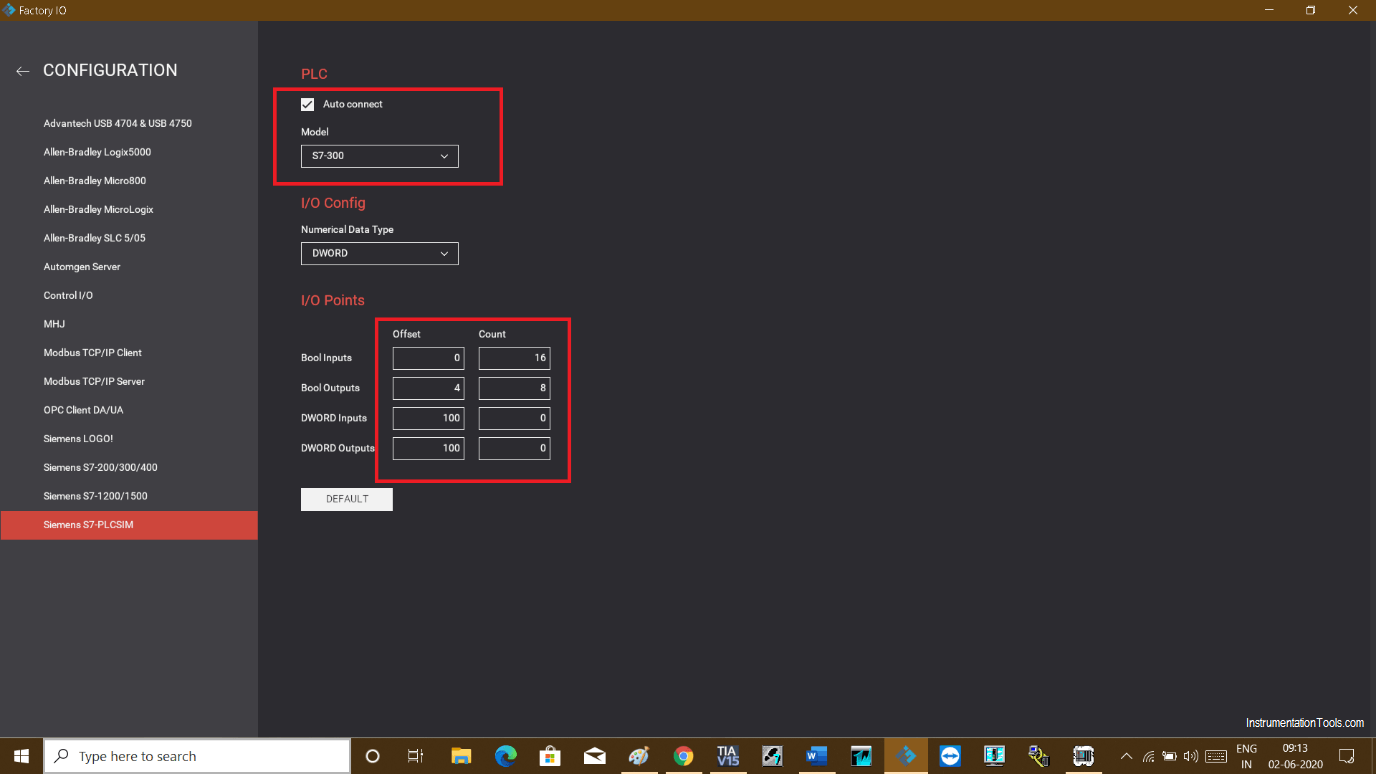
Step 9:
In the configuration window, select the checkmark to automatically connect PLC.
In “I/O points” choose the starting address of your PLC Input and output. “Offset” represent the starting address which is in our case start from “0 (zero)” for Input and “4” for Output.
“Count” represents the number of Inputs and outputs available in the PLC module.
Step 10:
After configuration, go back to the driver window. Now drag and drop Inputs and Outputs which we have used in our programming.
Simply drag Inputs or outputs from the Sensor and Actuator tab and put them into the module as shown in the below window.
Step 11:
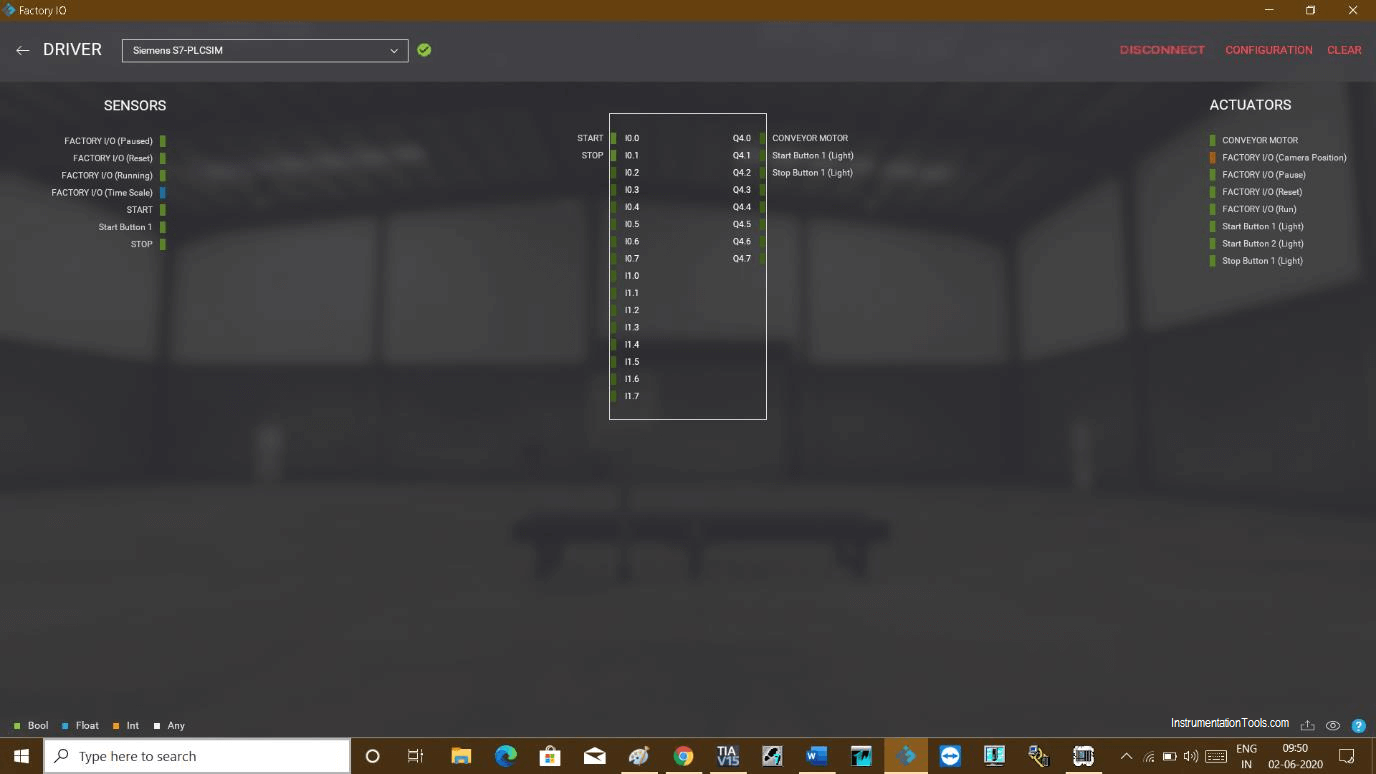
Click on the “connect” icon to connect it with the simulator.
Step 12:
On successful communication, the right checkmark will appear next to the driver option.
Step 13:
Now test the logic. As I have used pushbutton, if I press it and release it, due to latching in the program, it won’t stop, light and motor both will energize continuously.
Step 14:
As soon as I press the stop button, it stops the motor and the stop lamp will turn ON.
Author: Suhel Patel
If you liked this article, then please subscribe to our YouTube Channel for PLC and SCADA video tutorials.
You can also follow us on Facebook and Twitter to receive daily updates.
Read Next:
- Extended Timer Logic in PLC
- Pulse Generation Timer
- Allen Bradley RSLogix
- FIFO Instruction in PLC
- Motor Ladder Logic in PLC


I tried to connect it says
“It seems that S7-PLCSIM V13/V14 is not running. Please start it and try again.”