In this article, we will talk about the UDT or user-defined data types and how to use them for better and faster PLC project structure.
Contents:
- What is a user-defined data type -UDT-?
- Why would I need UDT?
- How to create a UDT?
- Applying the concept to previous tank simulation examples.
- Conclusions.
What is a User-defined Data Type?
TIA Portal platform and any other PLC programming software offers a wide range of different data types that you can use in your project, like, Booleans, Integers, Real, and some complicated types like Arrays and TimeOfDay. This helps you better structure your project and better utilize your PLC memory and processing areas.
A UDT is a complex user-defined data type, meaning you as a programmer have to define a UDT first and then use it in your PLC project. The UDT represents a structure made of several components of the same or different data types. You can change a PLC data type (UDT) centrally and use it repeatedly in the program code. All locations of use are updated automatically.
Why would you need UDT?
You don’t have to use UDTs in your project, however, it will give you many benefits when applying it in your project.
Following are some examples:
- By now you should understand the importance of FCs and FBs in PLC coding and how their reusability advantage makes it easier for you to code repeated processes with the same logic by just changing the function parameters, You can think of UDTs like the same but for tags and data types, you can reuse the UDT you created anywhere in your project and when you make a change it will be updated everywhere.
- Using UDTs will make it easier to group your data according to your process control, for example, you can have a UDT for the TANKs in your process and use it with all tanks and another UDT for PUMPs and so on.
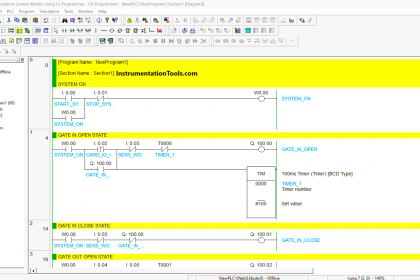
- Remember in the last article, when we needed to simulate a second tank in our project, we had to redefine the same set of tags for the second tank and they were the same exact tags. See picture 1.
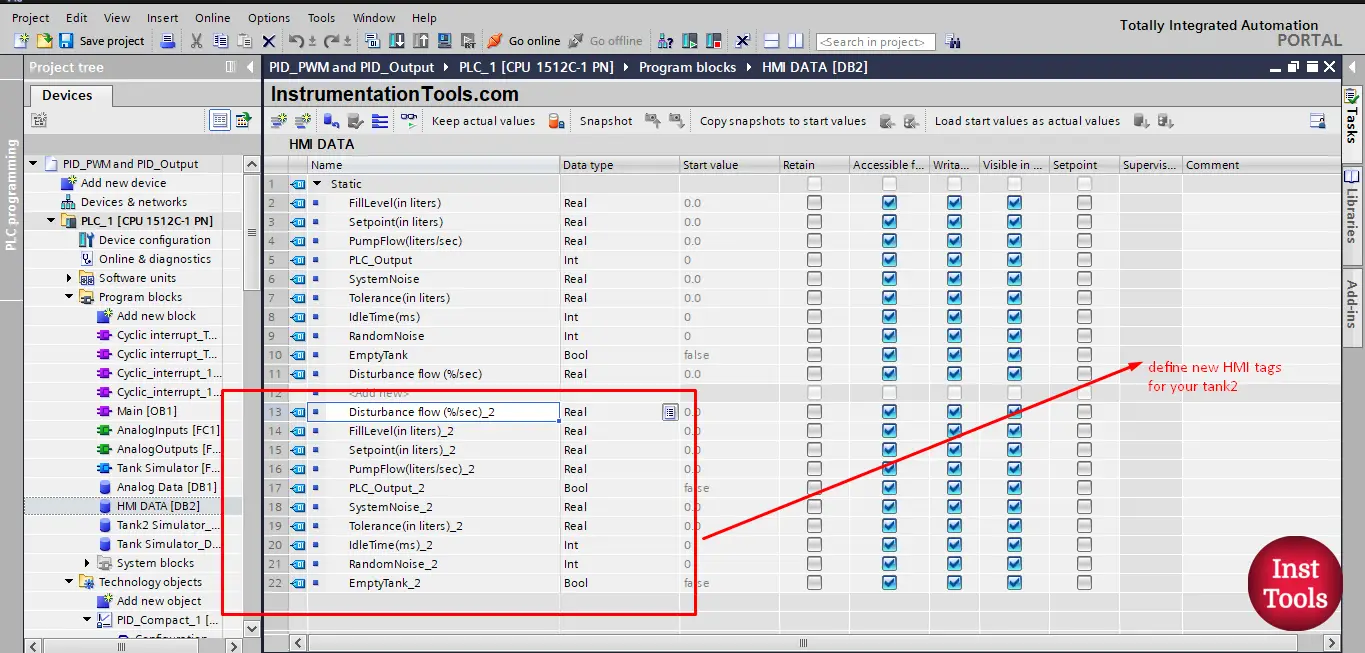
Picture 1. Defining tank2 tags.
Imagine if we had 10 or 50 tanks in our project, we would have to define the same tags for all the tanks which would be very difficult and time-consuming and it could lead to programming errors if there was any mix between tags of different tanks.
Using UDTs will ensure easier tags construction and faster programming as we will see following.
How to Create a UDT?
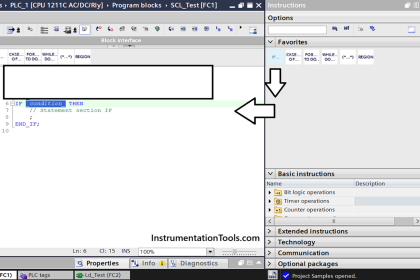
To create a new data type you just need to click the “PLC data types” and double-click on “Add new data type”. See picture 2.
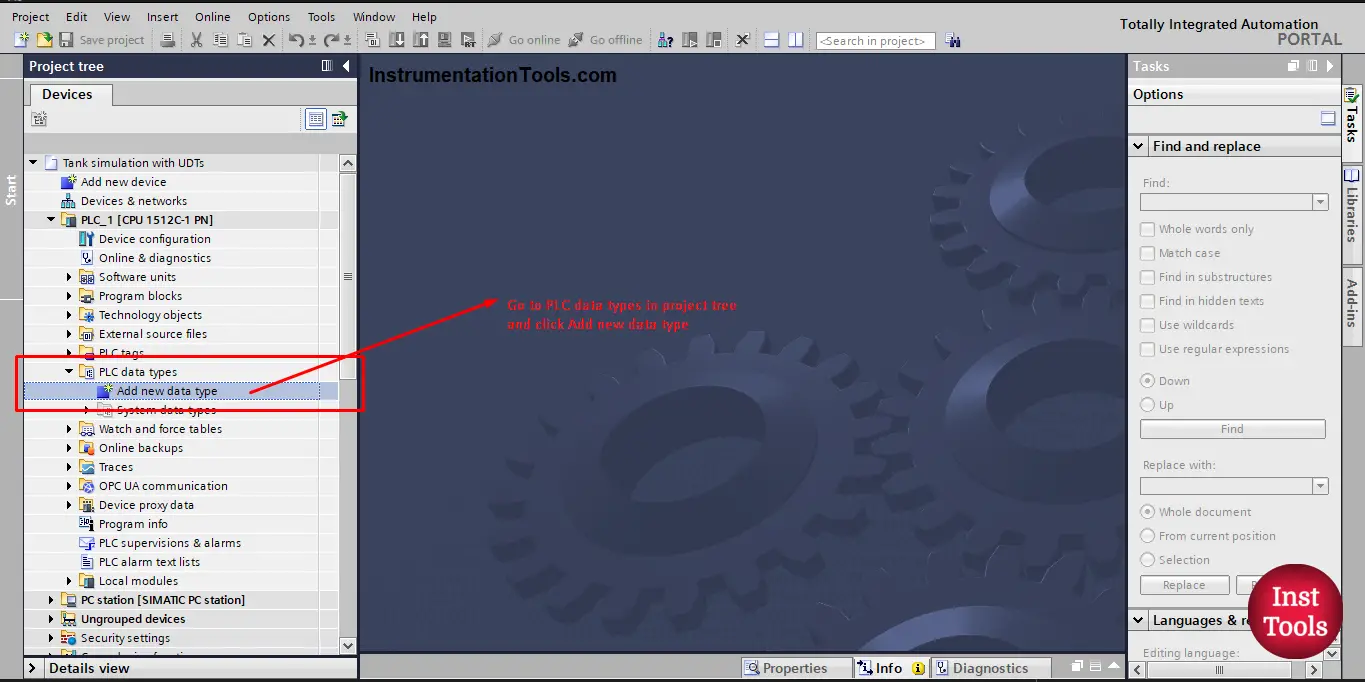
picture 2. Create a new data type.
Once you click the “Add new data type” a new UDT will be created and the data view of your UDT will open.
Remember to give your UDT a proper name that will represent its purpose, in our case the Tank system. See picture 3.

picture 3. Rename your UDT.
Applying the concept to the previous tank simulation example:
Next, you start to add the tags you want to your UDT, in our case we will add all the related tank tags from our previous simulation project into the Tank UDT. See picture 4.
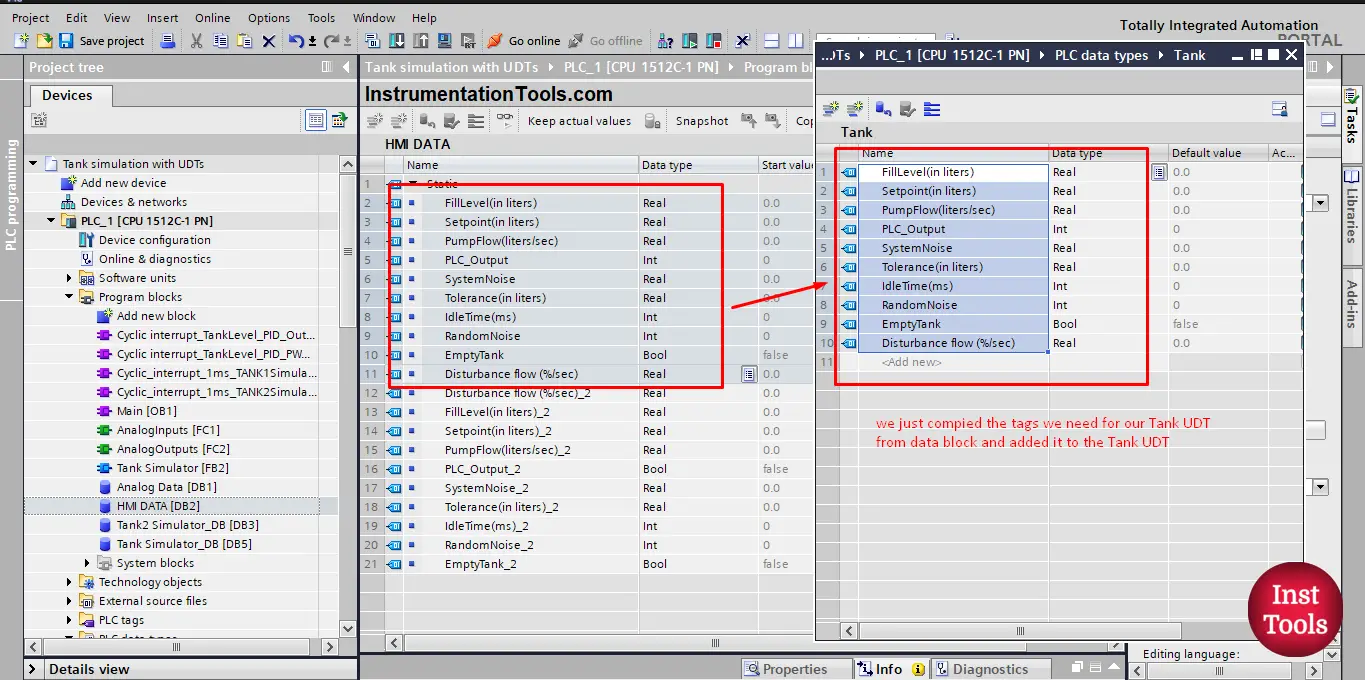
Picture 4. Add your tags to the UDT.
As you can see, we just copied the tags we used for our tank simulation project into our Tank UDT. And now we have a new data type that contains all related information of a tank system.
Now whenever we have a new tank in our PLC project we can just create a tag for that tank and give it the data type “Tank” and it will automatically have all the information needed for a tank system. See picture 5.
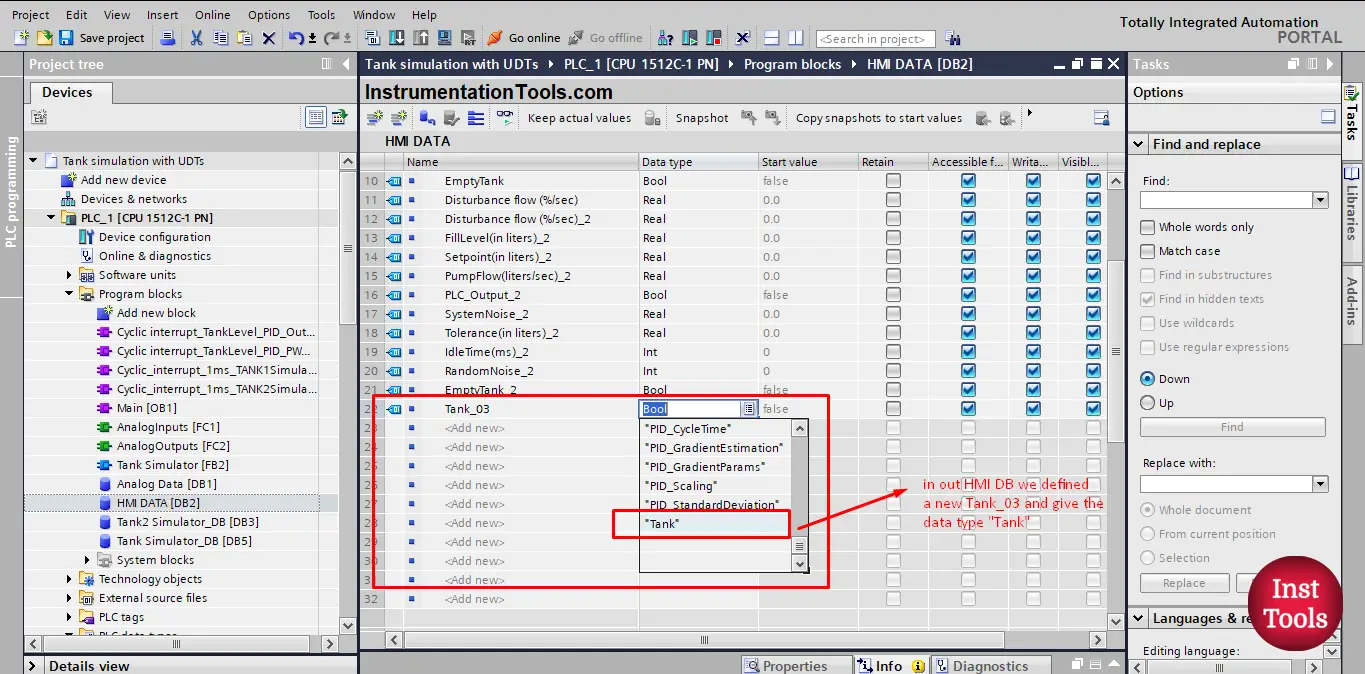
picture 5. Adding a new tank to our project.
You can see from the previous picture, that whenever you declare a new tag you can find and choose the data type “Tank“ for that tag. This time we declared a tag Tank_03 of data type “Tank”.
Once you declare Tank_03 you can see a small black arrow next to it, indicating that this tag has some information stored in, Once you click this arrow you will see all the tags defined inside the UDT “Tank”. See picture 6.
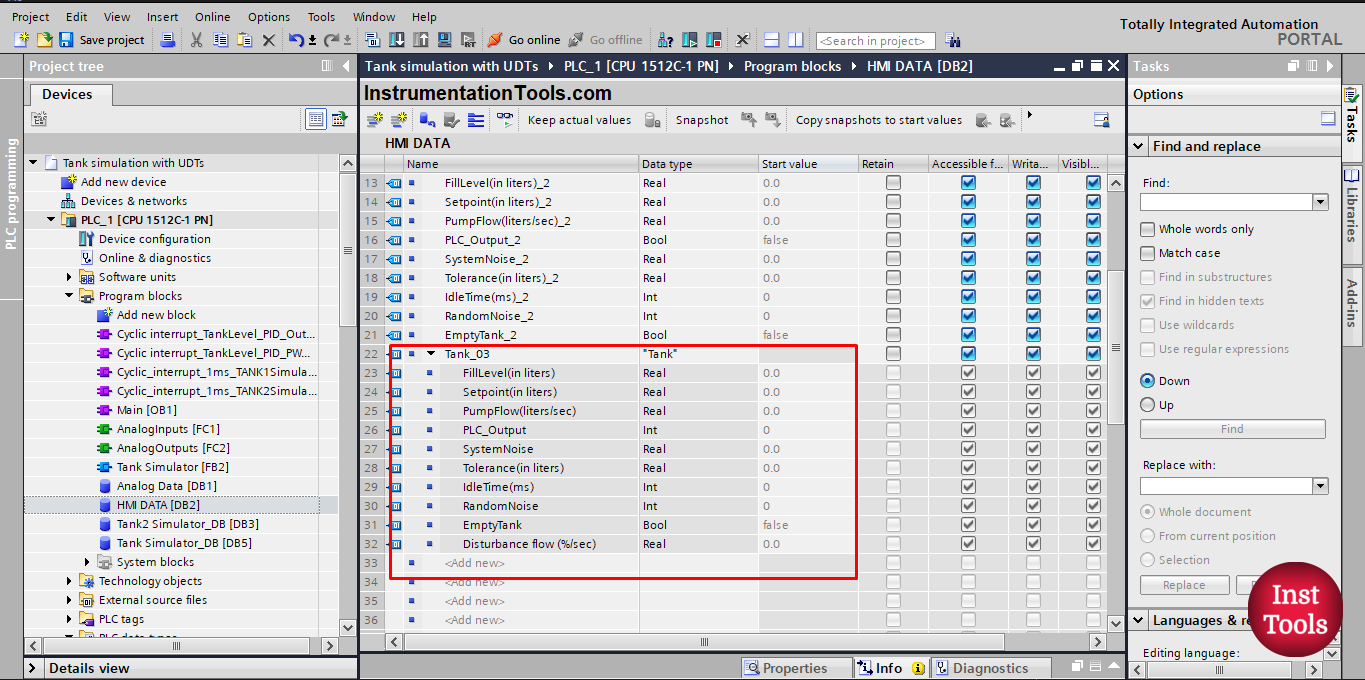
picture 6. Declare Tank 3 of data type Tank.
As you can see, Tank_03 has all the needed tags for a tank system.
Now, we will imagine that our process has 12 different tanks, we will just as easily create the tags for the rest of the tanks. See picture 7.
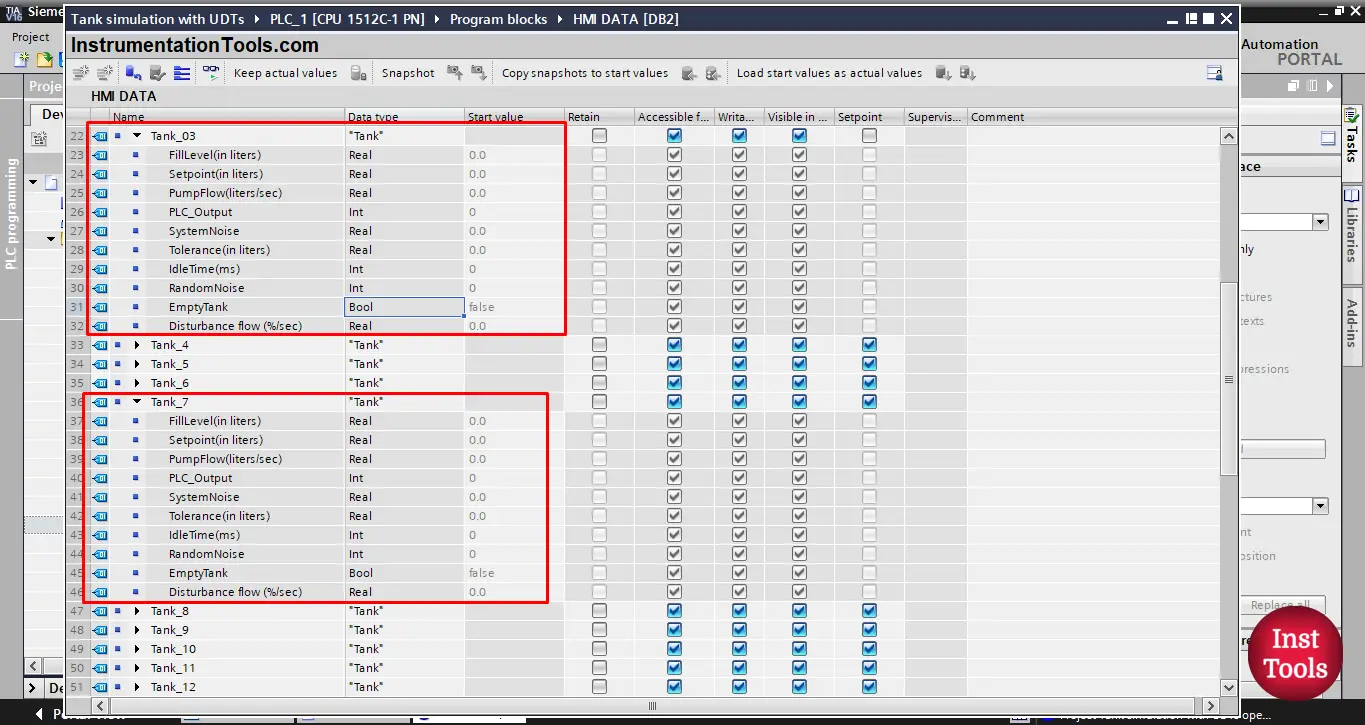
Picture 7. Imagine that we have 12 tanks.
As you can see, we created tags for 12 tanks and each one of them is of data type “Tank”.
Now, go back and imagine that you don’t have a UDT for the tank system, if you try to create the tags for 12 different tanks, you will need to re-declare all related tags for each tank individually 12 times. See picture 8.
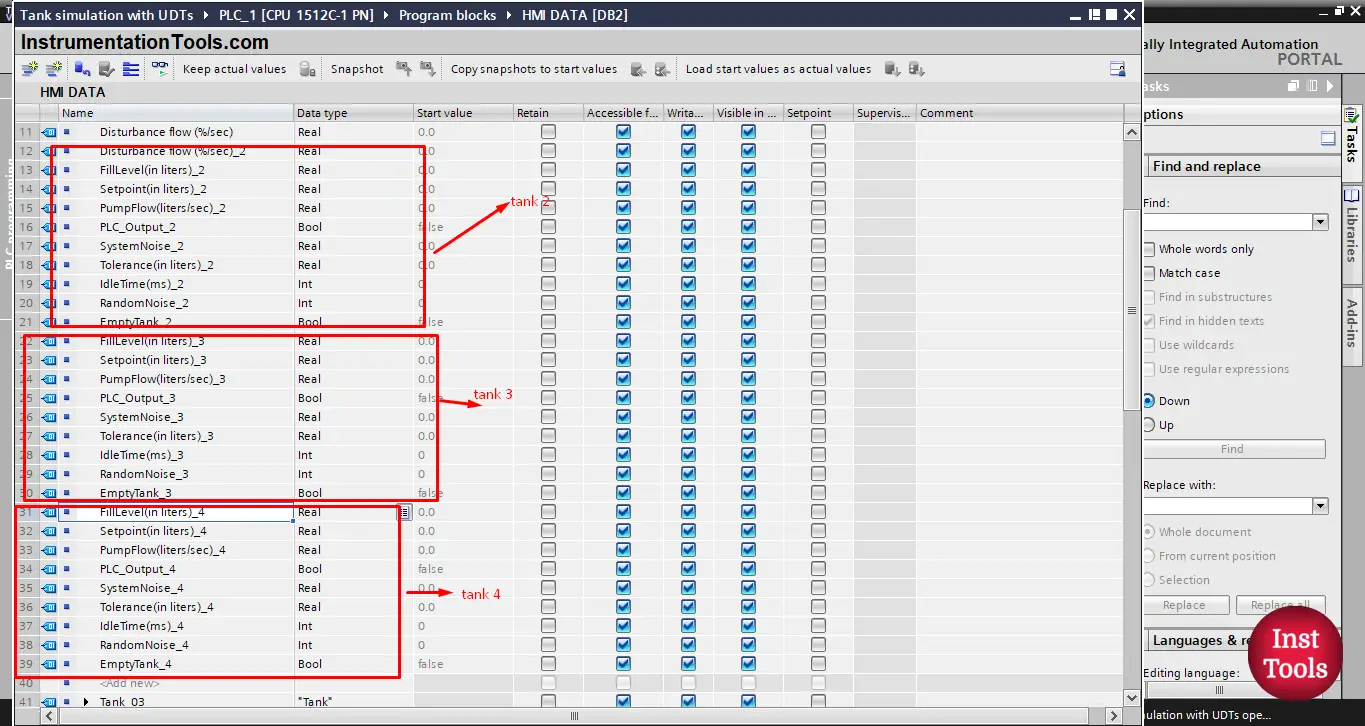
picture 8. Creating all tags one by one.
All the tags you see in the previous picture are only for 3 tanks; imagine creating the same for another 9 tanks. Surely that will be very annoying.
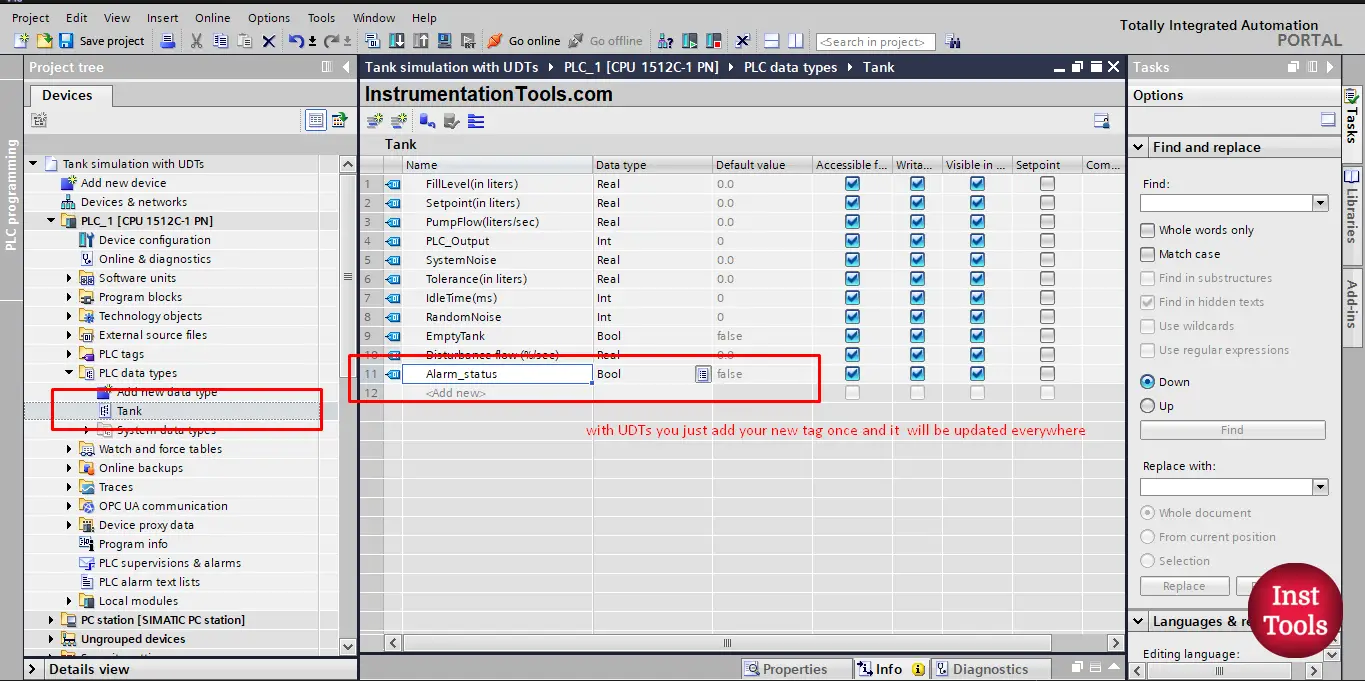
Now, imagine that you need to add another tag, for example, you need to have a tag that will tell the alarm status of a tank. You will have to add this new tag for each tank. See picture 9.
![User Defined Data Type [UDT] Tutorial](https://instrumentationtools.com/wp-content/uploads/2023/08/User-Defined-Data-Type-UDT-Tutorial.png)
picture 9. Adding new tag
As you can see, any time you need to add a new tag, you will have to declare it for each tank individually.
What about with UDT?
With UDTs, when you need to add a new tag, all you will do is go to your UDT data block and declare the new tag inside it. See picture 10.
picture 10. Adding new tags in UDTs.
Once you make any change in the UDT declared tags. The changes will be automatically updated everywhere using the same data type. However, you will need to recompile your UDT tags after each change. See picture 11.
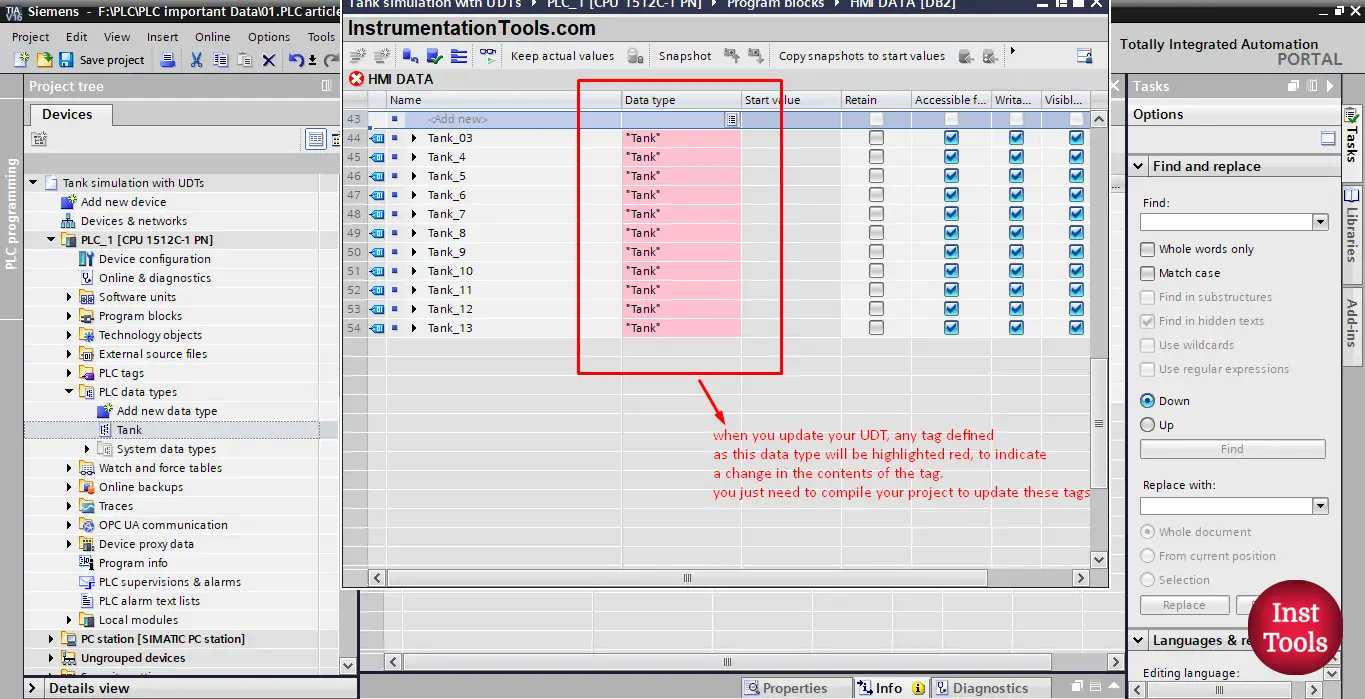
picture 11. Compile to update changes.
As you can see, all tags defined as a Tank data type are now colored red to indicate that there were some changes done to the original UDT.
Once you compile your project or at least your Data block, the changes in the UDT will be automatically updated in all related tags. See picture 12.
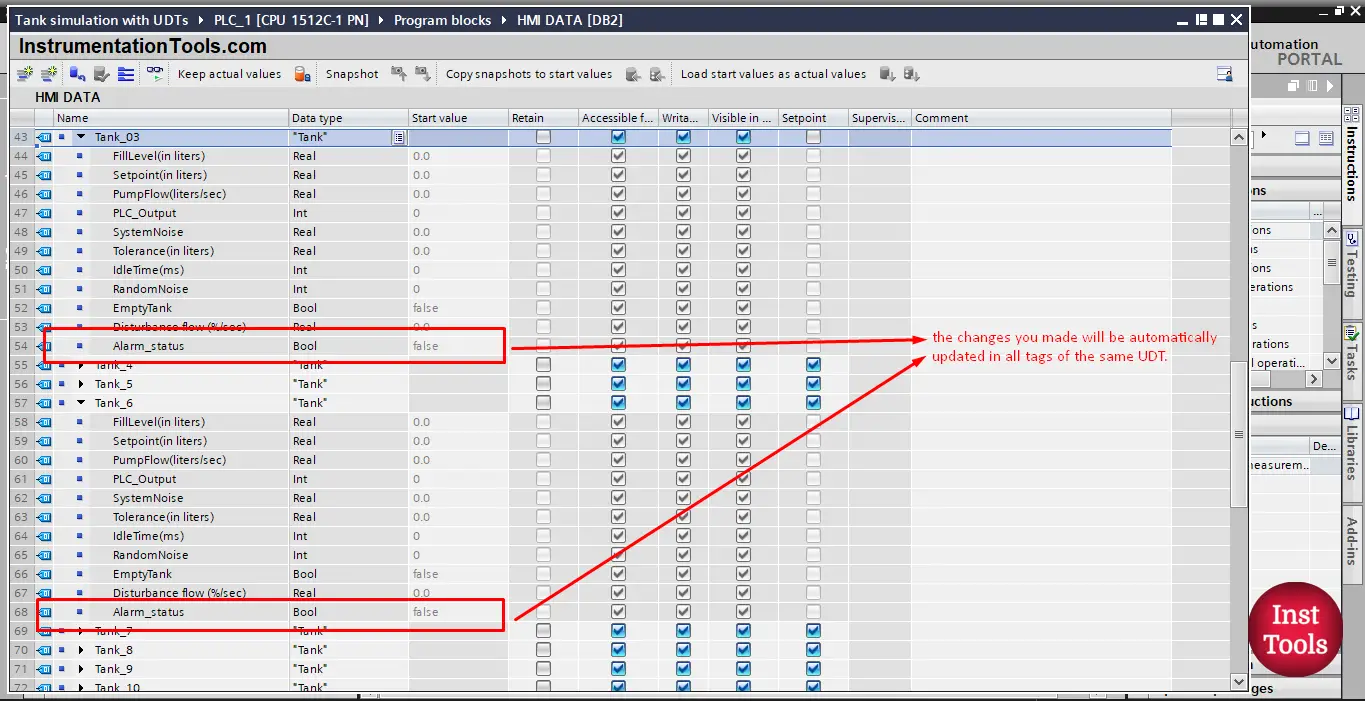
Picture 12. Changes are updated automatically.
You can see that the new Alarm_status tag is now added to all tanks.
Download: User-Defined Data Type
Conclusion
- UDT is a complex user-defined data type.
- UDT represents a structure made of several components of the same or different data types.
- You can change a PLC data type (UDT) centrally and all locations of use are updated automatically.
- UDTs are very useful when you want to better structure your project and when you have repeated processes in your project.
If you liked this article, then please subscribe to our YouTube Channel for Instrumentation, Electrical, PLC, and SCADA video tutorials.
You can also follow us on Facebook and Twitter to receive daily updates.
Read Next:
- HMI Screen Design Applications
- Static and Temp Variables in PLC
- Power Supply Sizing for Systems
- How to Read the PLC Datasheet?
- OB100 Start-up Organization Block


It was extremally useful, thanks!