Before Creating Process Mimics or Graphics, we need to configure the library in a project such as we need to create user groups and users who are especially needed to view Instruments configured with the PlantPAx library. If we do not configure or create a user group particular instrument and its faceplate will show a cross mark in objects.
So, we will see how to create default user groups and assign security codes.
Also, we will create one area in which we need to define an object. As we know it’s DCS so we need to create areas 1 area will particularly run 1 plant or process.
Factory Talk Studio PlantPAx Library
In this article, you will learn the configuration of the PlantPAx library in the factory talk studio of Rockwell Automation.
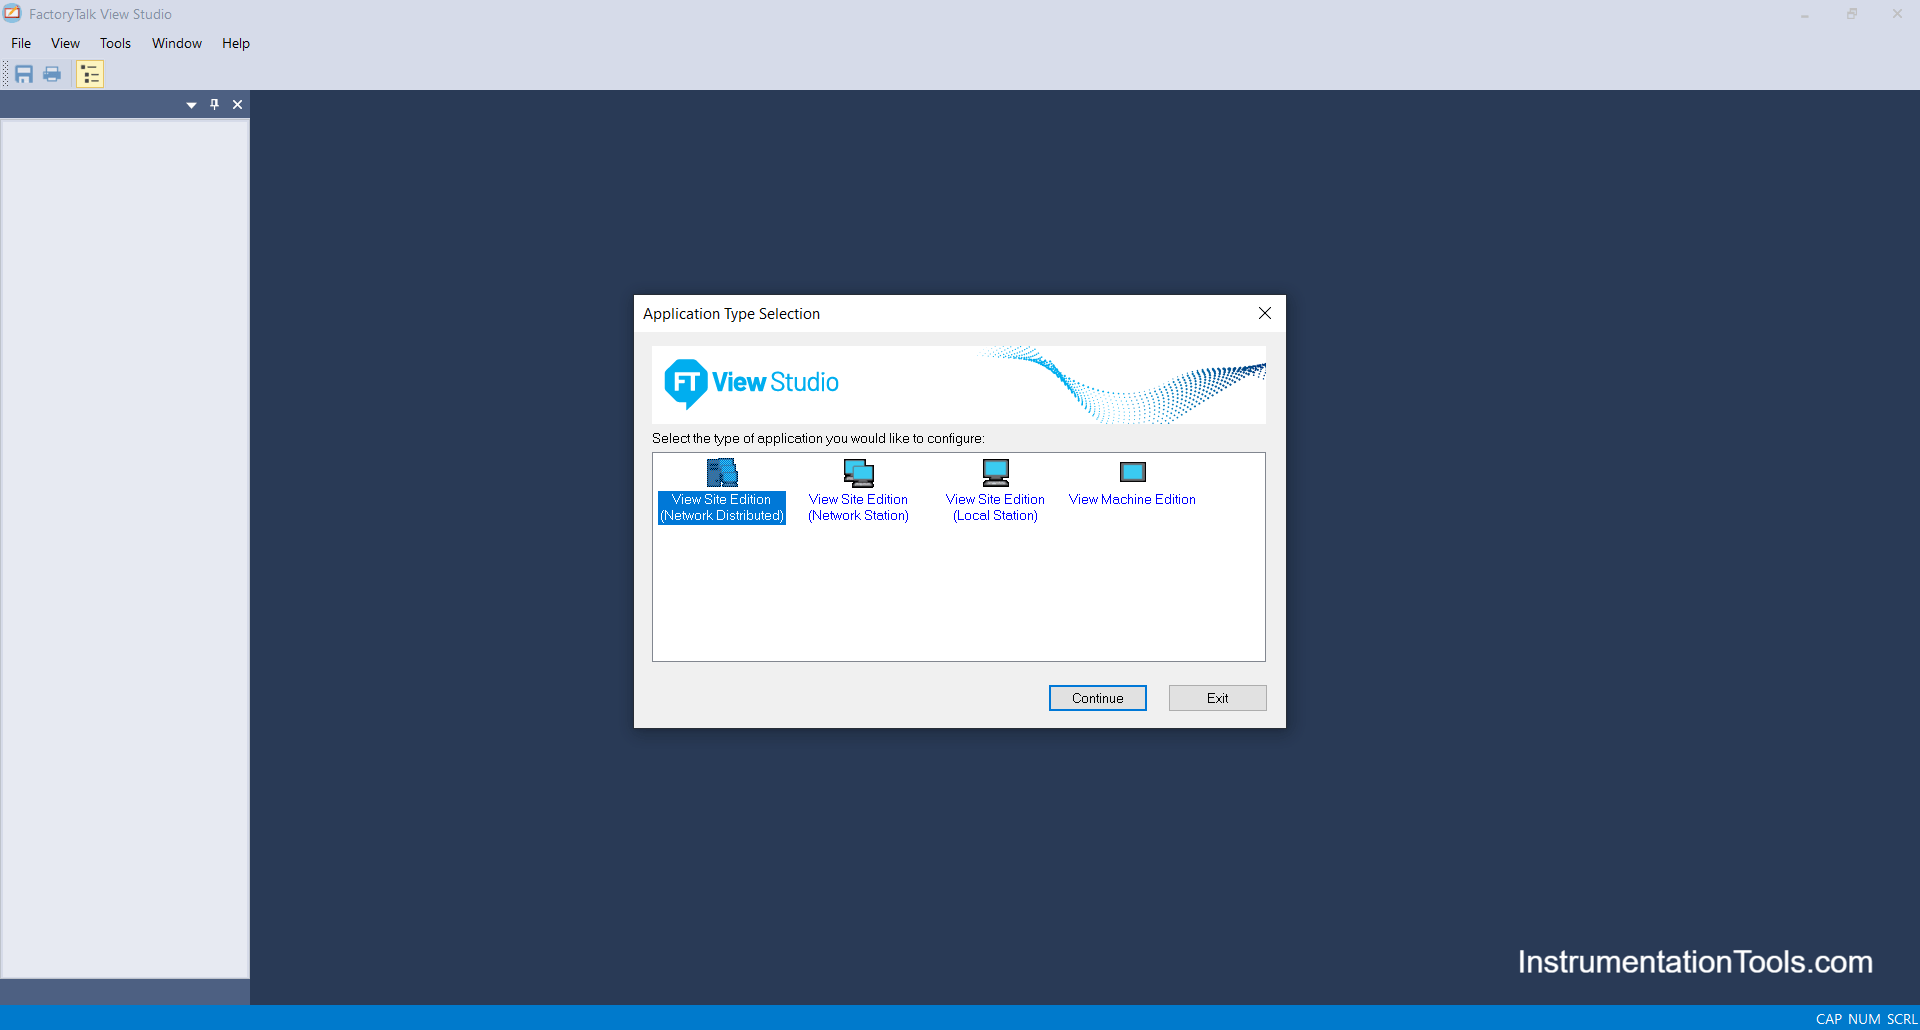
Step 1: Open Factory talk view studio and click on Network Distributed and continue.
Step 2: Create a new project or open an existing project file.

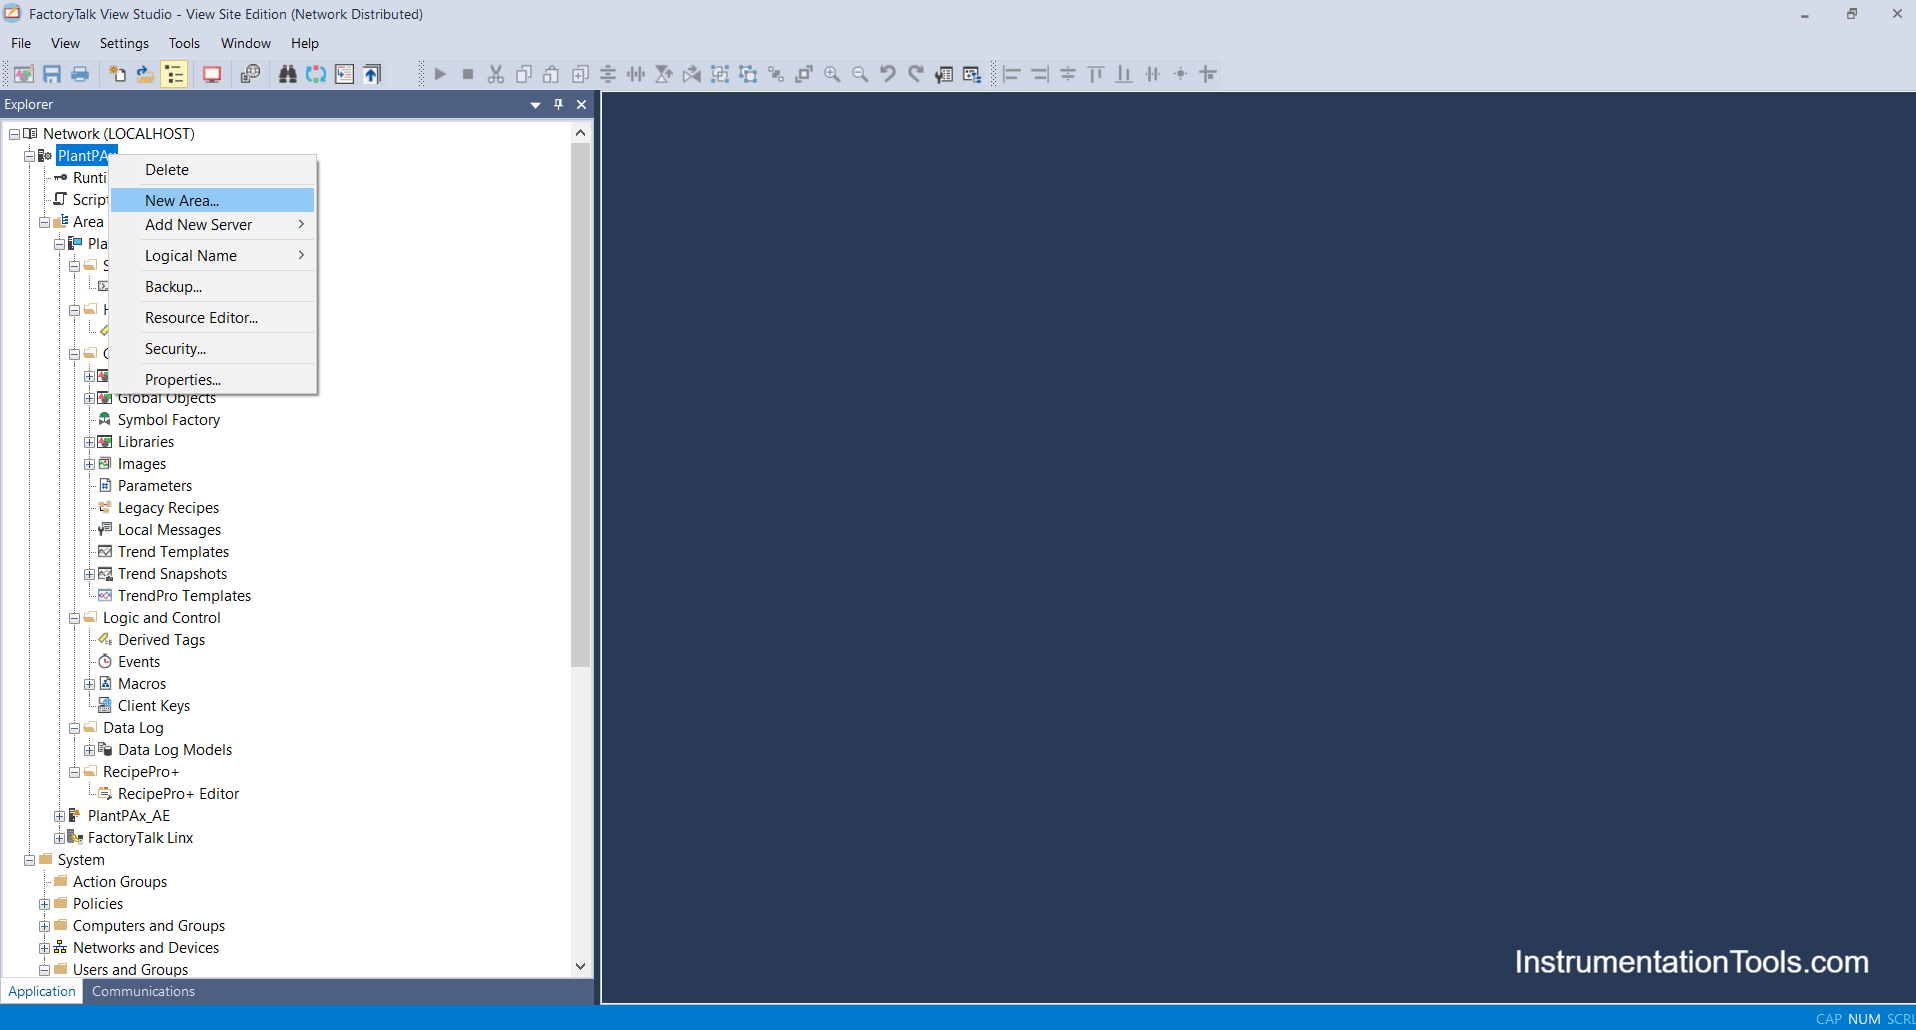
Step 3: Right Click on PlantPAx and Add a new area
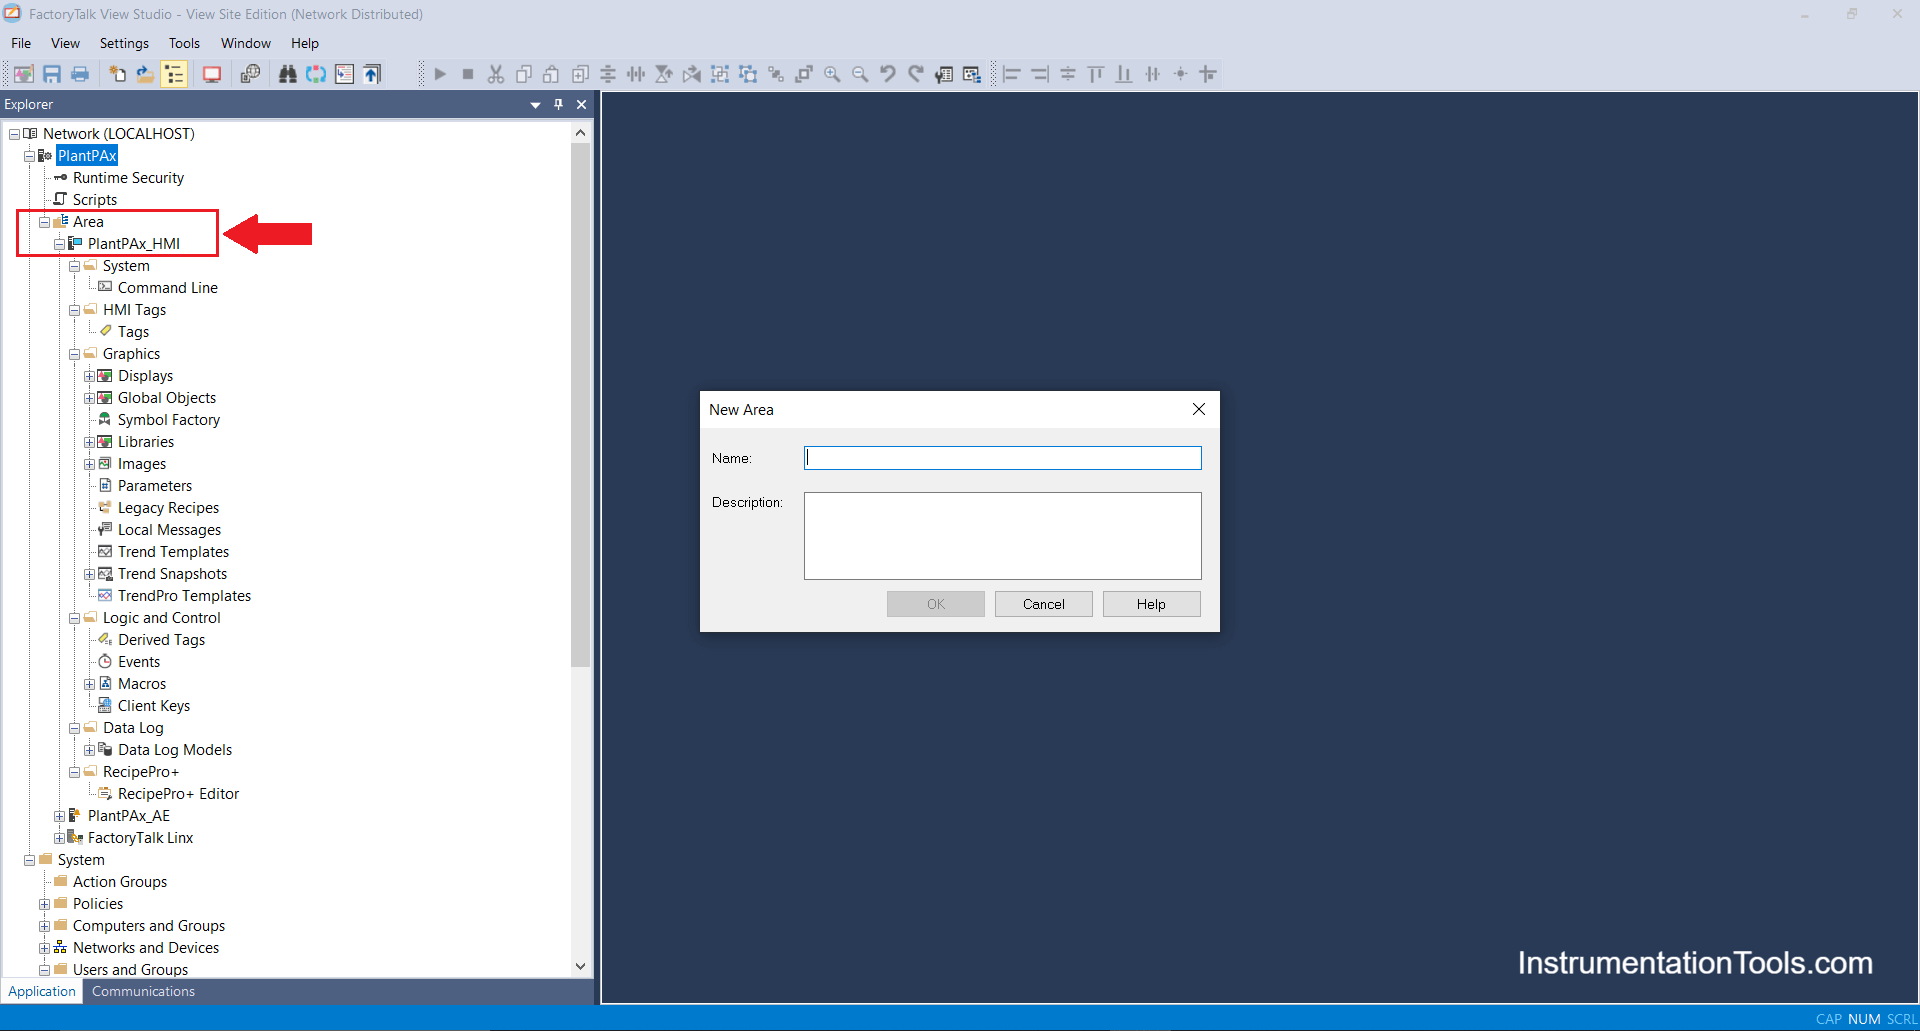
Step 4: Enter the Area Name as you want. You can name Area 01,02 etc.
Please note you can add multiple areas in 1 HMI server and you can create areas in area 01 or 02.
Step 5: Add Factory talk linx Server which helps communication with PLC i.e interfacing of PLC and SCADA.

Step 6: Open Factory talk Linx (Communication Setup).
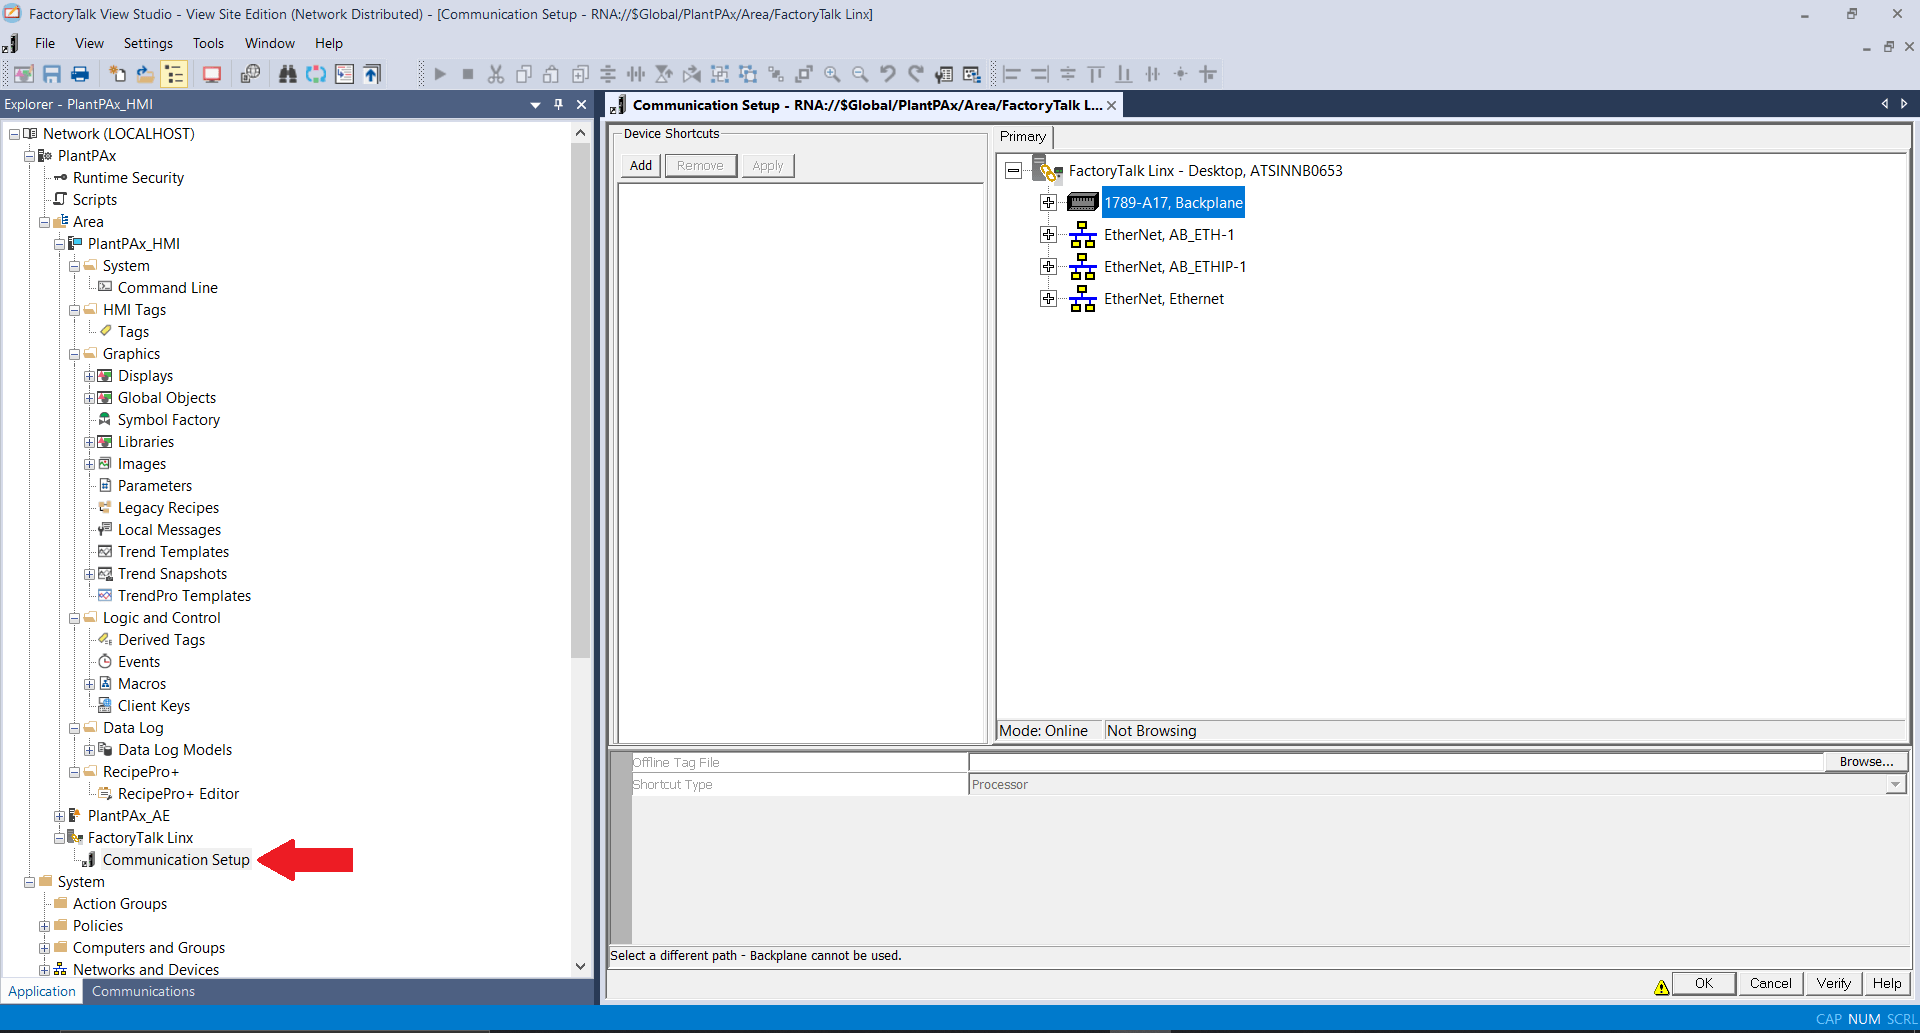
Step 7: Click on Add and create a new shortcut as your project name or any, I have created as PlantPAx.
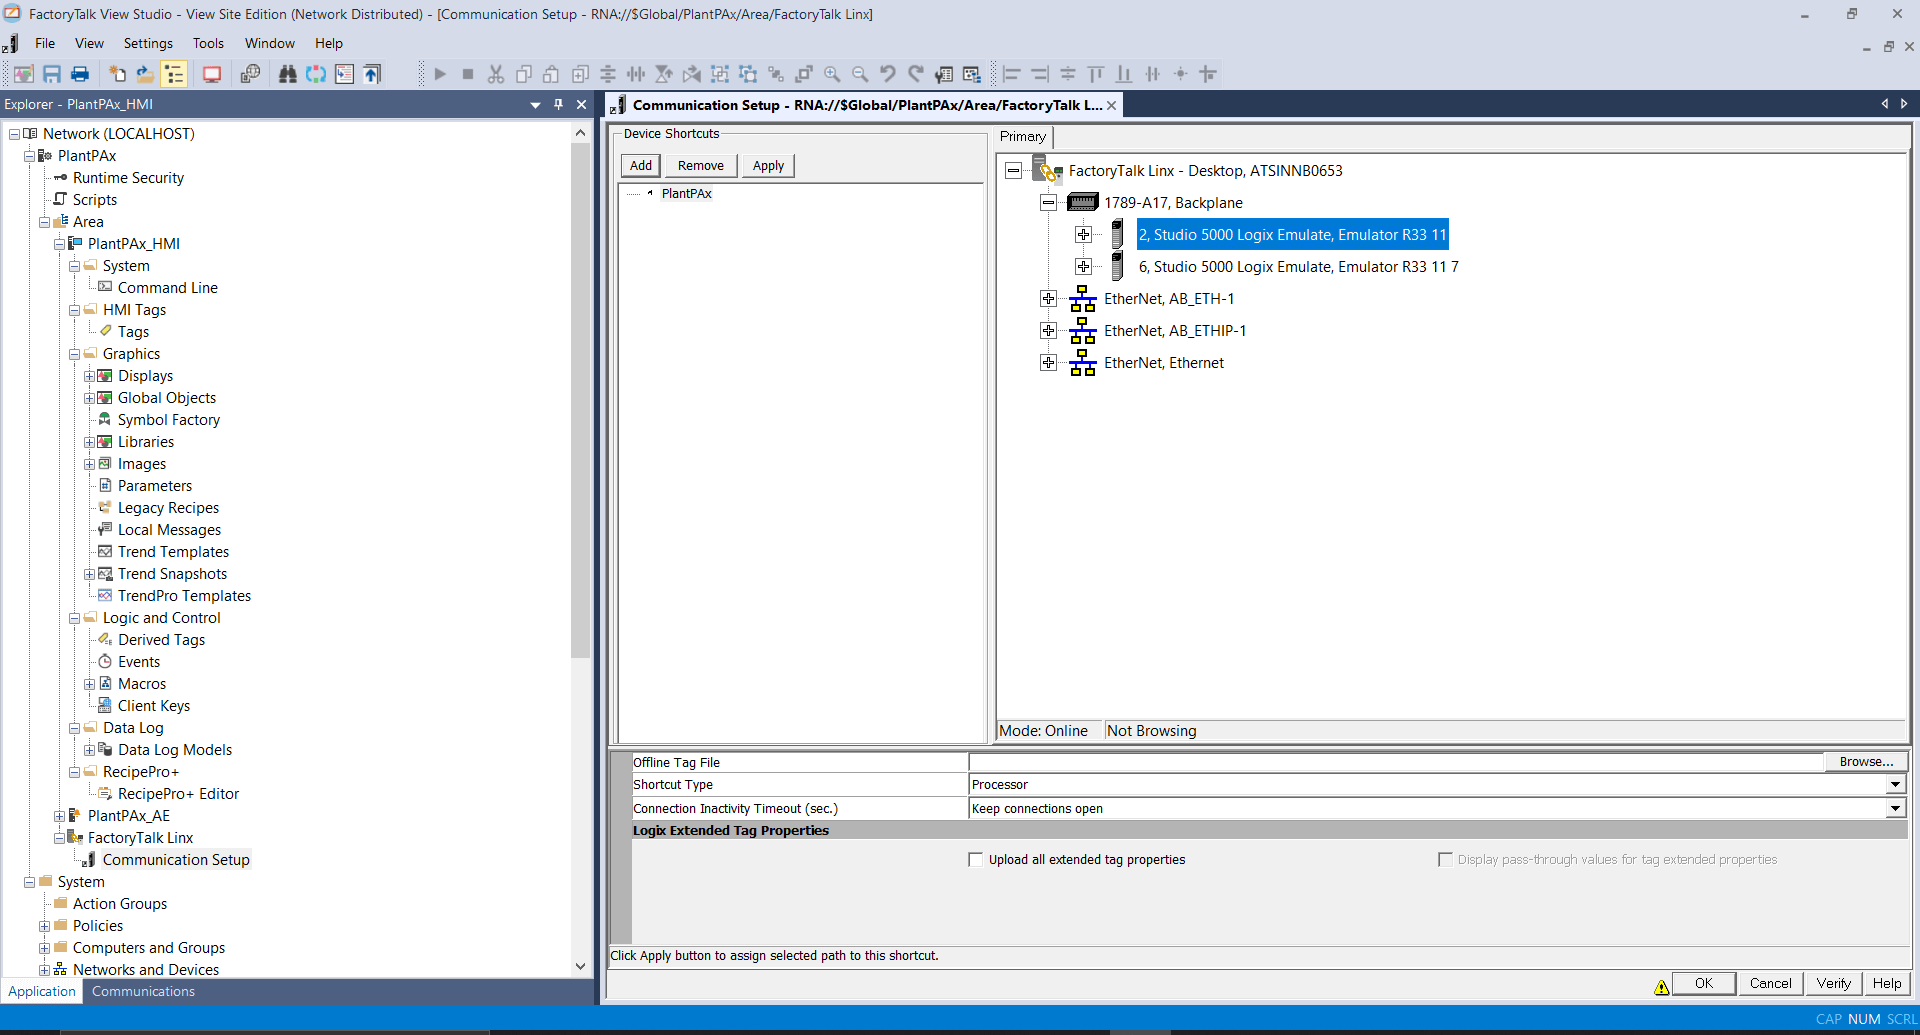
After creating a shortcut browse your PLC and select your PLC and click on Verify and OK.
Communication between PLC and Scada has been established.
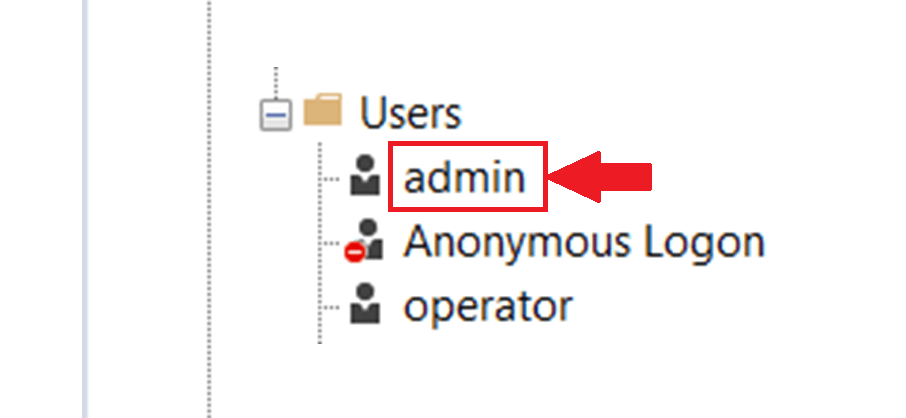
Step 8: Right Click on User Groups and click on New and User Group.
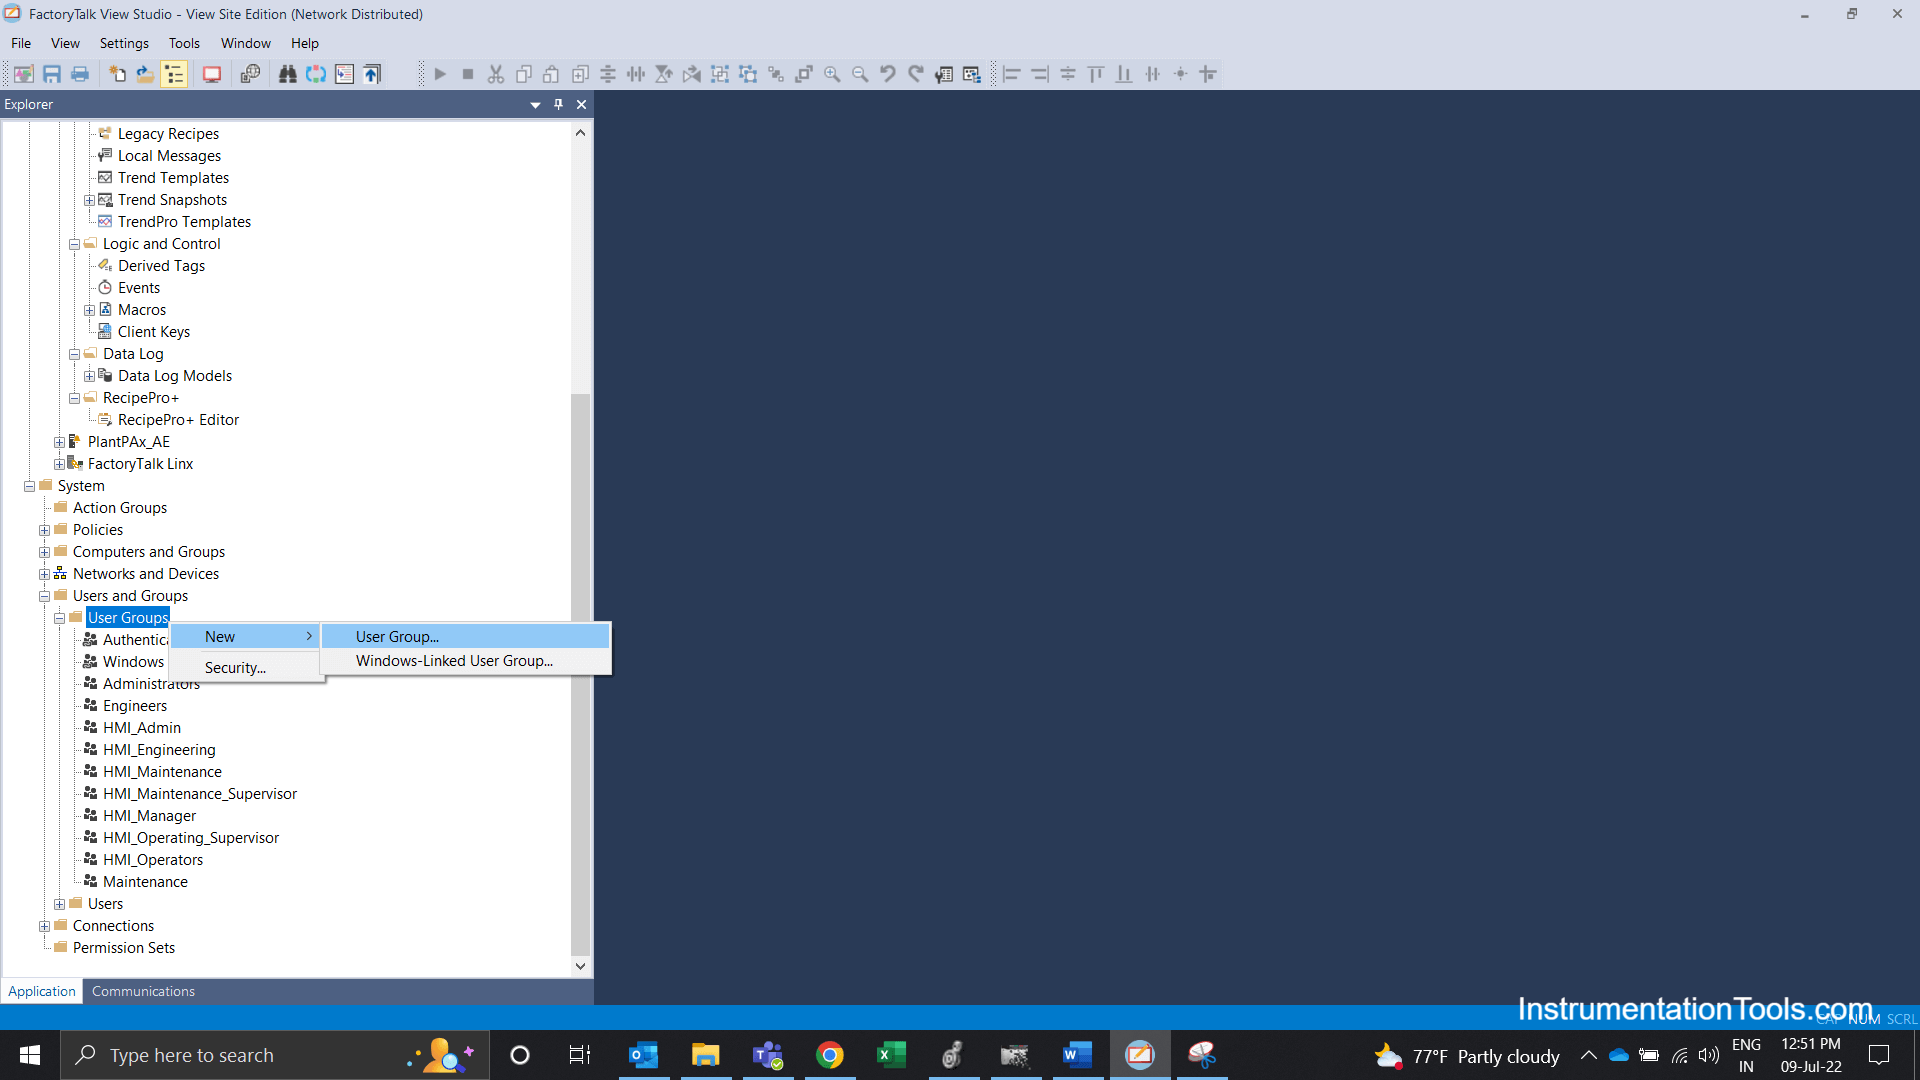
Step 9: Later New User Group Pop-Up will flash in that enter the name of group and click on OK.
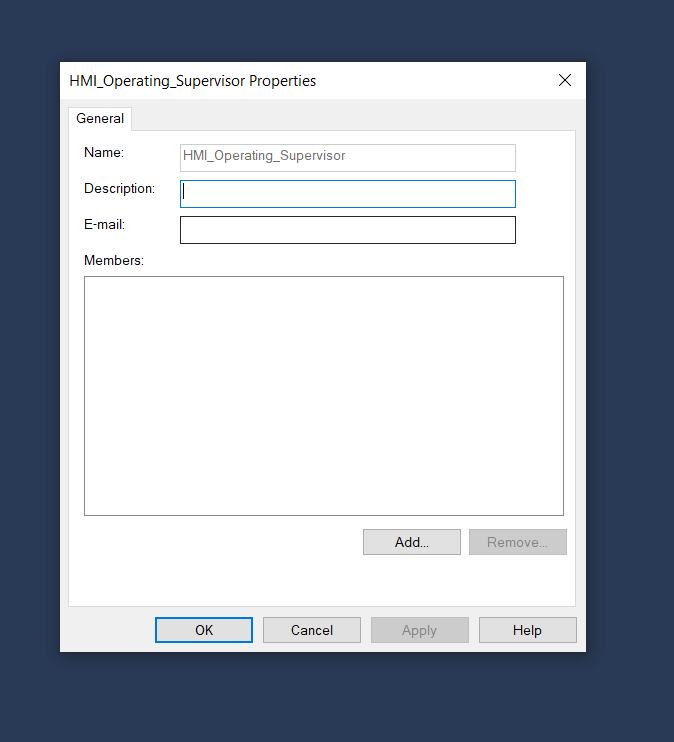
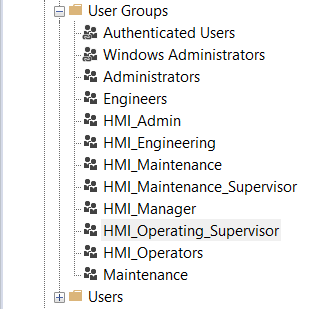
Step 10: Enter Name of Groups as per the below Image and similarly create user groups for all.

Step 11: After creating 6 User groups should show in the list as below.
Step 12: After creating groups we need to assign security codes, for that right click on runtime security and open.
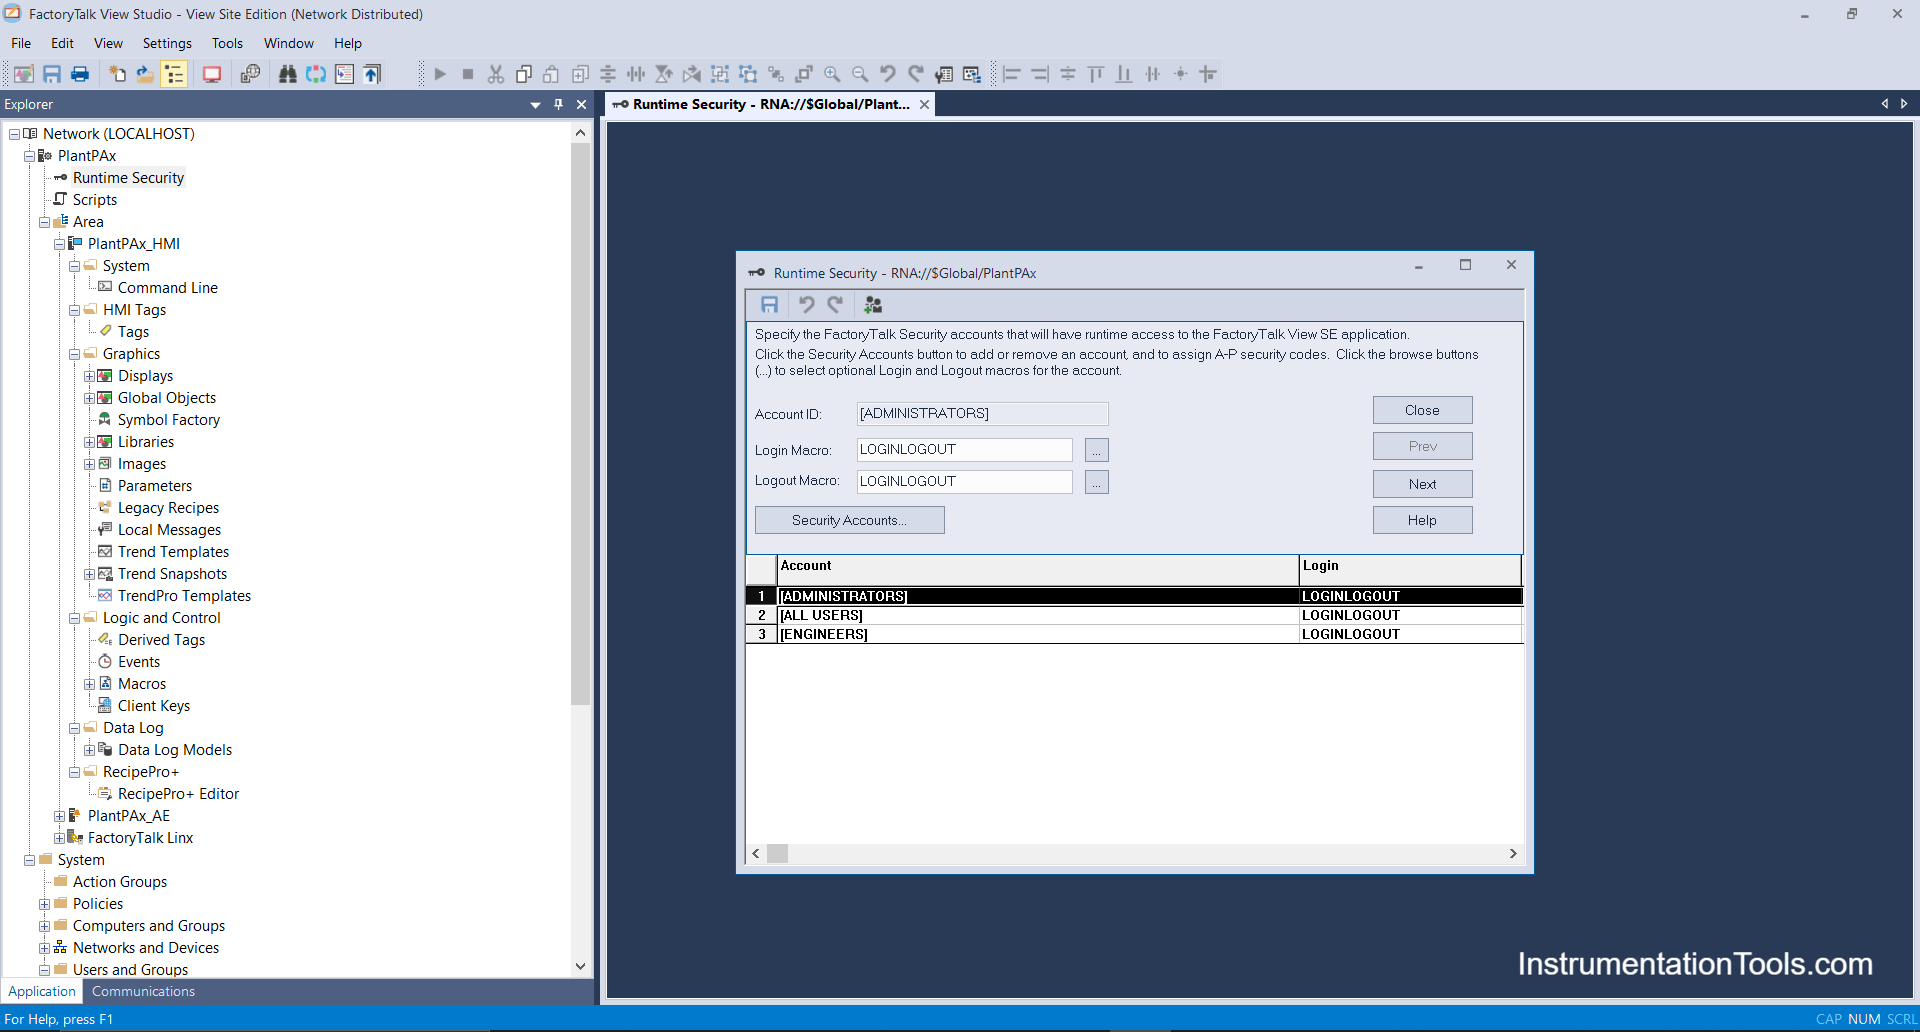
Step 13: Click on Security Accounts, one security dialog box will popup, after that Click on Add.
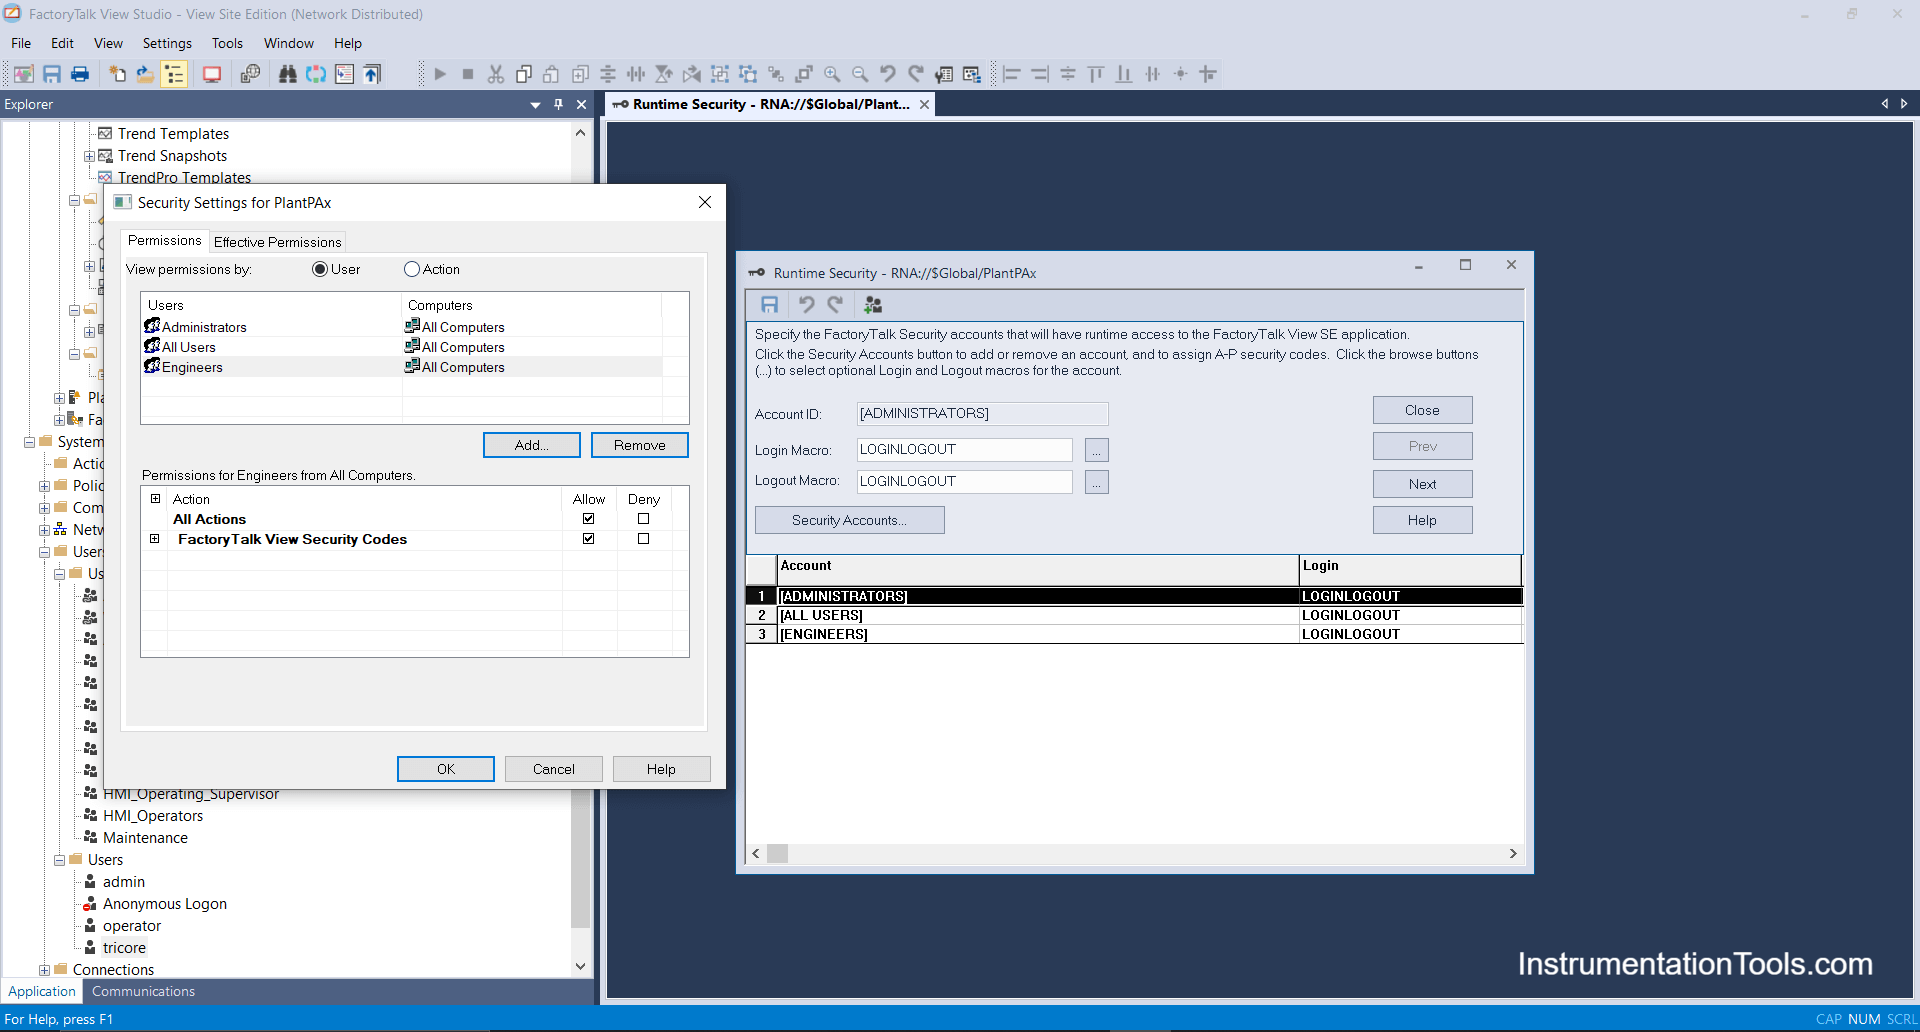
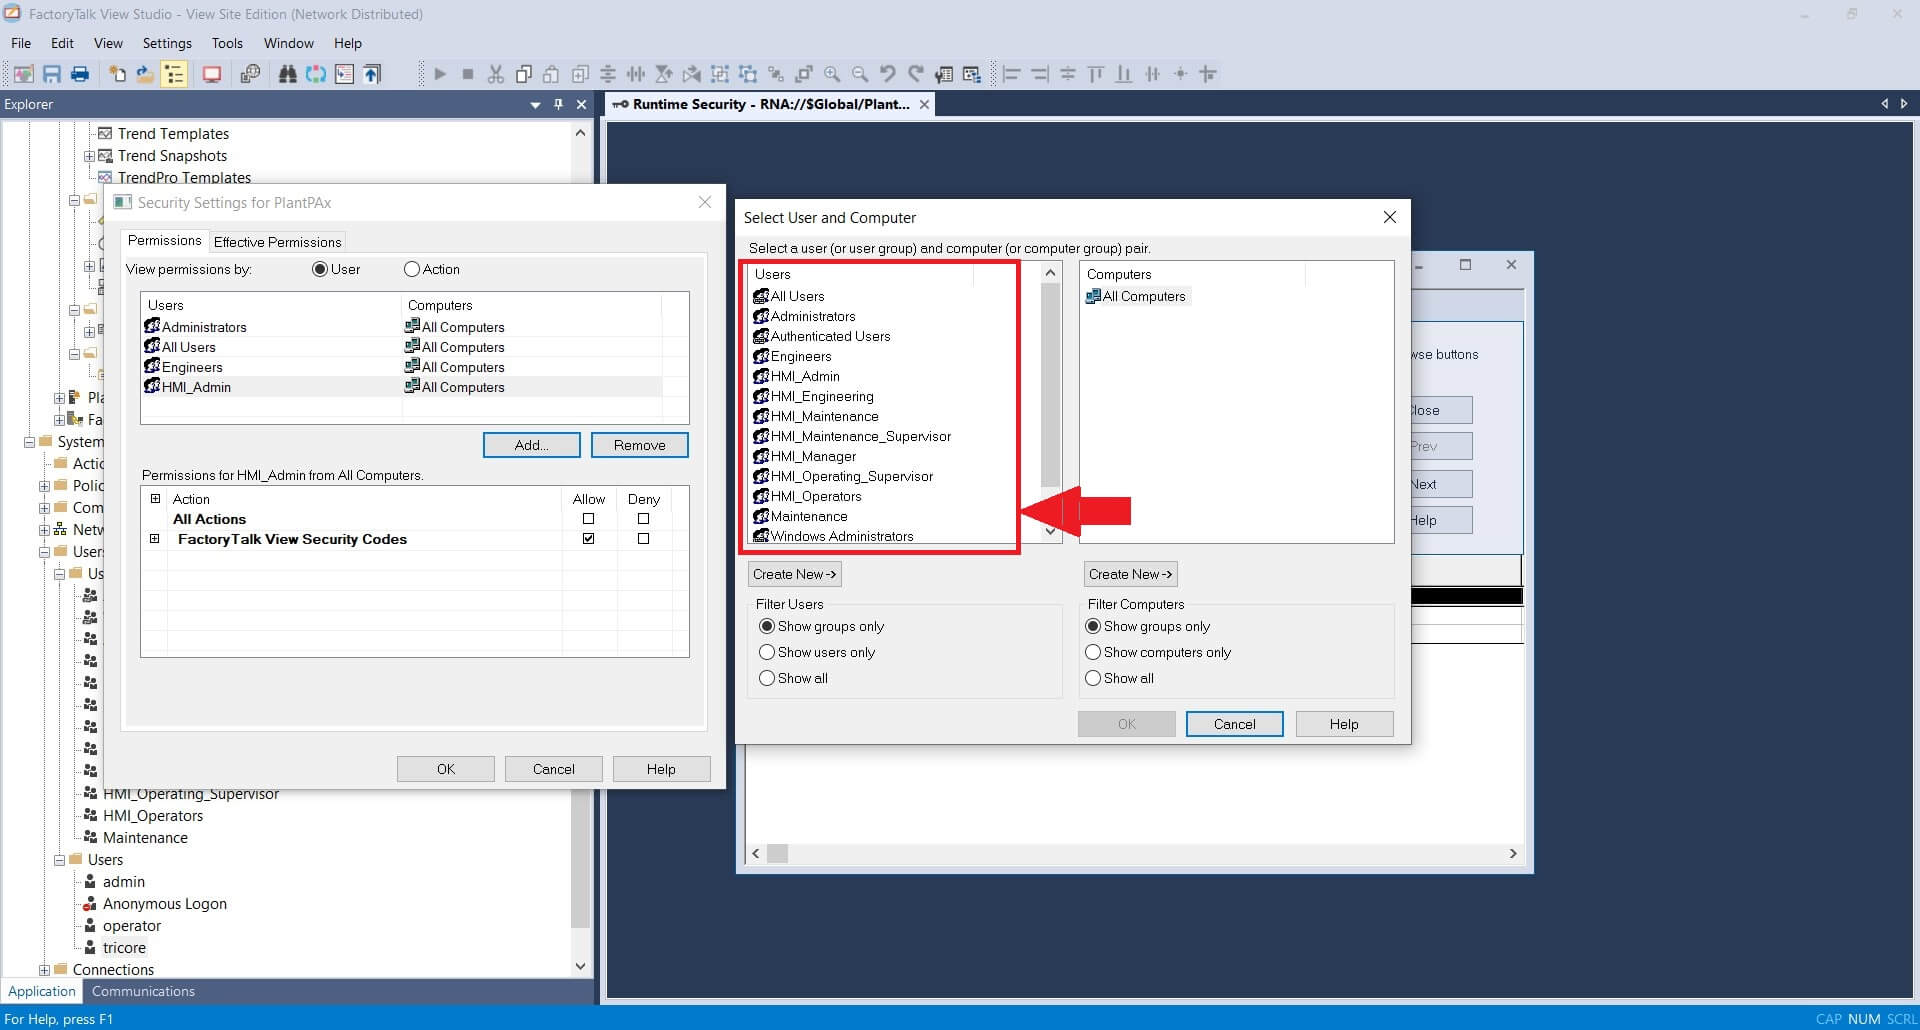
Step 14: After clicking on add you will find above 6 created user groups, add one by one.
Step 15: After Adding click on HMI_Admin and assign code G only as shown.
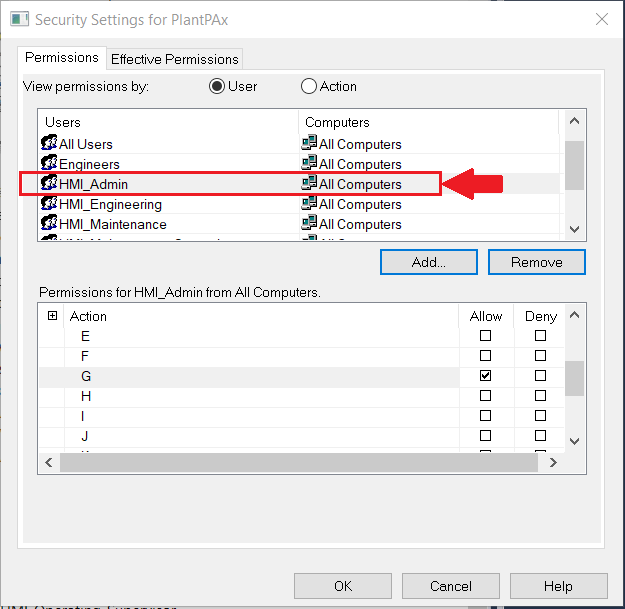
Similarly, assign Security codes for the other 5 groups.
- HMI_Operating Supervisor (code B only)
- HMI_Maintenance (code C only)
- HMI_Maintenance Supervisor (code D only)
- HMI_Engineering (code E only)
- HMI_Manager (code F only)
Step 16: After Assigning create one user that has all user rights. I have created an admin user.