Uncertainty means how Uncertain (or certain) we are.
No readings are complete without units and Uncertainty.
Types of Uncertainty
There are two types of Uncertainty
- Type A uncertainty
- Type B uncertainty
The Type A
The Type A evaluation of standard uncertainty is the method of evaluating the uncertainty by the statistical analysis of a series of observations.
Type A uncertainty is based on readings taken during calibration.
The Type B
The Type B evaluation of standard uncertainty is the method of evaluating the uncertainty by means other than the statistical analysis of the repeat measurements.
Type B uncertainty is based on other factors than readings taken during calibration.
Uncertainty can be reported either in % value or absolute value.
% Value can be reported as % of reading (% rdg) or % of Full-Scale deflection (%FSD)
Uncertainty Components of Pressure Calibration to be considered but not limited to:
Type A
- Repeatability
- Reproducibility
Type B
- Uncertainty due to Standard equipment
- Accuracy of Standard equipment
- Resolution
- Hysteresis
- Zero Error
Uncertainty Calculations
For understanding Uncertainty Calculations, we will take an example of Pressure Gauge calibration
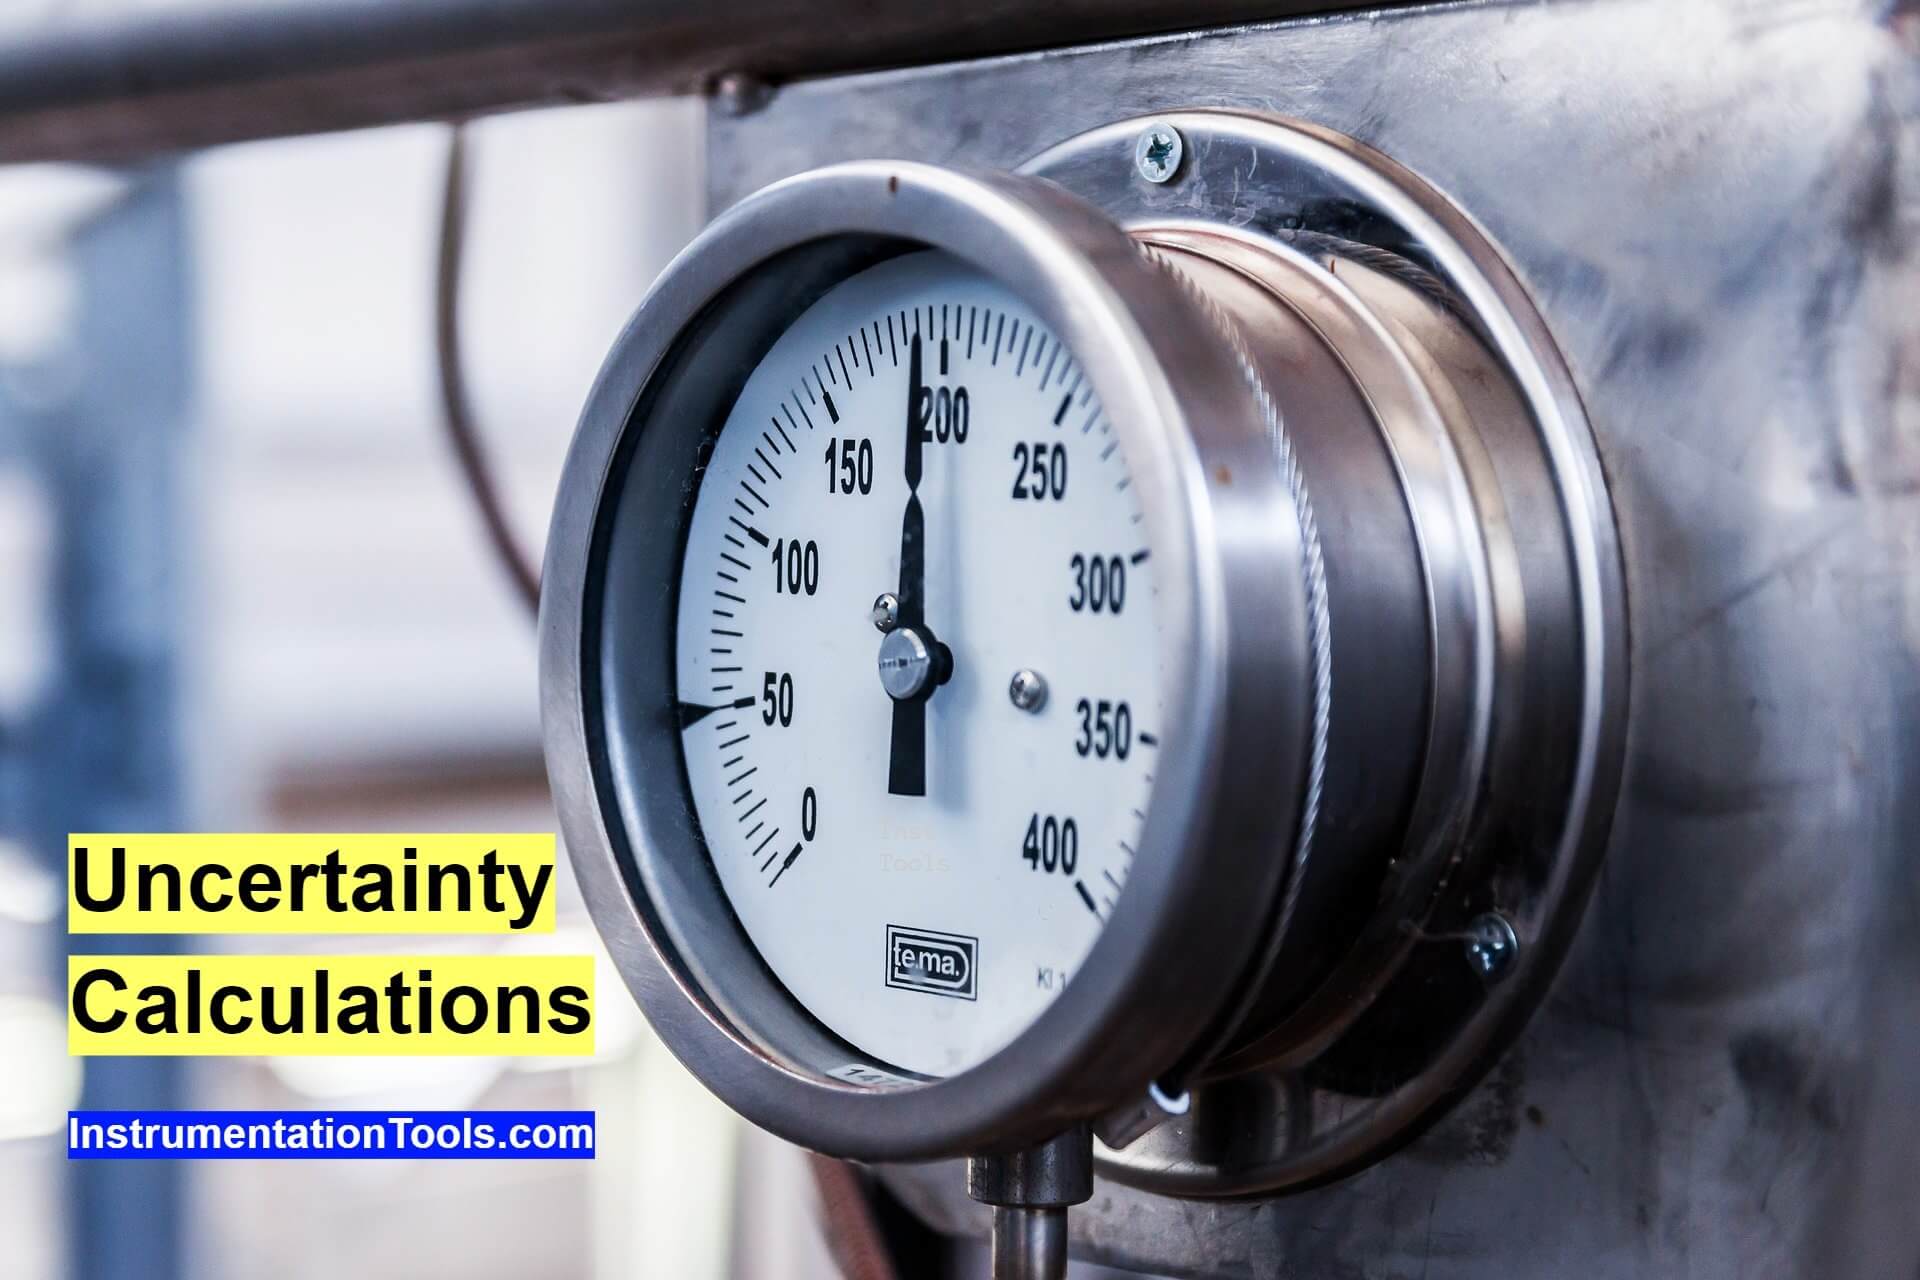
5 Point Calibration with 1 Up cycle and 1 Down cycle
Consider UUC pressure gauge of range 0 to 10 bar with resolution 0.1 bar calibrated with master pressure Gauge of range 0 to 40 bar with resolution 0.001 bar.
Uncertainty of master pressure Gauge is 0.01 bar with K=2. Accuracy is 0.1% rdg.
| Cal Point | UUC Reading | Standard Reading (UP) | Standard Reading (DOWN) | Average |
| Bar | Bar | Bar | Bar | Bar |
| 0 | 0.0 | 0.000 | 0.000 | 0.000 |
| 2 | 2.0 | 2.003 | 2.005 | 2.004 |
| 4 | 4.0 | 4.006 | 4.004 | 4.005 |
| 8 | 8.0 | 8.005 | 8.006 | 8.006 |
| 10 | 10.0 | 10.008 | 10.007 | 10.008 |
Type A Uncertainty
Type A uncertainty is the standard deviation of readings.
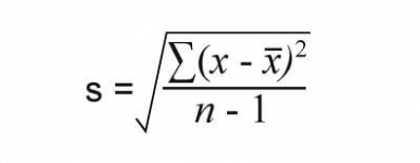
Where:
x: reading
x̄: Mean (average)
n: no of readings i.e. 2 in the above case
Using excel in can be calculated using formula = STDEV ()
Uncertainty due to Standard Deviation (Ua)
(Ua)= S.D / sqrt (n)
Sqrt: square root
| Cal Point | Type A | Ua |
| Bar | Bar | Bar |
| 0 | 0 | 0 |
| 2 | 0.001414 | 0.001 |
| 4 | 0.001414 | 0.001 |
| 8 | 0.000707 | 0.0005 |
| 10 | 0.000707 | 0.0005 |
Type B Uncertainty
Uncertainty due to Standard equipment
Uncertainty of standard equipment is mention on the calibration certificate. Also, the K value is mention in the calibration certificate.
Uncertainty due to Standard equipment (Ub1) = Uncertainty of standard equipment/ k
Here, in our example Uncertainty of Standard is 0.01 bar and K value is 2.
As this is absolute value directly in Pressure units, it is the same for the whole range.
If Uncertainty is provided in % rdg, it will be different for different calibration points.
| Cal Point | Uncertainty of Standard | Ub1 |
| Bar | Bar | Bar |
| 0 | 0.01 | 0.005 |
| 2 | 0.01 | 0.005 |
| 4 | 0.01 | 0.005 |
| 8 | 0.01 | 0.005 |
| 10 | 0.01 | 0.005 |
Uncertainty due to Accuracy of Standard Equipment
Accuracy is expressed in % rdg or % full scale or absolute readings direct in units
Uncertainty due to Accuracy of Standard equipment (Ub2)
Ub2 = Accuracy of standard equipment/ Sqrt (3)
Assuming rectangular distribution, the value obtained is divided by a square root of 3
In our example, accuracy is % rdg. Therefore accuracy will be different for every reading.
| Cal Point | Accuracy of Standard | Accuracy of Standard | Ub2 |
| Bar | Bar | Bar | Bar |
| 0 | 0.1%*0 | 0 | 0 |
| 2 | 0.1%*2 | 0.002 | 0.001155 |
| 4 | 0.1%*4 | 0.004 | 0.002309 |
| 8 | 0.1%*8 | 0.008 | 0.004619 |
| 10 | 0.1%*10 | 0.01 | 0.005774 |
Uncertainty due to Resolution
If UUC is set according to calibration point, and Standard reading is changed, resolution of Standard is considered.
If the Standard Pressure gauge is set according to calibration point, and UUC readings are changed, the resolution of UUC is considered.
In or above example, UUC is set and Standard readings are changing,
Therefore, the Resolution of a standard pressure gauge is considered.
The resolution of the Standard pressure gauge is 0.001 bar
Uncertainty due to Resolution (Ub3) = ((Resolution of Changing pressure gauge/2)) / SQRT (3))
Assuming rectangular distribution, the value obtained is divided by a square root of 3
| Cal Point | Resolution | Ub3 |
| Bar | Bar | Bar |
| 0 | 0.001 | 0.000289 |
| 2 | 0.001 | 0.000289 |
| 4 | 0.001 | 0.000289 |
| 8 | 0.001 | 0.000289 |
| 10 | 0.001 | 0.000289 |
Uncertainty due to Hysteresis
Hysteresis is the difference between Down Cycle reading and UP cycle reading.
For 2 up and 2 down cycles. Hysteresis is the maximum difference between Down Cycle reading and UP cycle reading.
Uncertainty due to Hysteresis (Ub4) = (Down reading- up reading)/ Sqrt (3)
Assuming rectangular distribution, the value obtained is divided by a square root of 3
| Cal Point | Hysteresis | Ub4 |
| Bar | Bar | Bar |
| 0 | 0 | 0 |
| 2 | 0.002 | 0.001155 |
| 4 | -0.002 | -0.00115 |
| 8 | 0.001 | 0.000577 |
| 10 | -0.001 | -0.00058 |
Uncertainty due to Zero Error
The Reading is noted when the pressure of the instrument is completely released.
The Zero Error is calculated as follows:
Zero Error= l x2,0 – x1,0 l
I.e. Zero readings of down cycle – Zero readings of up cycle
For Multiple cycles. The maximum value is Zero error.
Uncertainty due to Zero Error (Ub5) = Zero error/ Sqrt (3)
Assuming rectangular distribution, the value obtained is divided by a square root of 3
| Cal Point | Zero Error | Ub5 |
| Bar | Bar | Bar |
| 0 | 0.000 | 0.000 |
| 2 | 0.000 | 0.000 |
| 4 | 0.000 | 0.000 |
| 8 | 0.000 | 0.000 |
| 10 | 0.000 | 0.000 |
Combined Uncertainty
Combined uncertainty is not simple addition.
Step 1: All individual uncertainty Ua, Ub1, Ub2, Ub3, Ub4, Ub5 are squared.
Step 2: All individual uncertainty is added after squaring
Step 3: Square root of the value obtained in Step 2
| Cal Point | Ua | Ub1 | Ub2 | Ub3 | Ub4 | Ub5 | Combine Uncertainty |
| Bar | Bar | Bar | Bar | Bar | Bar | Bar | Bar |
| 0 | 0 | 0.005 | 0 | 0.000289 | 0 | 0.000 | 0.005 |
| 2 | 0.001 | 0.005 | 0.001155 | 0.000289 | 0.001155 | 0.000 | 0.005 |
| 4 | 0.001 | 0.005 | 0.002309 | 0.000289 | -0.00115 | 0.000 | 0.006 |
| 8 | 0.0005 | 0.005 | 0.004619 | 0.000289 | 0.000577 | 0.000 | 0.007 |
| 10 | 0.0005 | 0.005 | 0.005774 | 0.000289 | -0.00058 | 0.000 | 0.008 |
Combined Uncertainty is also called Standard Uncertainty
| Cal Point | Combine Uncertainty | Combine Uncertainty |
| Bar | Bar | Bar |
| 0 | Sqrt (02+0.0052+02+0.002892+02+02) | 0.005 |
| 2 | Sqrt (0.0012 +0.0052 + 0.0011552 +0.0002892 + 0.0011552 +02) | 0.005 |
| 4 | Sqrt (0.0012 +0.0052 + 0.0023092 +0.0002892 + 0.0011552 +02 ) | 0.006 |
| 8 | Sqrt (0.00052 +0.0052 + 0.0046192 +0.0002892 + 0.0005772 +02) | 0.007 |
| 10 | Sqrt (0.00052 +0.0052 + 0.0057742 +0.0002892 + 0.000582 +02) | 0.008 |
Expanded Uncertainty
Standard Uncertainty is multiplied by the k factor to obtained Expanded Uncertainty.
Where k is the coverage factor corresponding to the effective degree of freedom.
k factor is generally 2.
| Cal Point | Expanded Uncertainty |
| Bar | Bar |
| 0 | 0.010 |
| 2 | 0.011 |
| 4 | 0.011 |
| 8 | 0.014 |
| 10 | 0.015 |
Expanded uncertainty is reported in the calibration certificate.
A similar type of calculation is done for 9 Point calibration with 2 up and 2 down cycles.
If you liked this article, then please subscribe to our YouTube Channel for Instrumentation, Electrical, PLC, and SCADA video tutorials.
You can also follow us on Facebook and Twitter to receive daily updates.
Read Next:







For pressure transmitter according to DKD, 9 points is standard procedure. Up down up.
5 point calibration is for low level pressure gauges. Above CL 1
Dear Sir,
Profound gratitude for conveying your valuable information.
Thanks
Hajarana
Dear sir thank you so much for your explanation.
Regarding the resolution which standard are said that resolution take for UUT or Master equipment
Very informative & straight to the point, thank you.
Hi Sir,
Thanks for the informative knowledge. But how do you get combined uncertainty value. As calculate in excel i got (0.050) bar for each point. Kindly please explain Thank you.
Dear Sir
Please explain Weighing Balance Uncertainty Value calculation with Example