This article is about how to write a script for tank filling and emptying using a script in InTouch SCADA software.
Tank Filling and Emptying
Follow the below step to see the script to fill and empty the level of the tank.
Step 1:
Open InTouch SCADA.
Create a new project and enter an animation environment.
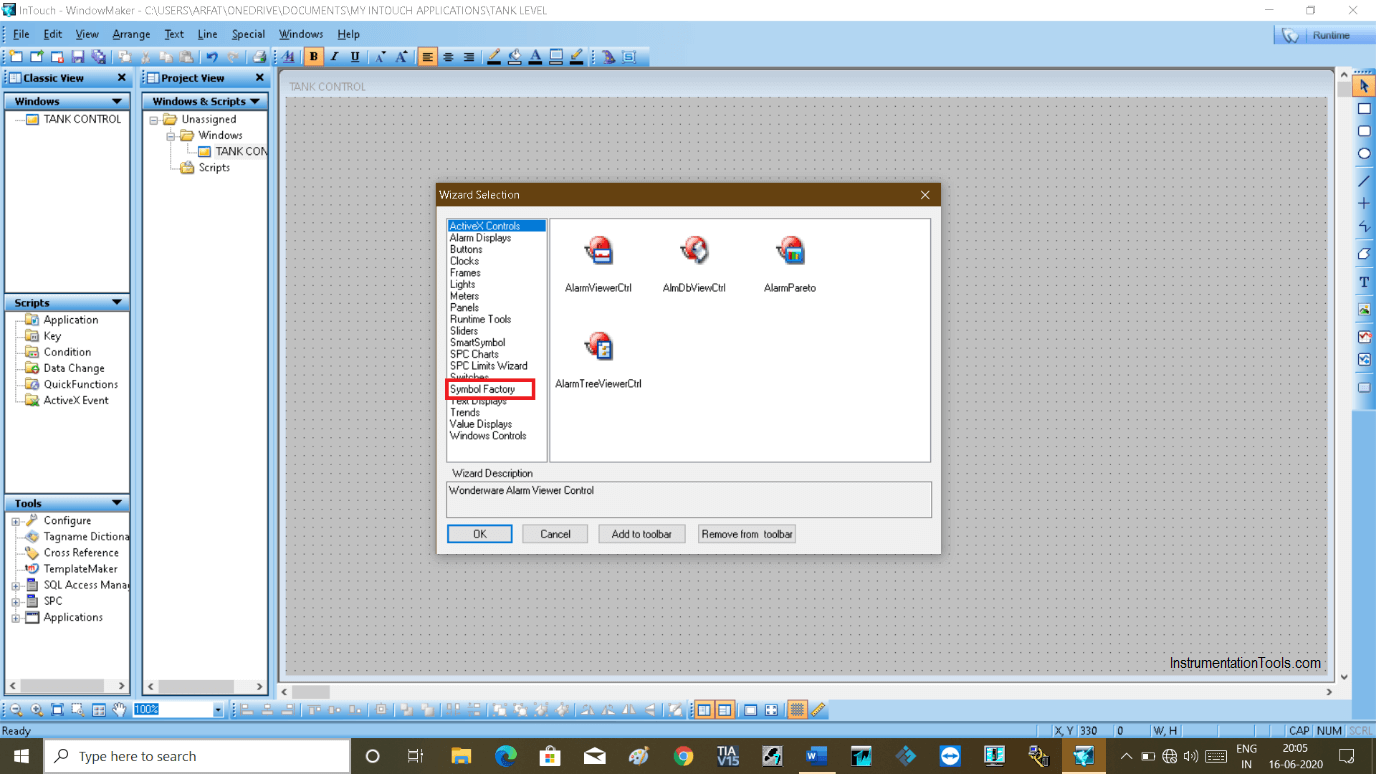
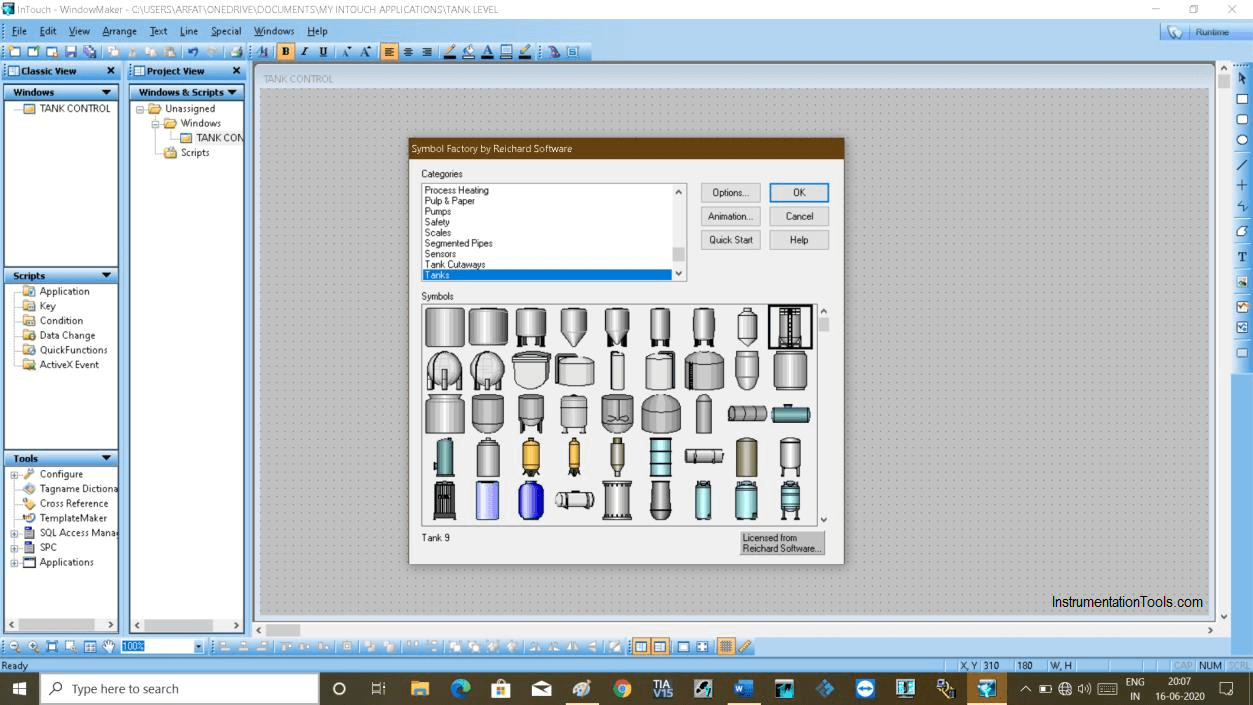
To add a tank, click on “wizard” then click on “symbol factory” and hit “ok” to proceed.
Step 2:
Search tank and add a tank that you want to use.
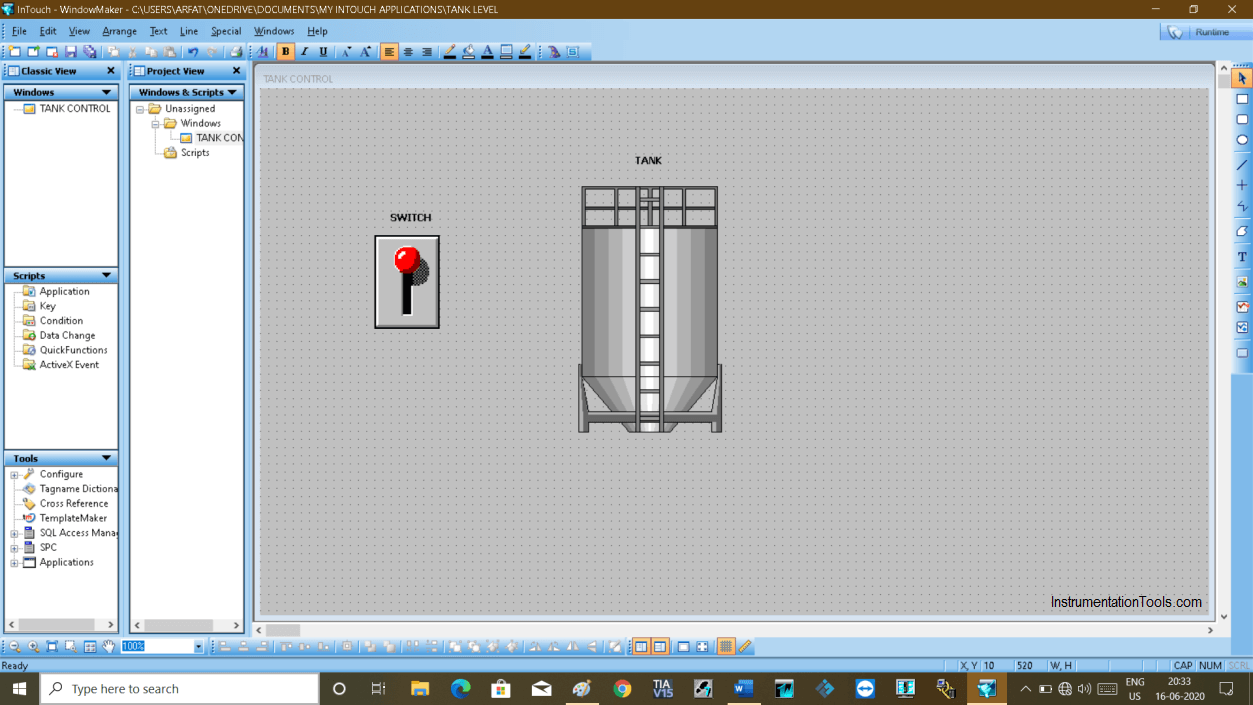
Step 3:
After adding a tank to the screen, add one switch to provide the condition to fill the tank.
Step 4:
Double click on tank to add properties and to give a tag name.
Click on “animation” and then choose “vertical”.
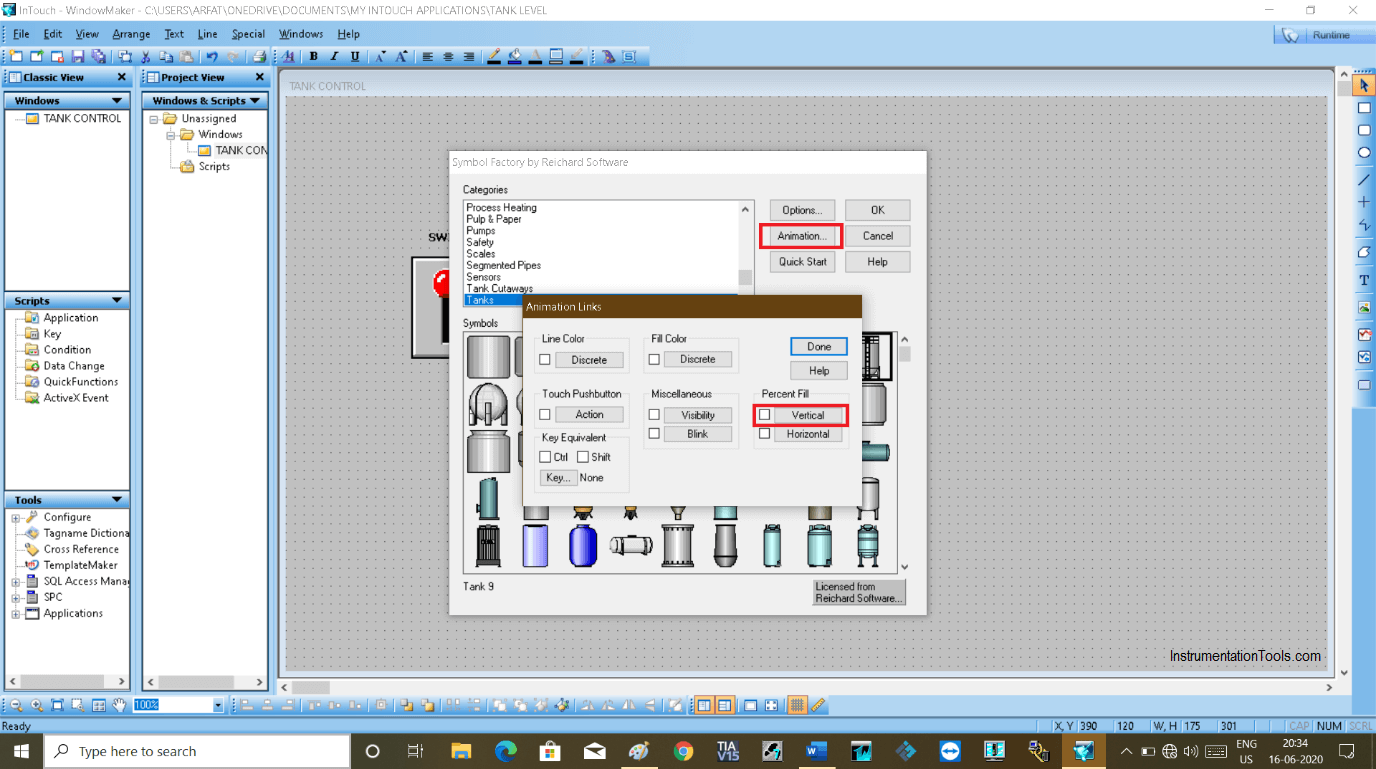
Step 5:
Clicking on a vertical will open up a new pop-up window as shown in the below window.

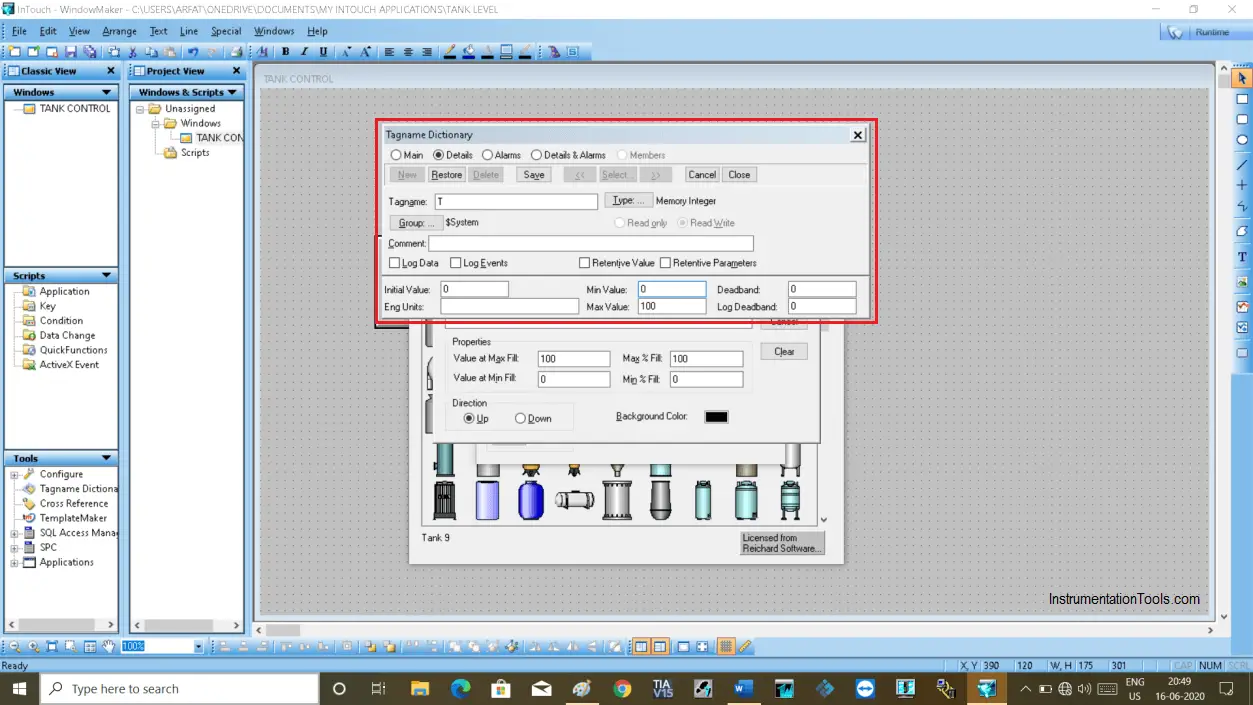
Step 6:
Give a tag name and choose the range you want to add. Hit “ok” to proceed.

Step 7:
New pop-up as shown in the below window will open up.
In type choose memory integer. Choose maximum and minimum value. Hit “save” then close the pop-up.
Step 8:
Give a tag name to switch too. Hit ok ton proceed.

Step 9:
Now I will write the script. As I am using a single-window script I will use windows script.
Do a right-click and choose windows script.
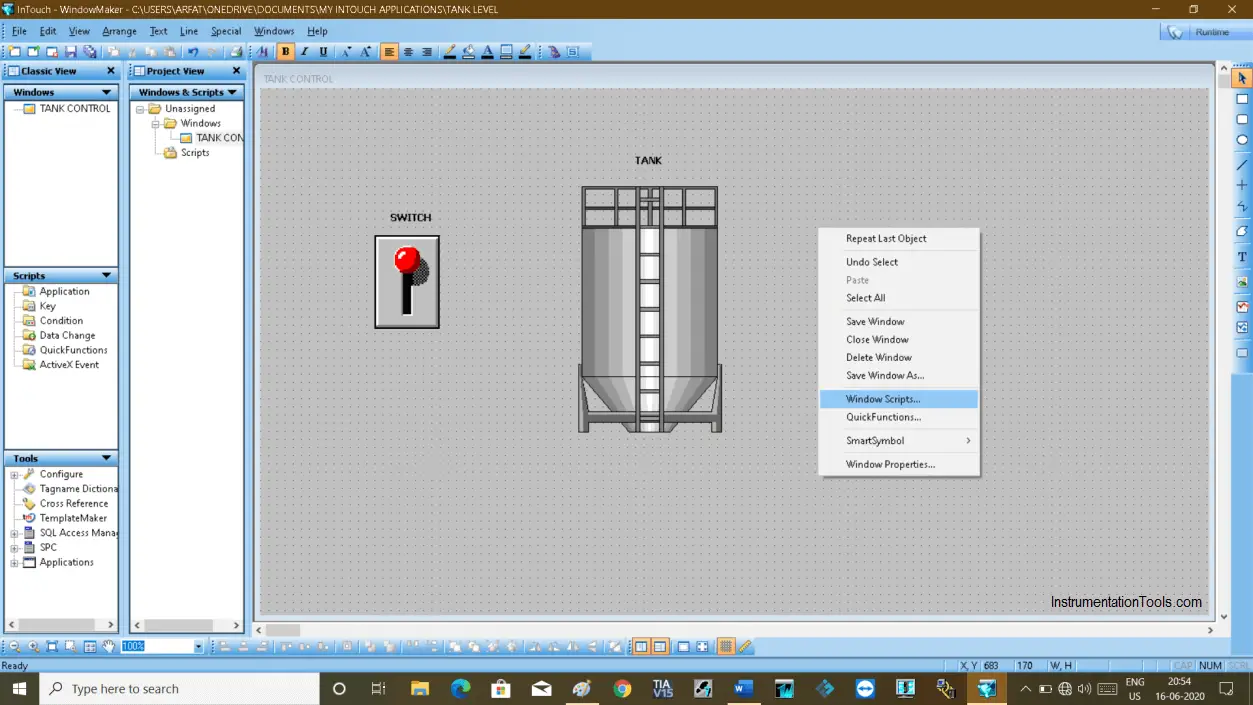
Step 10:
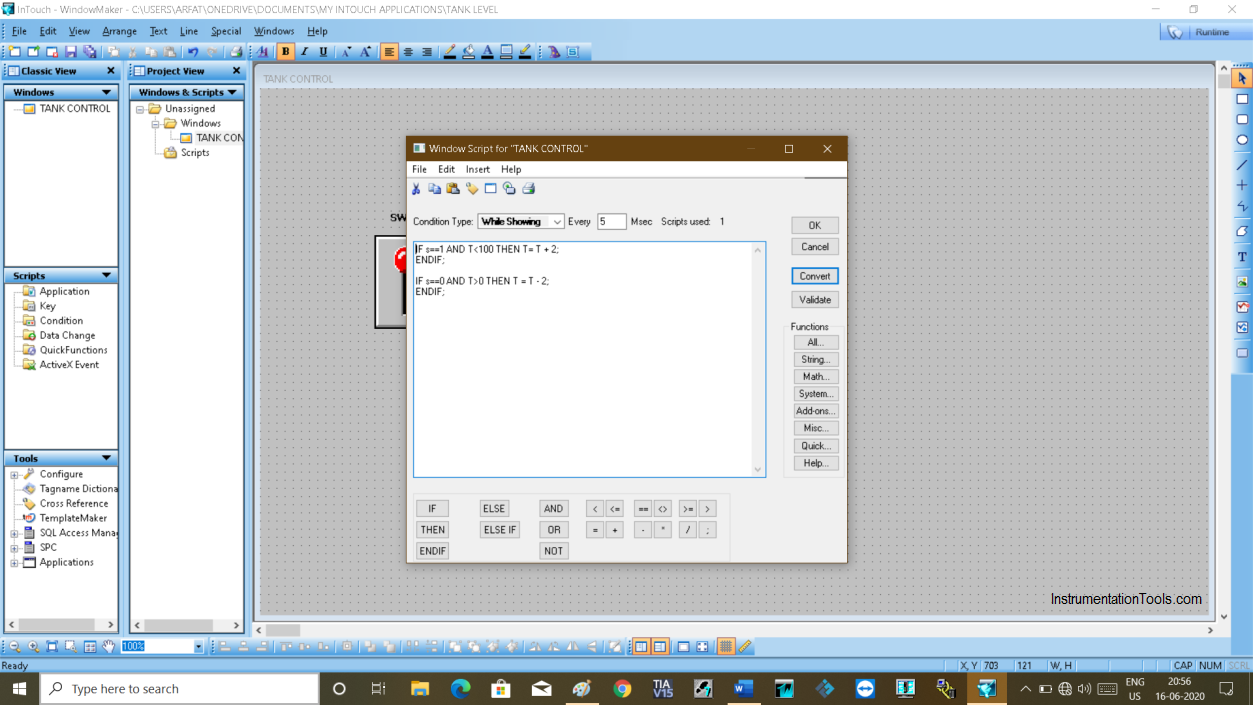
Here I have added a script to fill and empty the tank with the help of the switch.
In the first line of a script, you can see that to fill the tank I have used condition (==) and result (=).
Condition: If my switch is “1” means ON and tank level is less than 100 then the tank is going to fill (T = T + 2) with a rate of “2”. If you want to fill the tank in less time you can use any number from 1 (Low) to 10 (High).
In the tank emptying process, I simply have used OFF switch means when I put off the switch and level of the tank is greater than 0 (zero) then the tank is going to empty (T = T – 2).
So, “+” to fill the tank and “-“ to empty the tank is used.
Click on “validate” than “convert” and “ok” to load the script.
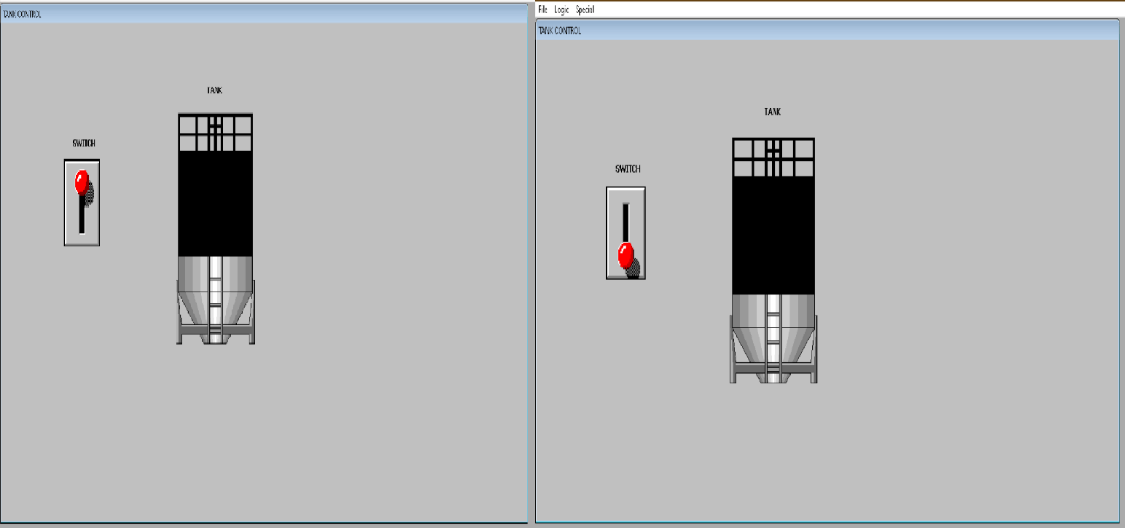
Step 11:
Check the process by clicking on the “runtime” button.
Author: Suhel Patel
If you liked this article, then please subscribe to our YouTube Channel for PLC and SCADA video tutorials.
You can also follow us on Facebook and Twitter to receive daily updates.
Read Next:
- Quiz Questions on Motors
- Statement List (STL)
- Field instrument to Control Room
- What is SCADA System?
- Configure an Alarm in InTouch