Mitsubishi Electric is a well-known name in the industrial automation field. They offer a wide range of products at different price points and for various automation needs. One of their popular tools for Human-Machine Interface (HMI) programming is the GT Designer software. This software is lightweight and easy to install, even on basic laptops.
In this guide, we’ll walk you through what GT Designer is and how to install it on your computer.
What is GT Designer?

GT Designer is part of the Melsoft software suite by Mitsubishi Electric. GT Designer is used for creating and programming HMI screens, the visual interface that operators use to interact with machines. GT Designer supports Mitsubishi’s GOT1000 and GOT2000 series HMIs.
This HMI software allows you to:
- Design HMI screens for factory machines
- Simulate your HMI without needing actual hardware
- Connect with a PLC and send/receive data
- Import tags from OPC-UA servers for live process monitoring
Key Features:
- Supports simulation mode using GX Simulator 2.0 or 3.0
- Works with Windows 10 and 11
- Lightweight software (~1.2 GB download, requires ~5 GB free space)
- Available in multiple languages
- Part of the powerful MELSOFT suite
Installation Tips
- Make sure your PC has Windows 10 or 11
- Free up at least 5 GB of storage
- For communication and simulation, it’s recommended to also install GX Works and GX Simulator
- Always download from the official Mitsubishi website to avoid issues
Free Download Mitsubishi HMI Software
First, you need to open the Mitsubishi automation website, click the link below.
This link contains the software setup file for the GT Designer series HMI. Here, you will find three categories of download types: trial version, free software, and update. We will go for the free software of GT Designer 2 Classic, which is the latest one.
Important Note:
Always download the software only from the official Mitsubishi website to ensure it’s safe and free from harmful files. Avoid using unknown or third-party sources. Also, keep your antivirus program active to protect your PC from potential threats.
If your antivirus software blocks the download or installation even from the official source, you can temporarily disable it for a few minutes during the process. Since it’s from Mitsubishi’s official site, there’s no risk involved. Just remember to turn your antivirus back on after installation.
When you click that link, you will be prompted first to click your region. Click that region, and the setup file will start downloading. Once downloaded, you now have to run the setup file.
On running the file as an administrator, the following pop-up first appears, which welcomes you to the setup file. Here, you have to click Next.

On clicking next, the following pop-up appears. Here, you have to enter your name and company name. After entering the information, click Next.

On clicking next, the following pop-up appears, where you have to enter the installation path of the software. By default, keep it as your OS path, which is shown automatically.

The last popup will just ask you to click next to start the installation, as shown in the figure below.
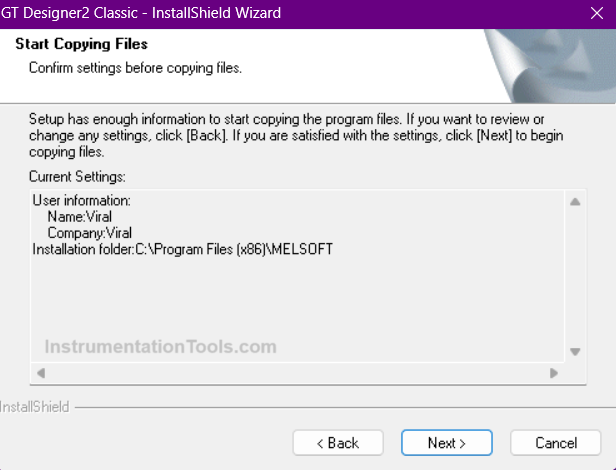
Once done, the setup will start installing on the PC. Once done, click finish, and your software is now ready to run.
Once the software is installed, you’re ready to start using it. The best part is it’s completely free and doesn’t require any license for long-term use. To get started quickly, check if any demo or sample projects are available. These can give you a better idea of how the software works. If no demos are provided, don’t worry, just explore the built-in help files and manuals for step-by-step guidance.
So, to quickly brief the installation process, the following steps are:
- Welcome to the software installation.
- Enter the username details and the organization name details.
- Choose the installation path for the software.
- Start the installation and finish GT Designer.
In this way, we saw how to install the GT Designer software on your PC.
Read Next:
- OMRON PLC Math Instructions Explained
- Create a Faceplate in FactoryTalk View Studio
- Studio 5000 Programming for Digital Alarms
- Example of Using a Counter in Omron PLC Program
- Connect Mitsubishi FX3U PLC with Weinview HMI