Siemens PLC Interview Questions and Answers : This article covers industrial automation interview questions and answers which covers basically Siemens PLC related questions and answers
Siemens PLC Interview Questions
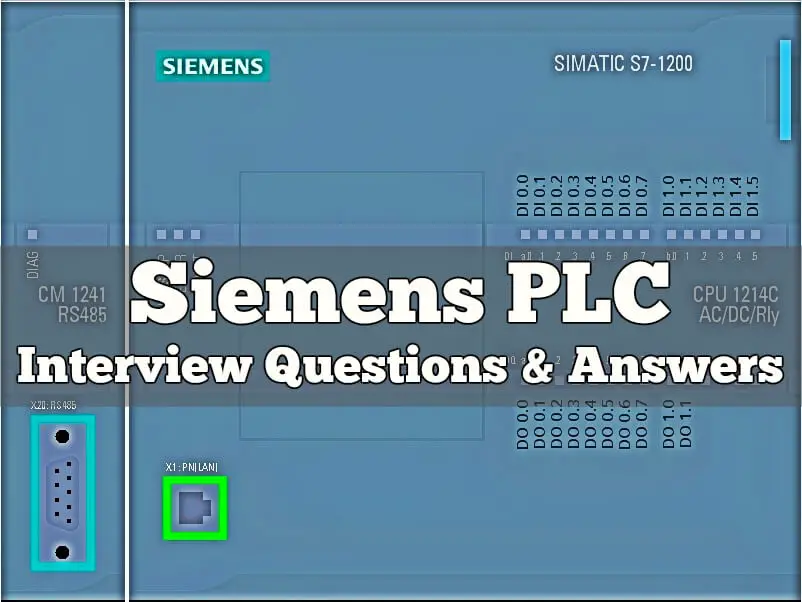
Programmable Logic Controller – Siemens
What are the various PLC system in SIMATIC S7 range ?
Siemens has broadly 3 PLC ranges ie Siemens S7 200 , 300 and 400
What are the software used with Siemens ?
- For S7 200 PLC programming : Microwin
- For S7 300 and 400 system : Simantic S7 manager
- The SCADA software used by Siemens is Win CC.
- Earlier Siemens use to supply COROS LS/B
Components of Siemens S7 300 Series PLC system ?
- CPUs (312 IFM, 313, 314, IFM, 314, 315, 315-2DP, 316-2DP, 318
- Signal Modules (SM), Digital I/O (SM321/322/323), Analog I/O (SM331/332/334)
- Function modules (FM) ex Positioning modules, Closed Loop
- Communication Processor ex CP 342-5 DP for Profibus
- Interface module – For interconnecting individual racks (IM 360/ 361, IM365 S / R)
Explain the System Bits available in S7-200 PLC Special Memory area ?
Special Memory Byte 0 (SM0.0 – SM0.7) provides eight bits that are updated by the S7-200 CPU at the end of each scan cycle. Your program can read the status of these bits and then make decisions based on a bit’s value.
Always_On : SM0.0 This bit is always ON.
First_Scan_On : SM0.1 This bit is ON for the first scan cycle only. One use is to call an initialization subroutine.
Retentive_Lost : SM0.2 This bit is turned ON for one scan cycle if retentive data was lost. This bit can be used as either an error memory bit or as a mechanism to invoke a special startup sequence.
RUN_Power_Up : SM0.3 This bit is turned ON for one scan cycle when RUN mode is entered from a power-up condition. This bit can be used to provide machine warm-up time before starting an operation.
Clock_60s : SM0.4 This bit provides a clock pulse that is OFF for 30 seconds and ON for 30 seconds, for a cycle time of 1-minute. It provides an easy-to-use delay or a 1-minute clock pulse.
Clock_1s : SM0.5 This bit provides a clock pulse that is OFF for 0.5 seconds and then ON for 0.5 seconds for a cycle time of 1 second. It provides an easy-to-use delay or a 1-second clock pulse.
Clock_Scan : SM0.6 This bit is a scan cycle clock that is ON for one scan and then OFF for the next scan. This bit can be used as a scan counter input.
Mode_Switch : SM0.7 This bit indicates the current position of the Mode switch (OFF=TERM position and ON=RUN position). You can use this bit to enable Freeport mode only when the switch is in the RUN position. Normal communication with the PC/programming device can be re-enabled by switching to the TERM position.
Explain the Time Stamp available in S7-200 PLC ?
This warning message indicates that the timestamps for the project do not match the timestamps for the program in the PLC.
This may indicate that the programs are different, in which case it would be dangerous to continue the current operation.
However, the programs may be functionally identical and still have different timestamps.
Also Read : HART and Fieldbus Questions
What are the Time Stamps available in S7-200 PLC ?
Each program contains two distinct timestamps; the “Created” timestamp and the “Last Modified” timestamp. The created timestamp is set when the project is created by the New Project option.
The Created timestamp is not affected by any user edits or program compilation.
The Last Modified timestamp is used to indicate when the user last modified the program. There are many conditions that cause the Last Modified timestamp to be set, it includes Edit of instructions or operands in the program, Adding, deleting, or modifying a Local or Global Symbol, Adding or deleting a POU, Compiling the program block and Downloading the program block (this automatically compiles the program block and therefore sets the last modified timestamp).
How to check whether the project and program in the PLC is same ?
STEP 7-Micro/WIN 32 provides the “Compare” option, to allow you to determine whether the
programs are same or different.
What are Fatal errors in Siemens S7 200 PLC ?
Fatal errors cause the PLC to stop the execution of your program. Depending on the severity of the error, a fatal error can render the PLC incapable of performing any or all functions.
What happens to PLC when it goes to Fatal error ?
The PLC performs the following tasks when a fatal error is detected.
- Changes to STOP mode
- Turns on both the System Fault LED and the Stop LED
- Turns off the outputs
The PLC remains in this condition until the fatal error is corrected.
What are Non – Fatal errors available in Siemens PLCs?
Compile and run-time errors are non-fatal errors. Non-fatal errors can degrade some aspect of the
performance of your PLC, but do not render the PLC incapable of executing the user program or updating the I/O.
Run-time errors are non-fatal errors detected in RUN mode, and reflected in special memory (SM) bits that your program can monitor and evaluate.
At startup, the PLC reads the I/O configuration and stores this information in the SM memory. During normal operation, the I/O status is periodically updated and stored in the SM memory.
If the PLC detects a difference in the I/O configuration, it sets the configuration-changed bit of the module-error byte; the I/O module will not be updated until this bit is reset. For the PLC to reset this bit, the module I/O must once again match the I/O configuration stored in the system data memory.
Run-time programming errors are non-fatal error conditions created by you or your program while the program is being executed.
An example of this is an indirect-address pointer, which was valid when the program compiled, modified by program execution to point to an out-of-range address. Use the PLC > Information… command to determine what type of error has occurred.
You can correct run-time programming errors only by modifying the user program. The run-time programming errors are cleared at the next transition from STOP to RUN mode.
Compile errors (or program-compile errors) are detected at download as the PLC compiles the program.
If there is a compile error, the compile halts, and the previous program (which is known to be valid since it previously compiled) is retrieved.
All of these steps occur while the PLC is in STOP mode. Compile errors can be displayed using the PLC > Information… command.
How To Writing and Forcing Outputs in S7-200 PLC STOP Mode ?
To enable Write and Force functions while in STOP mode, choose the Debug > Write-Force
Outputs in STOP menu command.
The S7-200 PLCs support writing and forcing outputs (both analog and digital) while the PLC is in STOP mode.
As a safety precaution, you must specifically request this functionality to be enabled in STEP 7-Micro/WIN 32. The menu option Debug>Write-Force Outputs in STOP enables you to Write or Force outputs while the PLC is in STOP mode.
Warning If the S7-200 PLC is connected to equipment when you write or force an output, these changes may be transmitted to the equipment. This could result in unanticipated activity in the equipment, which could also cause death or serious injury to personnel, and/ or damage to equipment.
Each time STEP 7-Micro/WIN 32 is opened, the menu option defaults to unchecked, and you are prevented from writing or forcing outputs while the PLC is in STOP mode.
Checking the menu option enables writing and forcing for the current editing session with the current project. When a different project is opened, the menu option returns to its default state and you are prevented from either writing or forcing output addresses while the PLC is in STOP mode.
How TO Write the STL Program in S7-200 PLC ?
The example program below shows formatting in the STL editor according to the guidelines given in How to Enter a Statement in STL. You might want to set up your program similarly, by having the network comments give a general overview of the function of the network and the statement comments identify the function of the statement. Note that the sample is written with symbolic addresses.
If you would like to see this program (in either STL or LAD) in STEP 7-Micro/WIN 32, select File>Open, browse to the STEP 7-MicroWIN\Samples\English directory, highlight the sample program and click the Open button.
Sample Program for a Paint Mixer
NETWORK 1 //Fill the tank with ingredient 1 and monitor tank level.
//Maintain Pump Status if Start Switch Opens.
LD Start_1 //Load value of Start_1 I0.0.
O Pump_1 //Or with Pump_1 Q0.0 value. A Stop_1 //And with Stop_1 I0.2.
AN High_Level //And Not with High_Level I0.4.
= Pump_1 //Assign result to Pump_1 Q0.0.
NETWORK 2 //Fill the tank with paint ingredient 2 and monitor tank.
//level. Maintain Pump Status if Start Switch Opens.
LD Start_2 //Load value of Start_2 I0.1.
O Pump_2 //Or with Pump_2 Q0.1 value. A Stop_2 //And with Stop_2 I0.3.
AN High_Level //And Not with High_Level I0.4.
= Pump_2 //Assign result to Pump_2 Q0.1.
NETWORK 3 //Set memory bit if High Level is reached.
LD High_Level //Load value of High_Level I0.4.
S High_Lev_Reached, 1 //Set High_Lev_Reached M0.1 to 1 (on).
NETWORK 4 //Start Timer if High Level is reached.
LD High_Lev_Reached //Load value of High_Level_Reached M0.1.
TON Mix_Timer, +100 //Timer 37, Preset = 100 (@0.1 s).
NETWORK 5 //Turn on Mixer Motor.
LDN Mix_Timer //Load Not value of Mix_Timer T37.
A High_Lev_Reached //And with High_Lev_Reached M0.1.
= Mixer_Motor //Assign result to Mixer_Motor Q0.2.
= Steam_Valve //Assign result to Steam_Valve Q0.3.
NETWORK 6 //Drain mixing tank.
LD Mix_Timer //Load value of Mix_Timer T37.
AN Low_Level //And Not with Low_Level I0.5.
= Drain_Valve //Assign result to Drain_Valve Q0.4.
= Drian_Pump //Assign result to Drain_Pump Q0.5.
NETWORK 7 //Count each cycle.
LD Low_Level //Load value of Low_Level I0.5.
A Mix_Timer //And value of Mix_Timer T37.
LD Reset //Load value of Reset I0.7.
CTU Cycle_Counter, +12 //Counter 30, Preset = 12.
NETWORK 8 //Reset memory bit if Low Level reached and Timer //timed out.
LD Low_Level //Load value of Low_Level I0.5.
A Mix_Timer //And value of Mix_Timer T37.
R High_Lev_Reached, 1 //Reset value of High_Lev_Reached M0.1 to 0.
What is the Protocol used in the in S7-200 PLC and How many station Can Be Possible in the S7-200 Network?
- Protocol used in the in S7-200 PLC is PPI Protocol
- 32 station Can Be Possible in the S7-200 Network
S7 300 PLC Questions and Answers
What is Absolute and Symbolic Addressing IN S7_300 PLC?
In a STEP 7 program you work with addresses such as I/O signals, bit memory, counters, timers, data blocks, and function blocks.
You can access these addresses in your program absolutely, but your programs will be much easier to read if you use symbols for the addresses (for example, Motor_A_On, or other identifiers according to the code system used within your company or industry). An address in your user program can then be accessed via this symbol.
Absolute Addresses
An absolute address comprises an address identifier and a memory location (for example, Q 4.0, I 1.1, M 2.0,FB21).
Symbolic Addresses
You can make your program easier to read and simplify troubleshooting if you assign symbolic names to the absolute addresses.
STEP 7 can translate the symbolic names into the required absolute addresses automatically. If you would prefer to access ARRAYs, STRUCTs, data blocks, local data, logic blocks, and user-defined data types using symbolic names, you must first assign symbolic names to the absolute addresses before you can address the data symbolically.
You can, for example, assign the symbolic name MOTOR_ON to the address Q 4.0 and then use MOTOR_ON as an address in a program statement.
Using symbolic addresses it is easier to recognize to what extent the elements in the program match the components of your process control project.
What is meaning by Instance data block in S7_300 PLC?
An instance data block is assigned to every function block call that transfers parameters. The actual parameters and the static data of the FB are saved in the instance DB.
The variables declared in the FB determine the structure of the instance data block. Instance means a function block call. If,
for example, a function block is called five times in the S7 user program, there are five instances of
this block.
Creating an Instance DB
Before you create an instance data block, the corresponding FB must already exist. You specify the number of the FB when you create the instance data block.
One Instance DB for Each Separate Instance
If you assign several instance data blocks to a function block (FB) that controls a motor, you can use this FB to control different motors.
The data for each specific motor (for example, speed, runup time, total operating time) are saved in different data blocks. The DB associated with the FB when it is called determines which motor is controlled. With this technique, only one function block is necessary for several motors
What are System Function are in S7_300 PLC?
System Functions
A system function is a preprogrammed function that is integrated on the S7 CPU. You can call the SFC in your program.
SFCs are part of the operating system and are not loaded as part of the program. Like FCs, SFCs are blocks ”without memory.”
S7 CPUs provide SFCs for the following functions:
- Copying and block functions
- Checking the program
- Handling the clock and runtime meters
- Transferring data sets
- Transferring events from a CPU to all other CPUs in multi-computing mode
- Handling time of day and timedelay interrupts
- Handling synchronous errors, interrupts, and asynchronous errors
- Information on static and dynamic system data, for example, diagnostics
- Process image updating and bit field processing
- Addressing modules
- Distributed I/O
- Global data communication
- Communication via non-configured connections
- Generating block related messages
Differences between Instance Data Blocks and Shared Data Blocks
A shared data block is not assigned to a logic block. It contains values required by the plant or machine and can be called directly at any point in the program.
An instance data block is a block that is assigned directly to a logic block, such as a function block. The instance data block contains the data that were stored in a function block in the variable declaration table.
How to Exchanging/Swapping Modules in the Configuration Table in S7-300
If you using HW Config to revise a station configuration and you want to exchange a module for one with a new order number for example, proceed as follows:
1. Use a drag-and-drop operation to drag the module from the Hardware Catalog window over the old module that is already placed.
2. Drop the new module. To the extent possible, the new module assumes the parameters of the one that was already inserted.
This procedure is faster than exchanging modules by deleting the old module and then inserting the new one and assigning parameters to it.
You can turn this function on or off in HW Config by means of the menu command Options > Settings (“Enable Module Swapping”)
What is Meant by Complex Data Types
Complex data types define data groups that are larger than 32 bits or data groups consisting of other data types.
The following table describes the complex data types. You define structures and arrays either in the variable declaration of the logic block or in a data block.
Data Types :
DATE_AND_TIME
Defines an area with 64 bits (8 bytes). This data type saves in binary coded decimal format: DT
STRING
Defines a group with a maximum of 254 characters (data type CHAR). The standard area reserved for a character string is 256 bytes long.
This is the space required to save 254 characters and a header of 2 bytes. You can reduce the memory required for a string by defining the number of characters that will be stored in the character string (for example: string[9] ‘Siemens’).
ARRAY
Defines a multidimensional grouping of one data type (either elementary or complex). For example: ”ARRAY [1..2,1..3] OF INT” defines an array in the format 2 x 3 consisting of integers.
You access the data stored in an array using the Index (”[2,2]”). You can define up to a maximum of 6 dimensions in one array. The index can be any integer (-32768 to 32767).
STRUCT
Defines a grouping of any combination of data types. You can, for example, define an array of structures or a structure of structures and arrays.
UDT
Simplifies the structuring of large quantities of data and entering data types when creating data blocks or declaring variables in the variable declaration.
In STEP 7, you can combine complex and elementary data types to create your own ”userdefined” data type. UDTs have their own name and can therefore be used more than once.
FB, SFB
You determine the structure of the assigned instance data block and allow the transfer of instance data for several FB calls in one instance DB.
Structured data types are saved in accordance with word limits (WORD aligned).
What meant by User-Defined Data Types (UDT)
User-defined data types are special data structures you create yourself that you can use in the whole S7 program once they have been defined.
- User-defined data types can be used like elementary data types or complex data types in the variable declaration of logic blocks (FC, FB, OB) or as a data type for variables in a data block (DB). You then have the advantage that you only need to define a special data structure once to be able to use it as many times as you wish and assign it any number of variables.
- User-defined data types can be used as a template for creating data blocks with the same data structure, meaning you create the structure once and then create the required data blocks by simply assigning the user-defined data type (Example: Recipes: The structure of the data block is always the same, only the amounts used are different.)
User-defined data types are created in the SIMATIC Manager or the incremental editor just like other blocks.
What you mean by Memory Compressing? (RAM) When it can be?
After deleting and reloading blocks, gaps can occur in the user memory (load and work memory) and reduce the usable memory area.
With the compress function, the existing blocks are rearranged in the user memory without gaps, and a continuous free memory is created.
Always Try to Compress the Memory in STOP Mode
Only if you compress the memory in “STOP” mode are all the gaps closed up. In the RUNP mode (mode selector setting), the blocks currently being processed cannot be shifted since they are open.
The compress function does not work in the RUN mode (mode selector setting) (write protection!).
What are the Communication Protocol used in Siemens 300 ?
Multi-Point Interface ( MPI ) :
Data Transfer – 187.5 kbits to 15 Mbit/s,
Distance – 50 m without RS 485 repeater / 10 Km with repeater
Number of nodes – up to 32
Profibus :
Data Transfer – 12 Mbit/s,
Distance – 23 Km with fibre optic cable
Number of nodes – up to 125
What are the blocks used in Siemens ?
Simantic S7 manager uses DB, OB, FC, PB and FB
OBs : Determine the structure of the user program
Data Block : These are the blocks used by logic blocks in CPU program for storing the data. DB’s doesnot contain any instructions and it take up space in the user memory. The user program can access a data block with bit, byte, word or double word operations.
Global data block : These contains information that can be accessed by all the logic block in the user
program.
Instance data block : These DBs are always assigned to a particular FB.
FC Functions : It is a logic block without memory. An FC is always executed by calling in another block. FC is used either for returning a function value to a calling function or executing a technological function. Temporary variable belonging to FC are saved in local stack and this data is lost when the FC has been executed.
Function Blocks (FBs) : A function block is block with a memory. A FB contains a program that is always executed when a different logic block calls the FB. FB make it much easier to program frequently occurring complex functions.
What are SFCs and SFBs ?
SFBs and SFCs are integrated in the S7 CPU and allow you access to some important system functions.
What is Statement List?
Statement List (STL) is a textual programming language that can be used to create the code section of logic blocks.
Its syntax for statements is similar to assembler language and consists of instructions followed by addresses on which the instructions acts.
If you liked this article, then please subscribe to our YouTube Channel for PLC and SCADA video tutorials.
You can also follow us on Facebook and Twitter to receive daily updates.
Read Next:




Thanks sir!
I need the program in PLC.
Sir , please I want to study all plc . Please give me guidance
Who made this was great, years ago! I think full families are missing.
You cannot learn PLC without doing it but this is only my opinion.
Dear Mr/MIS
I have cpu 1214c and dcs ,
Plc and Dcs are connected via modbus rtu .
pc time and Plc are time the same .
The reading time is different .
where is the problem from ?
how do i fix this problem ?
please help me .
thankyou