In this article, we discuss the PLC to PLC communication using open user communication in Siemens Tia Portal.
In Siemens TIA Portal, there are multiple ways of establishing communication between active or passive devices.
The communication between devices with different make & model is established using a method called “Open User Communication“.
The instructions that come under this method are listed below.
- TCON – Establish Communication Connection
- TDISCON – Terminate Communication Connection
- TSEND – Send Data via Communication Connection
- TRCV – Receive Data via Communication Connection
Using above instructions we can establish communication between PLC and any other Active / Passive Device.
The above instructions use TCP protocol for data transfer. The medium used is Profinet / Industrial Ethernet.
Open User Communication Configuration Steps
The below steps explains the procedure to do the PLC to PLC data transfer and receive using the open user communication method in Tia Portal.
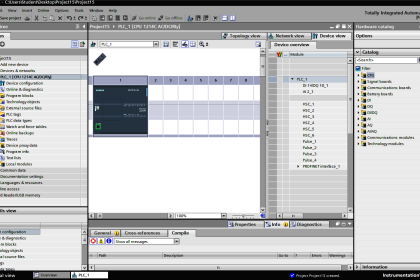
Step 1:
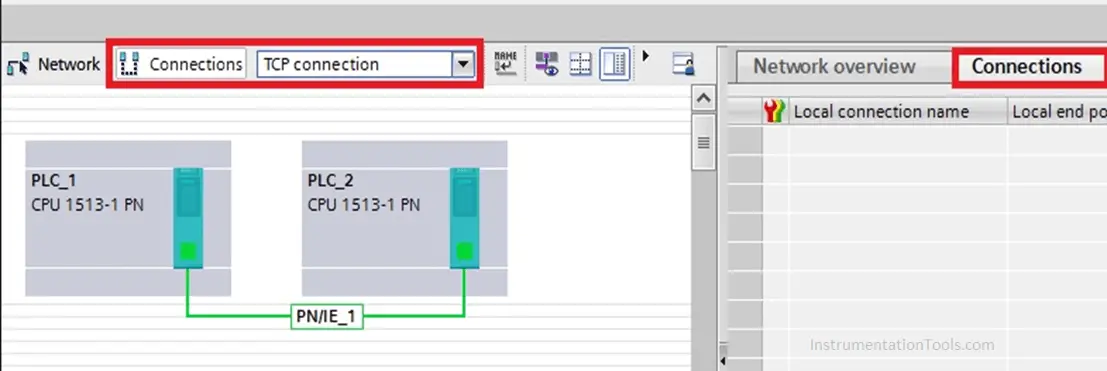
Drag two CPU’s from TIA Catalog into Hardware Configuration of TIA Portal.
Create a connection as shown below figure.
Note that connection is not yet established.
Step 2:
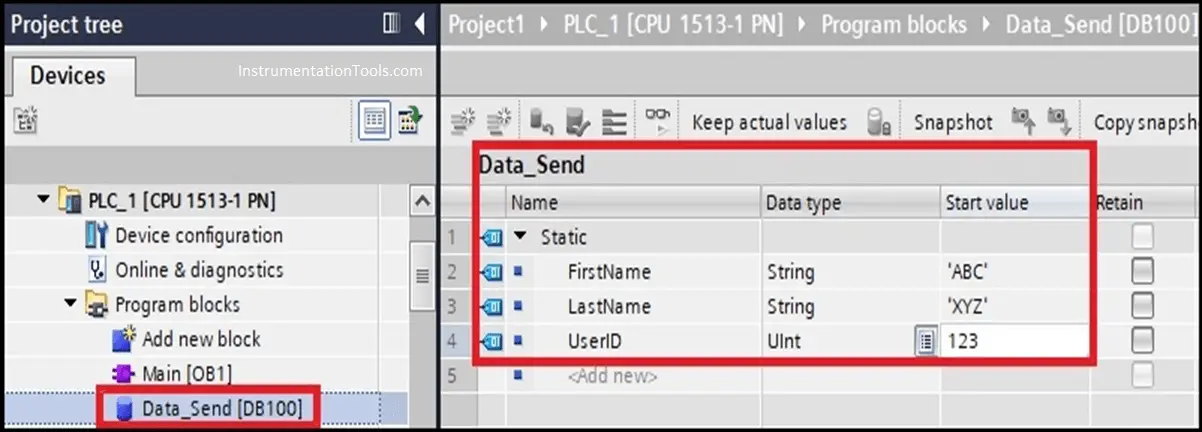
Create a data block as shown below for data to be sent & stored in Local PLC.
Step 3:
To store the status data for instructions create data block with following structure & tags in PLC_1.
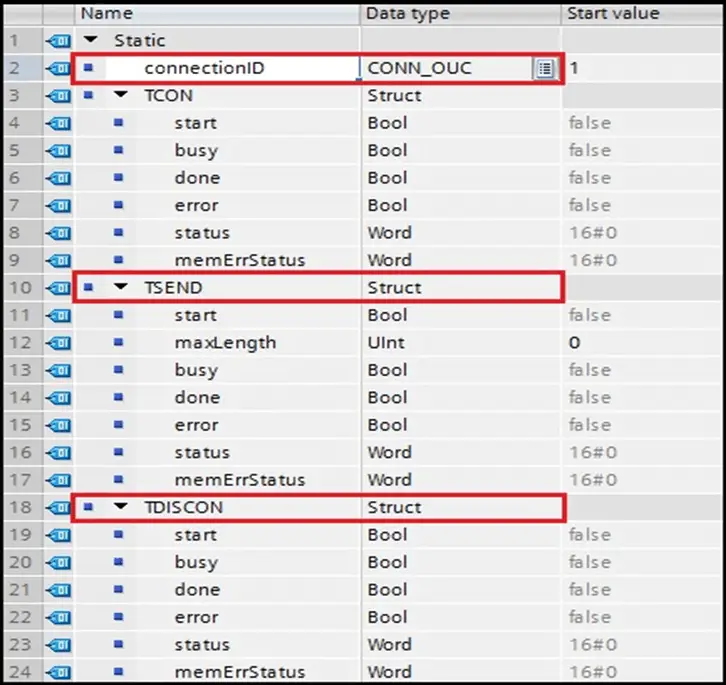
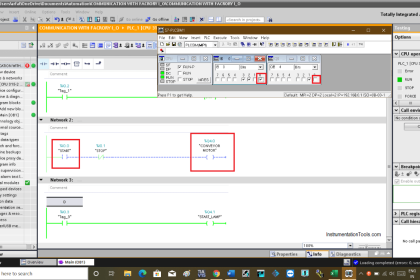
Step 4:
Now we will program for Local PLC_1.
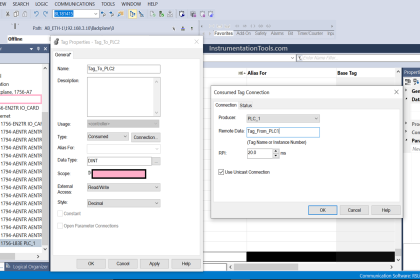
Connect the parameters of Instructions ‘TCON’ as follows with the use of data block developed in Step 3.
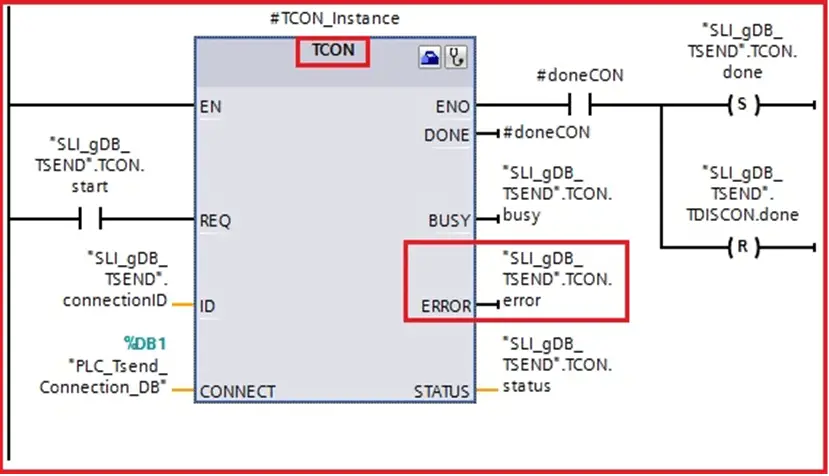
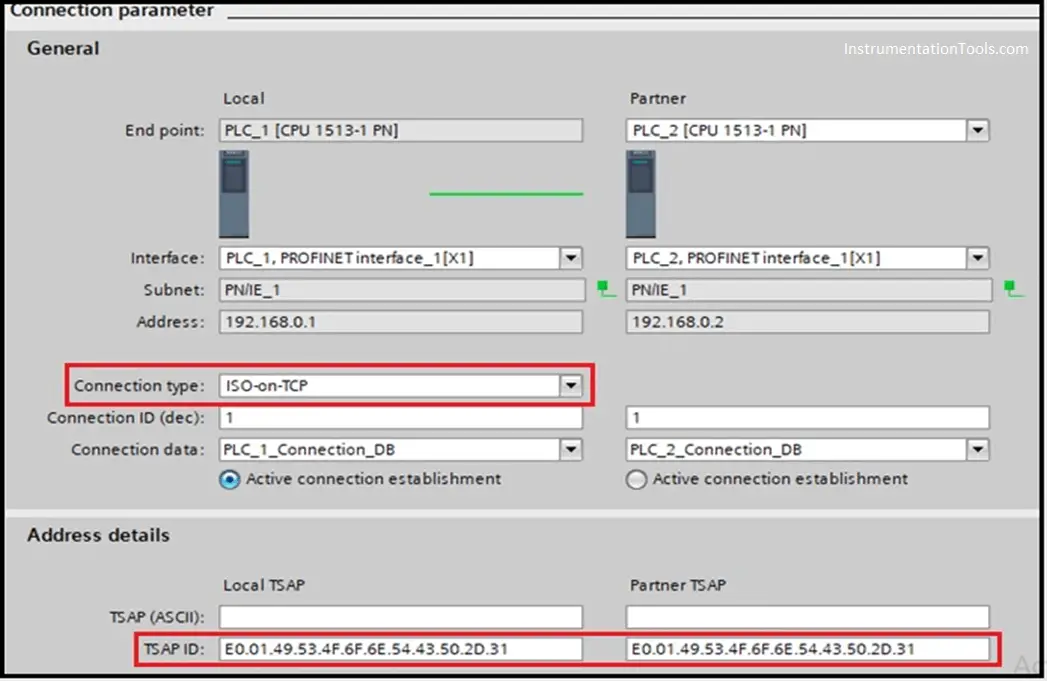
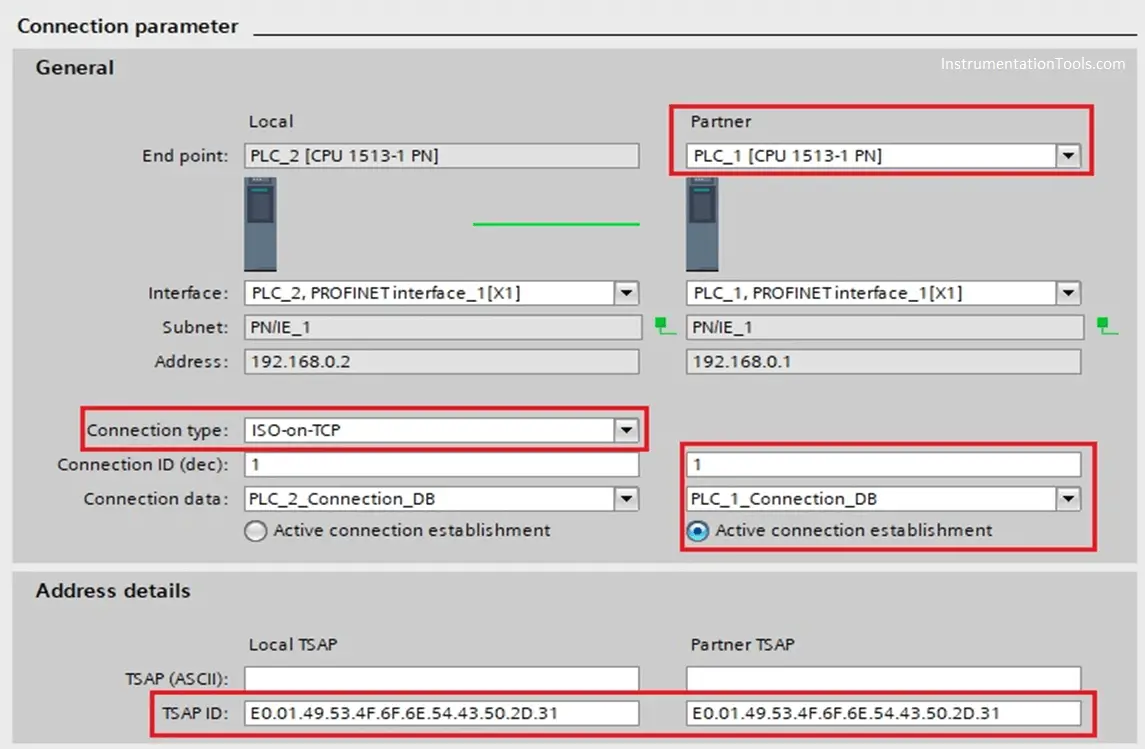
Configure the TCON Instruction as mentioned in below figure –
Connection Type is selected as ISO-on-TCP
TSAP ID is auto-generated by the system.
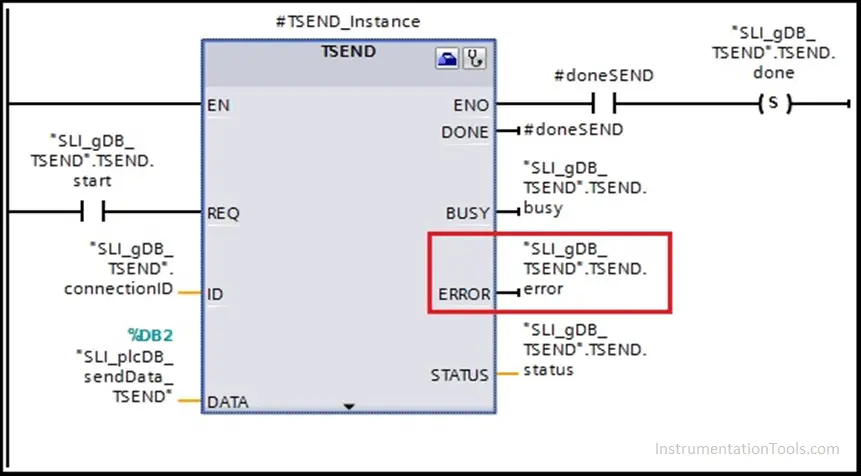
Connect the parameters of Instruction ‘TSEND’ as follows with the use of data block developed in Step 3.
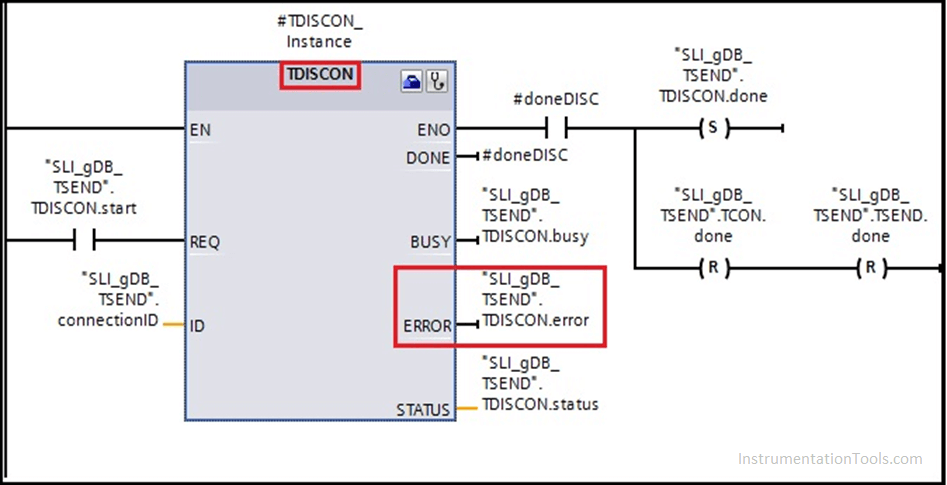
Connect the parameters for Instruction ‘TDISCON’ as follows with the use of data block developed in Step 3.
Step 5:
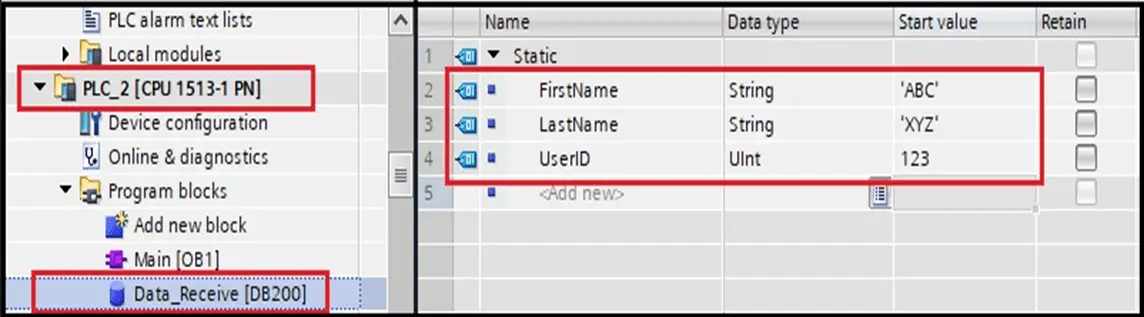
Now we will program for Partner PLC_2.
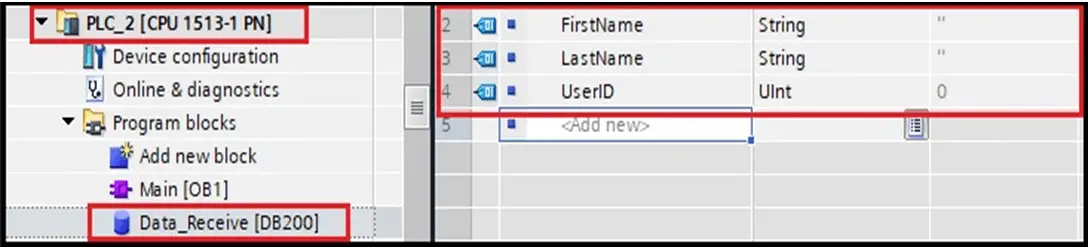
Create a data block as shown below for data to be received & stored.
Step 6:
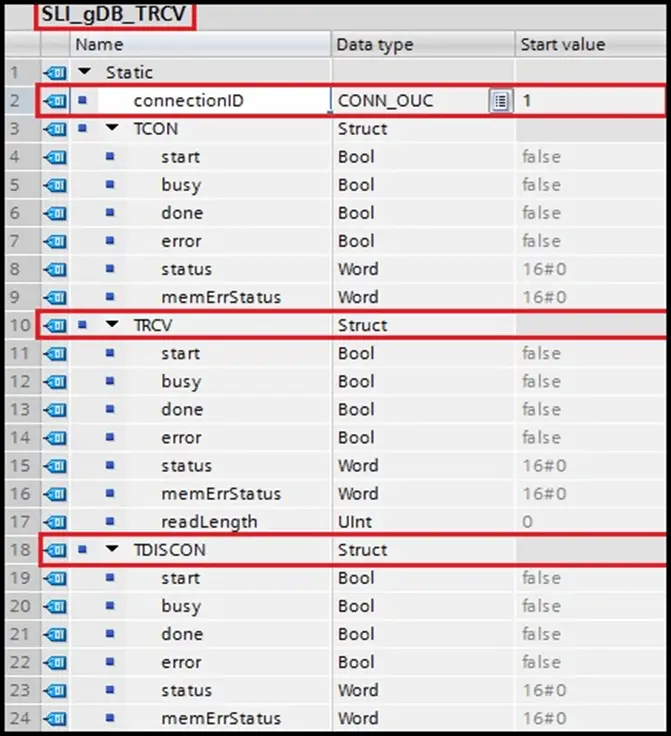
To store the status data for instructions create a data block with the following structure & tags in PLC_2.
Step 7:
Now we will program for Partner PLC_2.
Connect the parameters of Instructions ‘TCON’ as follows with the use of data block developed in Step 6.
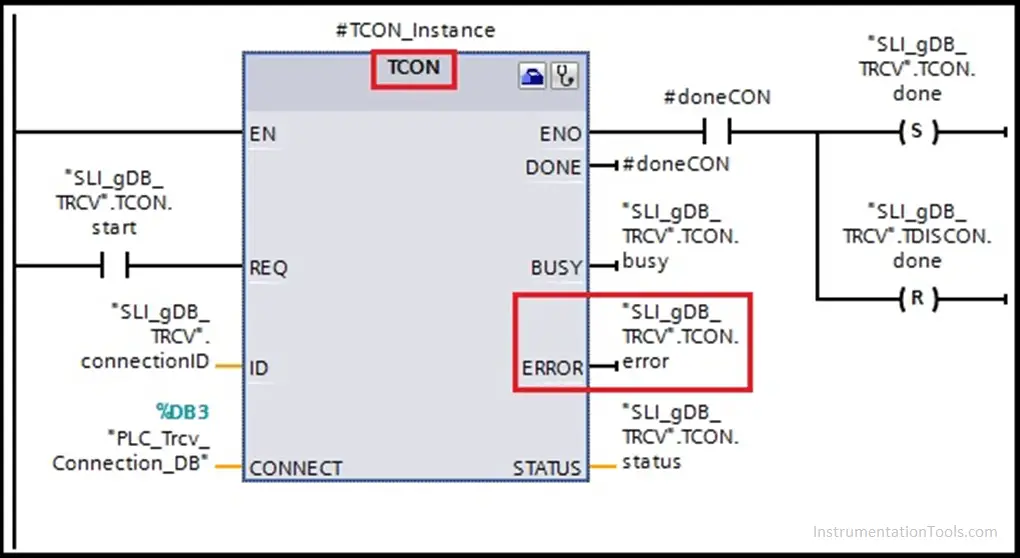
Configure the TCON Instruction as mentioned in the below figure.
Connection Type is selected as ISO-on-TCP
TSAP ID is auto generated by system.
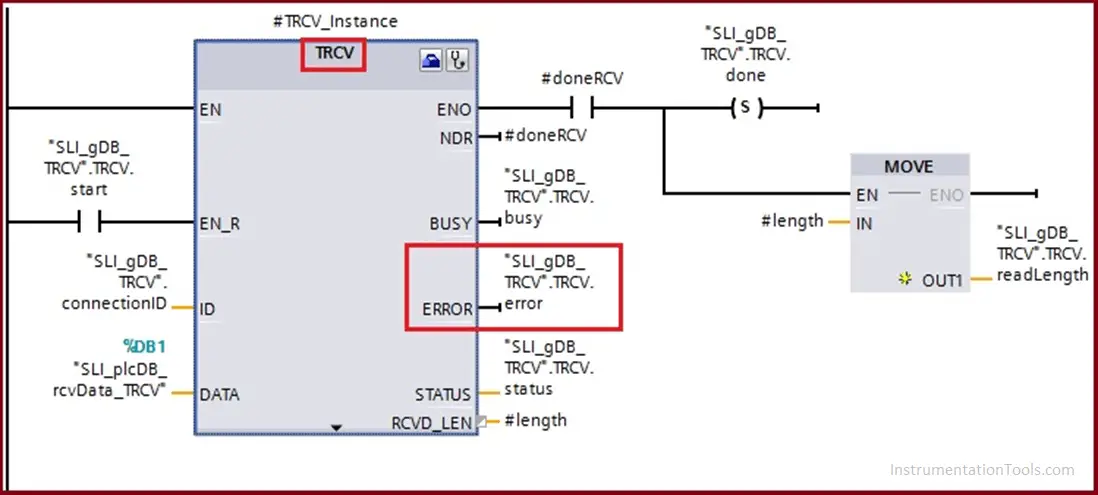
Connect the parameters of Instruction ‘TRCV’ as follows with the use of data block developed in Step 6.
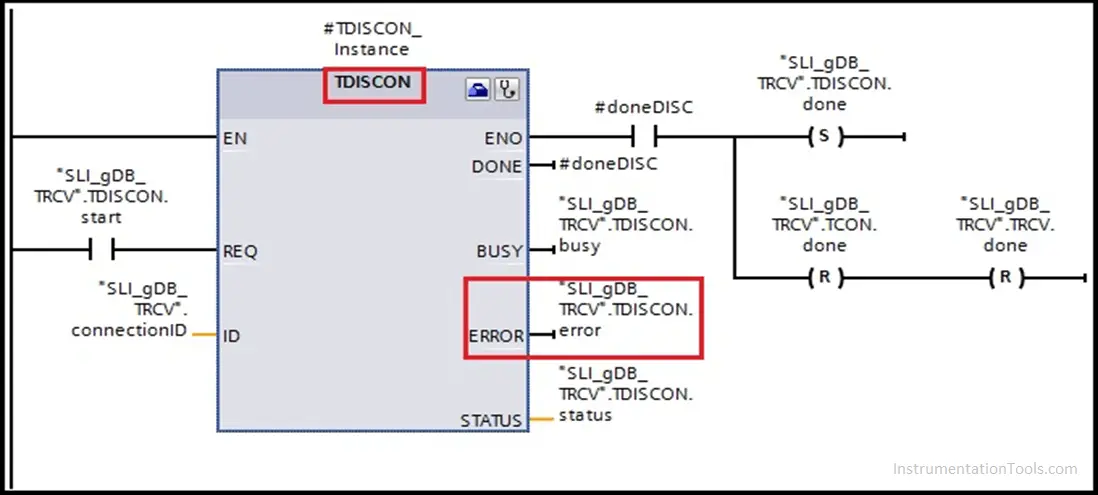
Connect the parameters for Instruction ‘TDISCON’ as follows with use of data block developed in Step 6.
Simulation Steps
Step 1:
Now both the Local & Partner PLCs are ready for communication. Start the simulation for both PLCs and download the codes.
Step 2:
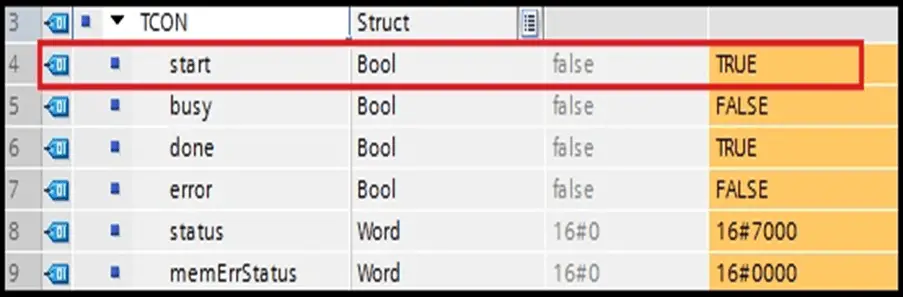
For Establishing Connection (TCON), observe the output by making the following changes.
- Change the parameter REQ to “TRUE” for CPU_2.
- Change the parameter REQ to “TRUE” for CPU_1.
Step 3:
When the connection is established by TCON, the TSEND instruction shall send the data based on the Input Parameter ID.

Step 4:
At the same time, the TRCV instruction shall receive the data based on the Input Parameter ID.
Step 5:
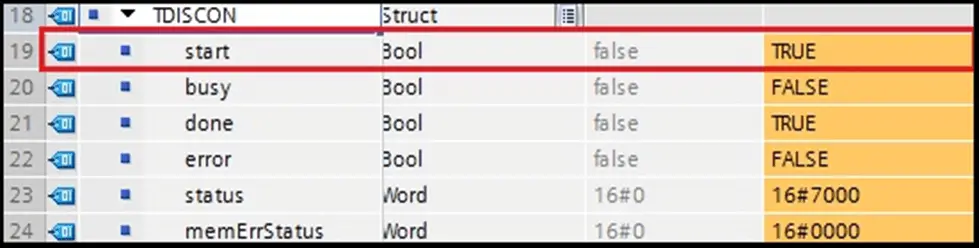
For Terminating Connection (TDISCON), observe the output by making the following changes.
- Change the parameter REQ to “TRUE” for CPU_2.
- Change the parameter REQ to “TRUE” for CPU_1.
Pros & Cons
- It is a secure method of data exchange between devices.
- We can share a large amount of data compared to GET & PUT Instructions.
Conclusion
We studied one of the methods to establish communication between PLC’s using TSEND & TRCV instructions in Open User Connection.
It is one of the secure methods of data transfer where connection can be established and terminated from both Local & Partner PLC using TCON & TDISCON instructions.
Author: NMG
If you liked this article, then please subscribe to our YouTube Channel for Instrumentation, Electrical, PLC, and SCADA video tutorials.
You can also follow us on Facebook and Twitter to receive daily updates.
Read Next: