In this article, I will cover the configuration steps of the Profibus network using Siemens Simatic manager.
Profibus is a famous communication protocol founded by siemens provide a baud rate of 187.5 kb/sec. We can connect up to 64 devices on a single network.
Also Read: Principle of Profibus
When I/O devices are installed over long distances instead to lay a cable from the control room to field can become complex and increase installation cost too.
To mitigate complexity, we can mount a small local panel near to field devices. Now the local panel will be connected to the control room system cabinets. We have to use IM (Interface Module) which will provide communication from that panel to control room utilizing Profibus method. This is called remote I/O.
It recognizes by its purple color outer jacket.
Consider that We have to mount some digital and analog devices on remote location. Let’s follow the below steps to configure the Profibus network.
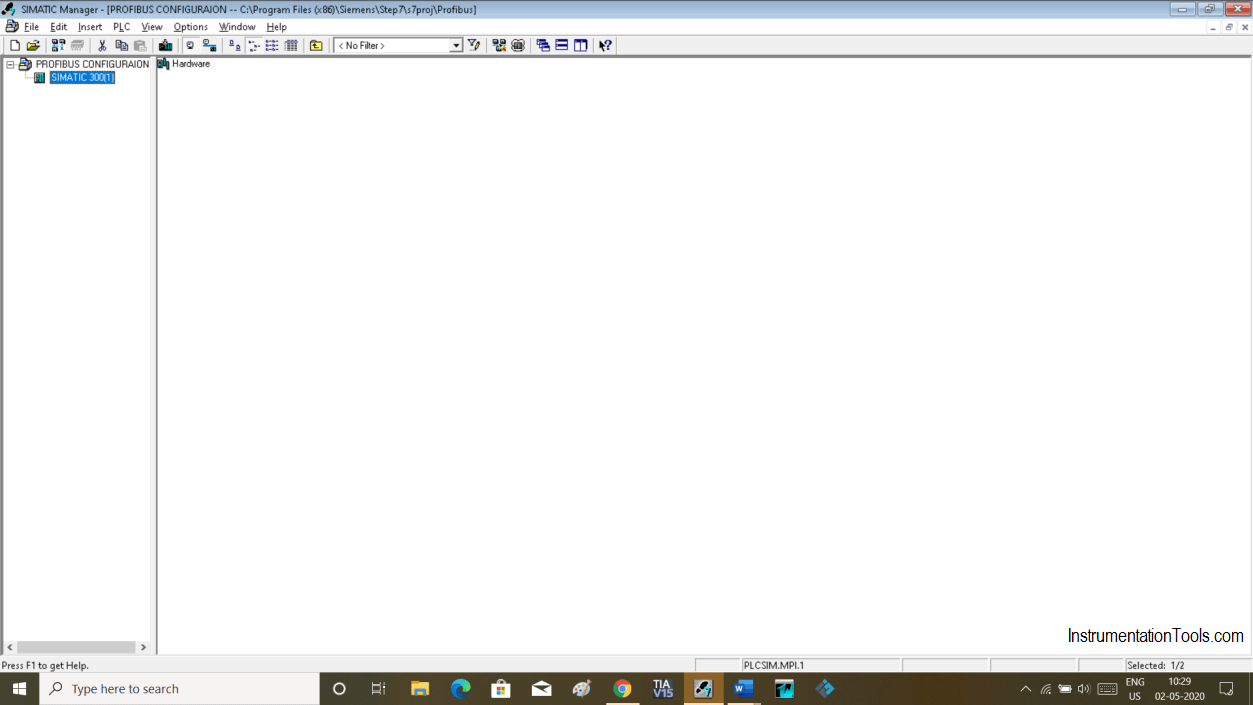
Open Simatic manager. Create a new project and select the type of the CPU.
Select and add Required module as located in the main control room. Please visit my previous article on how to create a new project.
Select CPU type which has a Profibus port on it as we are going to configure the Profibus network. In our case, I have chosen CPU 315-2DP.
For the practical purpose you can choose random I/O otherwise choose as per your physical I/O arrangement.
To create a Profibus network double click on “DP” as shown in the below window.
Clicking on DP will open a new pop-up window as shown in the below window.
Here, “Networked selection is no”. To configure network click on “properties”.
Clicking on properties will open up the following window. Click on “New” to add network. Here default address is “2”. Leave as it is.
Clicking on new will pop up one more window. Change the name if you wish to. Click “ok” to add.
The network is added with default speed. Hit “ok” again to proceed.
Here, previously “NO” is turned to “Yes”. Hit “ok” to proceed.
Now you can see that the Profibus network is added. Here on this network, you can add Drive, IM, etc. We have to add here remote I/O, so we will configure Interface Module.
To add the Interface module we have to select ET (Electronic terminal). To add, expand “PROFIBUS-DP” where you can find a variety of “ET-200”.
To select the “IM” expand the “ET-200” module and select the Interface Module as per model number we have in the hardware.
For the sake of our example, I will use ET-200S.
Here, expanding ET-200is will open IM 151-2. Add Analog and digital module as per model number located on the hardware.
Drag and drop IM 151-2 on the network which we have created earlier.
The following window will pop-up asking you for the address. To Add address have a look onto actual IM where you can find DIP switches. See which DIP switches are on and add them.
For example, if ON DIP switches are 2, 4, and 8. Now add them 2+4+8 = 14. So. An address which we have to add here is 14.
The maximum address you can add is “128”.
After adding address hit “ok” to proceed.
IM is added with the address which we had entered. Let’s add the I/O module.
Select IM to add modules. You can see below the window that I have added all the required modules installed in hardware as per the order number. We are done with Profibus Network.
Author: Suhel Patel
If you liked this article, then please subscribe to our YouTube Channel for PLC and SCADA video tutorials.
You can also follow us on Facebook and Twitter to receive daily updates.
Read Next:
PLC ladder logic design to control 3 motors with toggle switch and explain the program…
VFD simulator download: Master the online tool from the Yaskawa V1000 & programming software for…
The conveyor sorting machine is widely used in the packing industries using the PLC program…
Learn the example of flip-flop PLC program for lamps application using the ladder logic to…
In this article, you will learn the STAR DELTA programming using PLC controller to start…
Lube oil consoles of rotary equipment packages in industrial process plants are usually equipped with…


View Comments
Please send me steps on how configure Variable Speed Drive (VSD) to control the speed of a motor.