Learn how to do Force ON and Force OFF in GE PLC software proficy machine edition using ladder logics and reference view tables.
FORCE in GE PLC
Step 1:
Open “Proficy Machine Edition” Software

Step 2:
Open the saved project.

Step 3:
Software loaded.

Step 4:
First Click on Online mode then click on Toggle online. Refer the below picture.

Step 5:
Now you are online. Browse the logic and select the required variable to be forced.
Right-click on the variable to be forced and click “Force ON” option as shown in the below figure.
Here we are forcing a on/off valve or also called as shutdown valve. Force ON means we are making the logic status to 1.

Step 6:
Now if we want to test the logic status with “0” then right-click on the required variable and click “Force OFF” as shown in the below figure.
Force OFF means we are making the logic status to 0.

Step 7:
After testing the logic with Force ON and Force OFF options, we must remove the force so the logic will work in real-time otherwise these variables will stay in force state.
Right-click on the required variable and select “Remove Force” option as shown in the below figure.

Step 8:
Till now we discussed how to do force ON and OFF from logics.
Now if we want to do the force ON and OFF from reference tables then the below steps will apply.
Select the “Reference View Tables” menu in the left side-bar and expand it.

Step 9:
Select the “Default Tables” folder in the left side-bar and expand it as shown in the below figure.

Step 10:
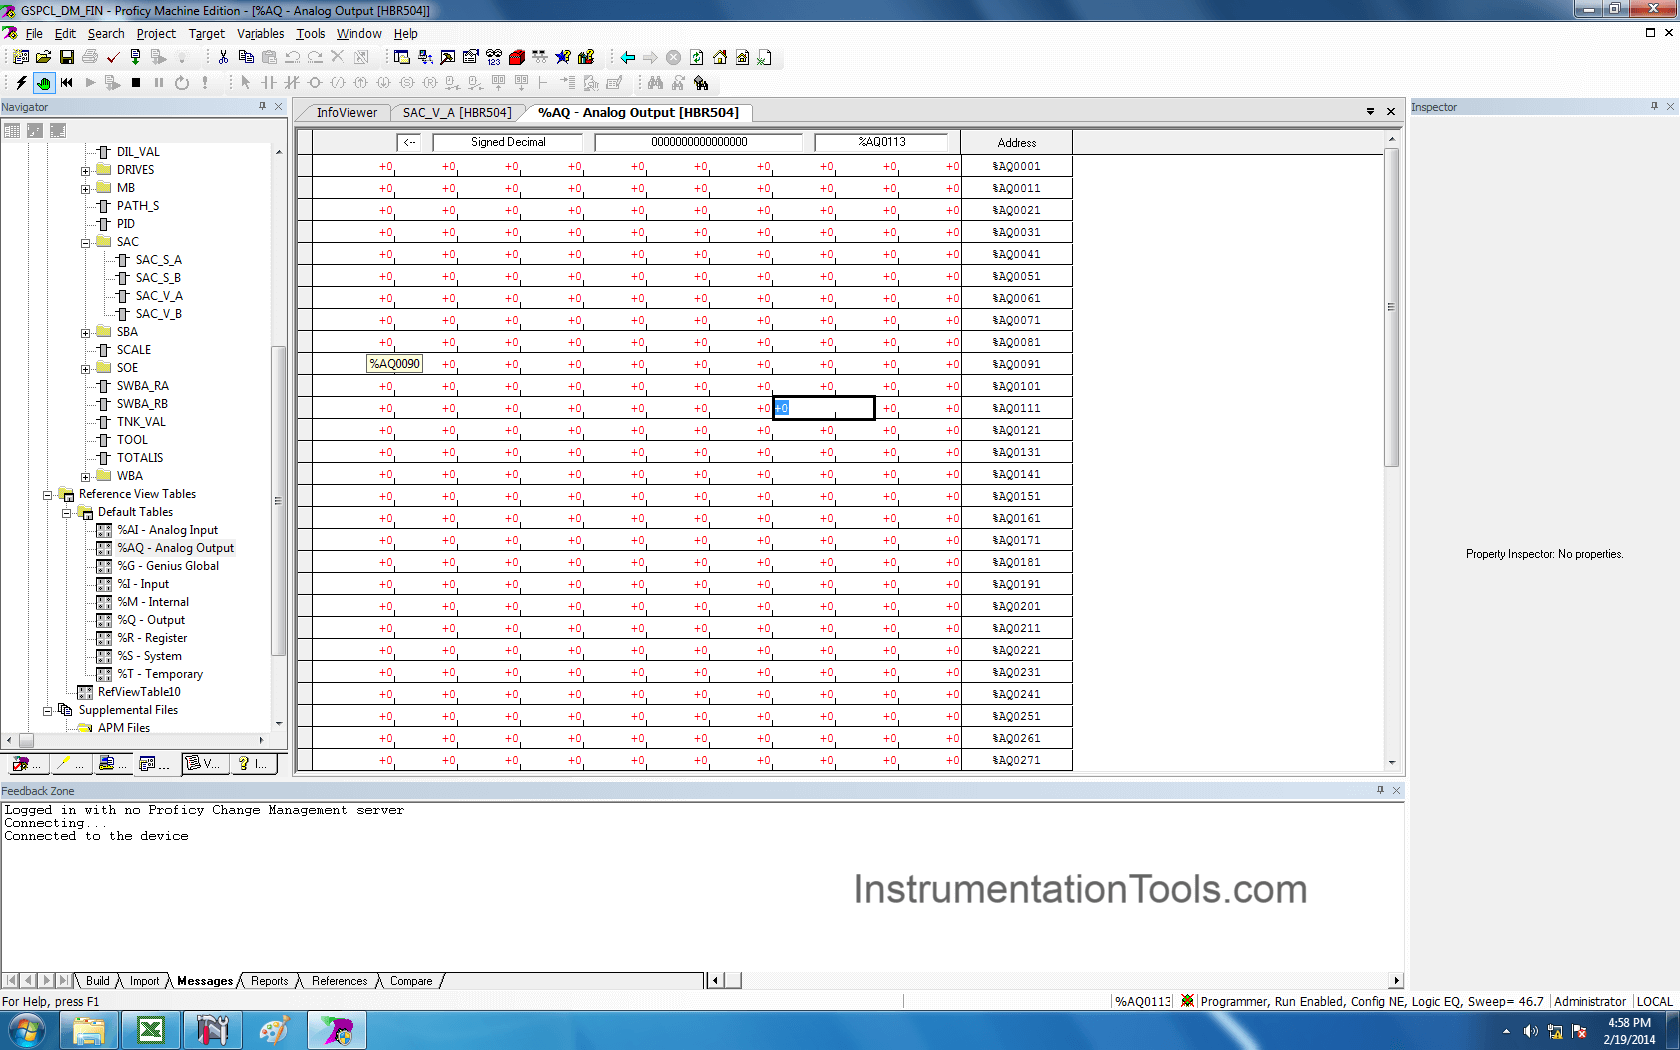
Select “Analog Output” option in the left side-bar and double-click on it.
In this window, we must know the address used for the outputs in the logic.
Select the required address (%AQ0113 in our example), click on it and apply the required value.

Step 11:
After testing, again enter the default value.
Step 12:
Now we see the FORCE ON and FORCE OFF of digital inputs.
Select the “Input” option in the left side-bar as shown in the below figure.

Step 13:
In our example, we want to force %I00005 address. Select the respective bit and right-click on it.
The value in the selected address if logic “0”.
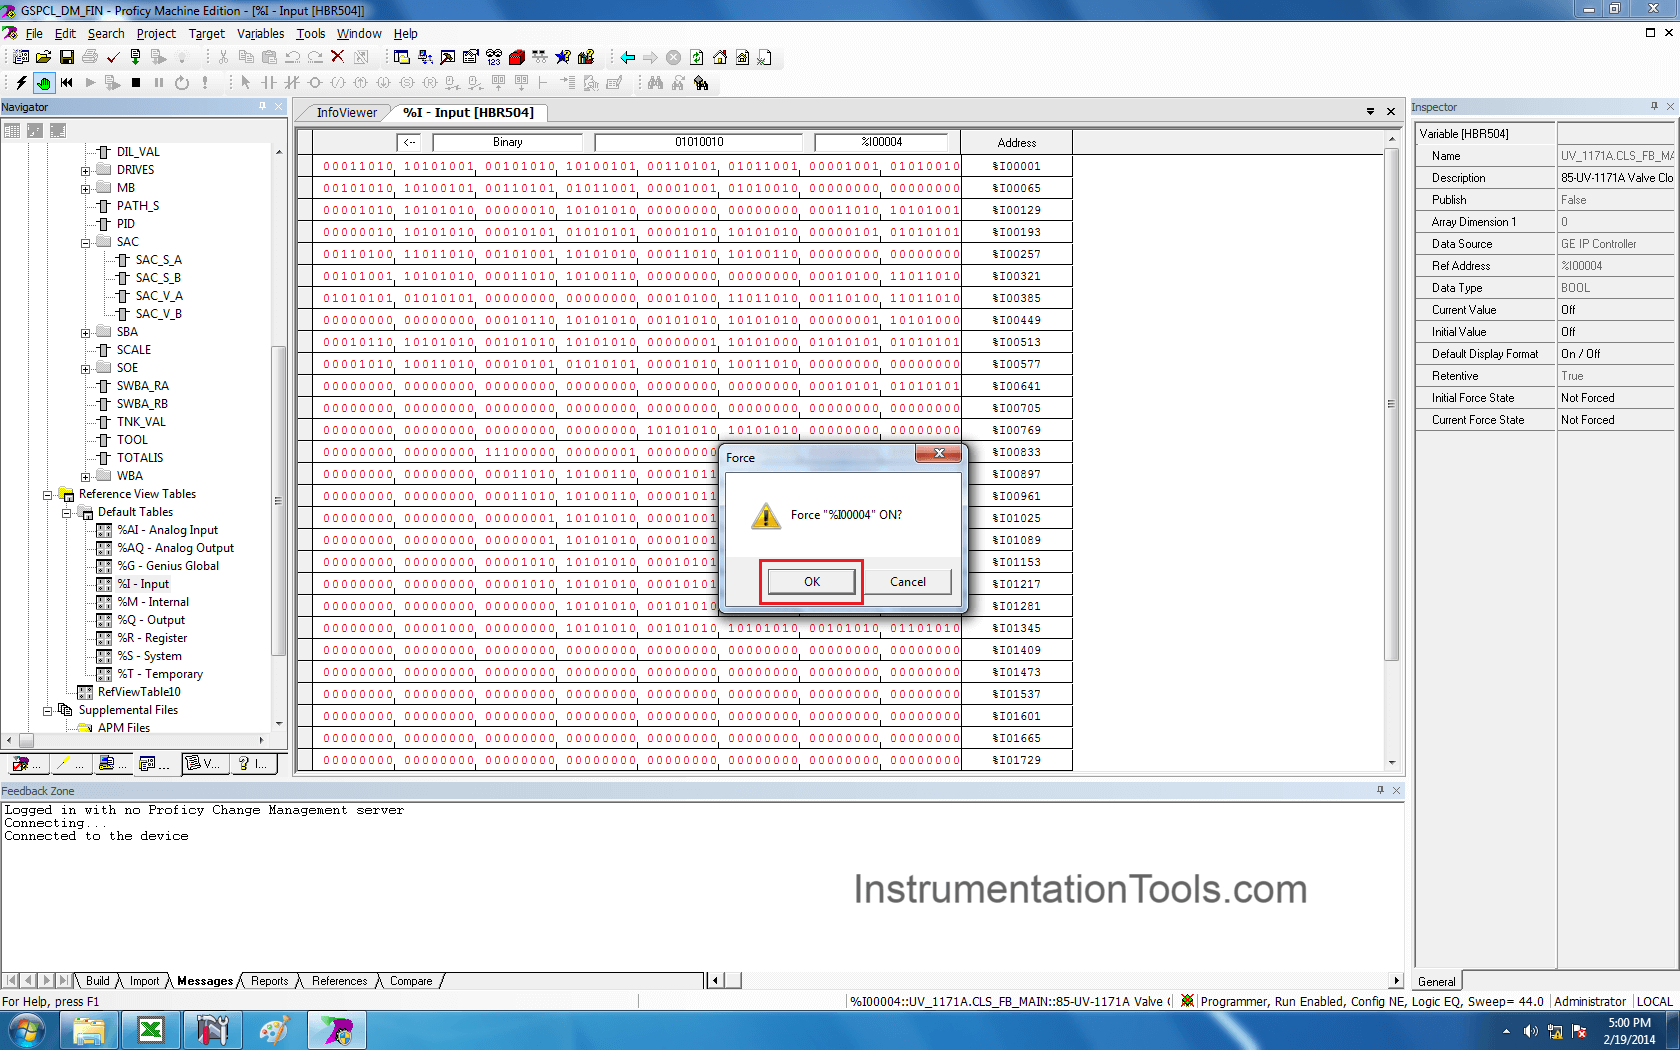
A drop-down window will appear as shown in the below figure and select “Force ON” option.

Step 14:
Then a pop-up window will open for confirmation. Click on “OK”.
Step 15:
As we used FORCE ON option, so the logical value in the address %I00005 will change to logic “1” as shown in the below figure.

Step 16:
Similarly, right-click on the address and click on “Force OFF” option to make the logic status to “0”.

Step 17:
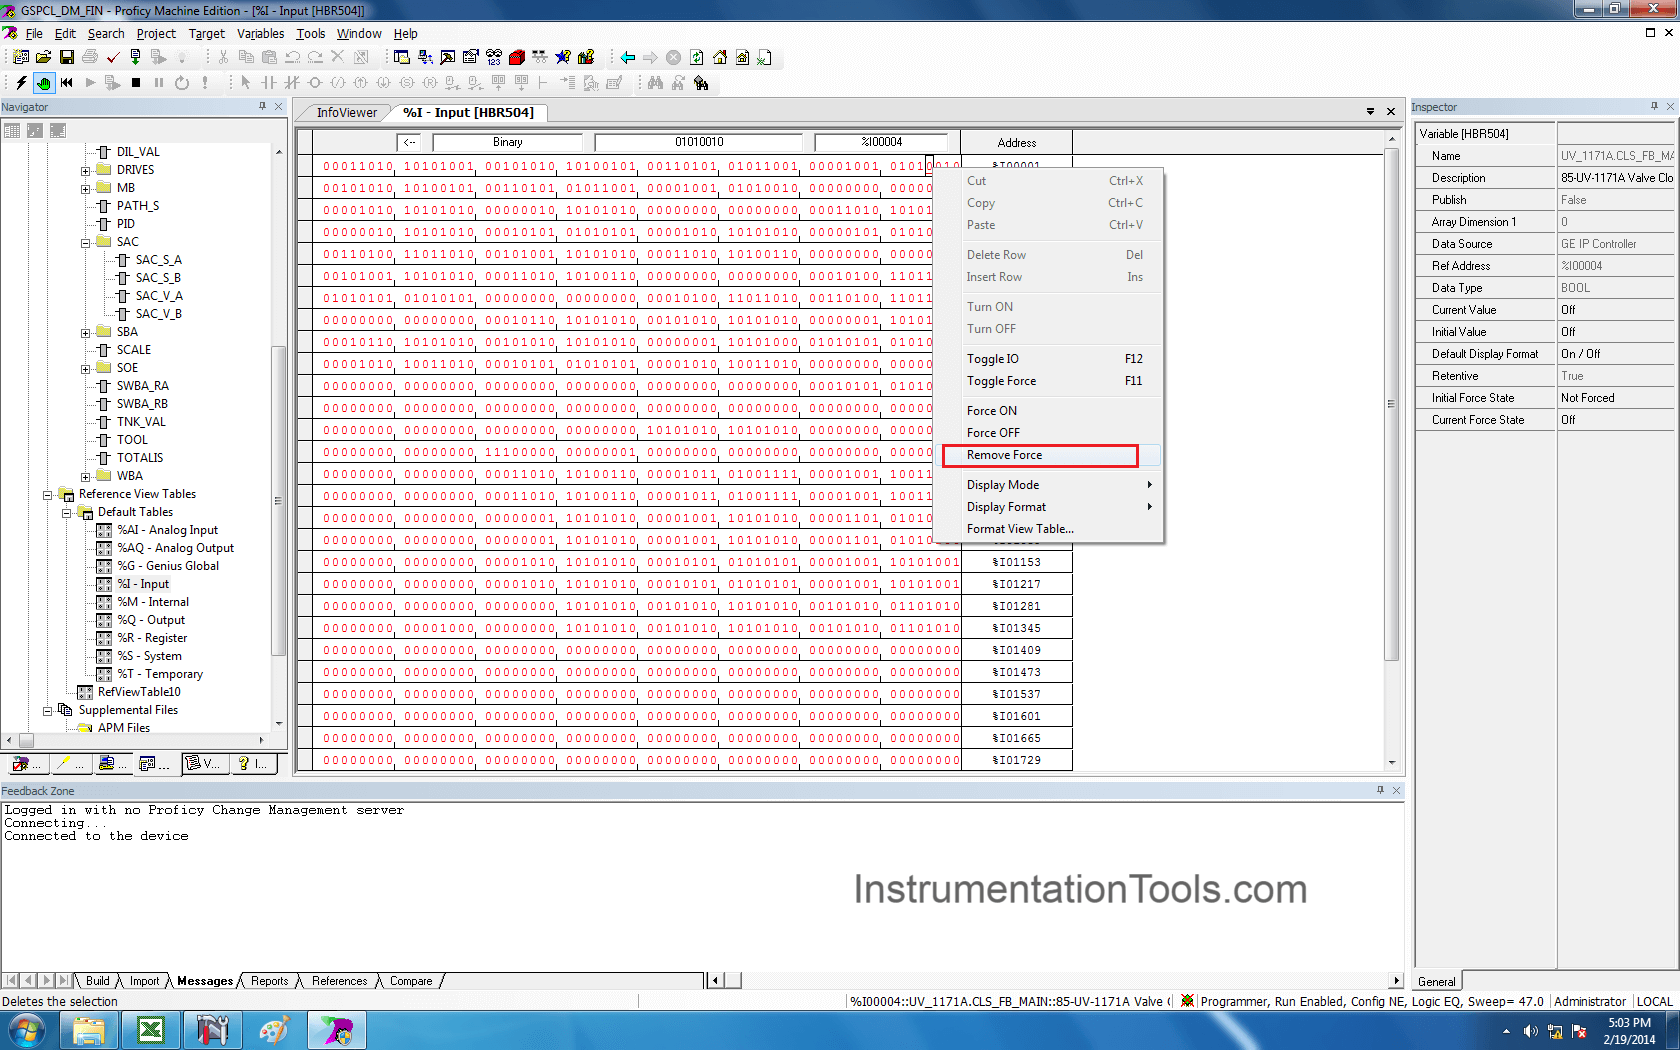
After testing, we have to remove the force otherwise the logic status will stay in the forced state.
So, right-click on the required address and select “Remove Force” option.
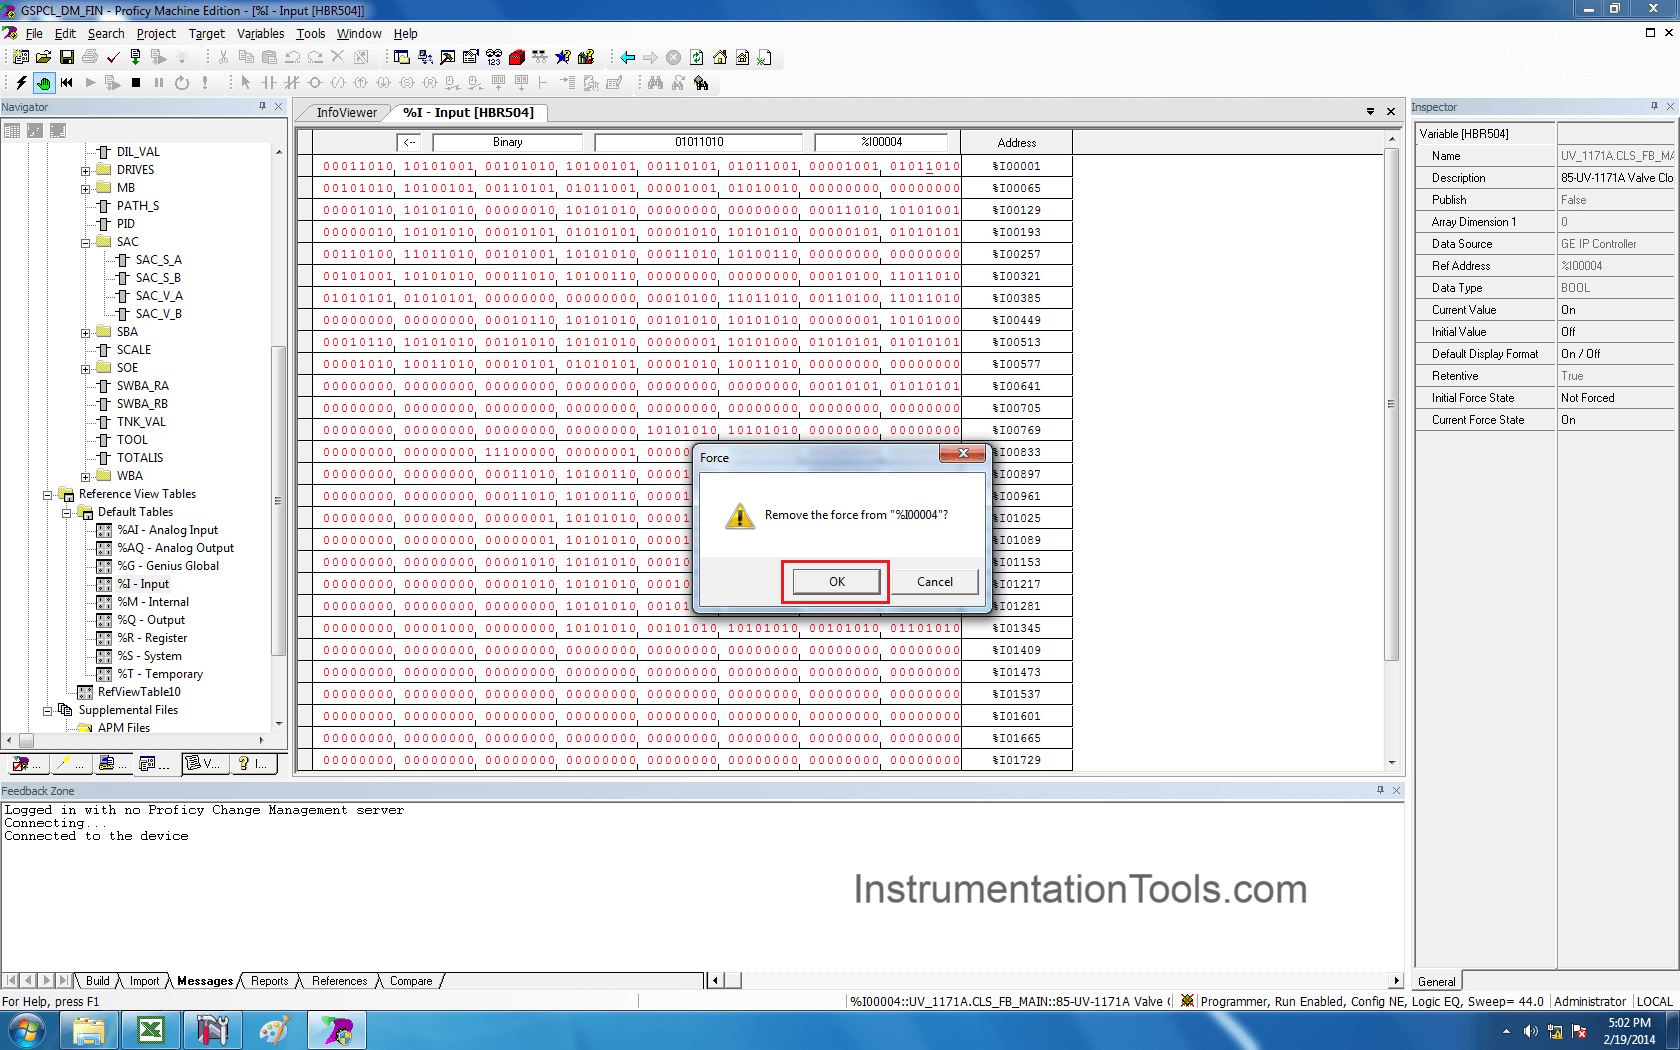
Step 18:
Again, a pop-window will open for confirmation. Click on “OK” to remove the force.
Step 19:
Now if we want to show all the variables which are in “Forced state” then follow the below step.
Select “HBR504” option and right-click on it.
A drop-down window will appear, now select “online Commands”, again a new dropdown appears.
Select “Show Forces in Controller” option as shown in the below figure.

Step 20:
Now software displays all the forced variables in the controller as shown in the below figure.

If you liked this article, then please subscribe to our YouTube Channel for PLC and SCADA video tutorials.
You can also follow us on Facebook and Twitter to receive daily updates.
Read Next:
- Download Free PLC software
- SCADA Software Demo
- Up Down Counter in PLC
- Grounding Scheme in PLC
- Backup from Siemens PLC
- Wiring Diagrams of PLC


Why are we using “toggle online” after taking PLC online in step 4?