This article is about creating a new project using the Siemens Simatic manager software.
Let’s dig into the procedure of creating a new project.
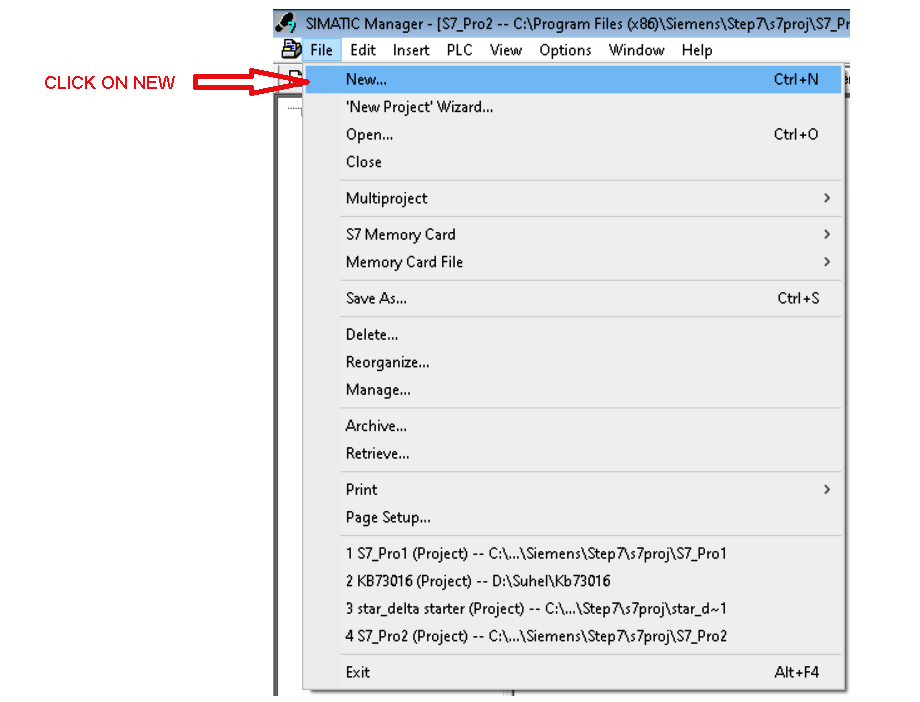
Step 1:
Open Simatic Manager. Click on “File” then click on “New”.
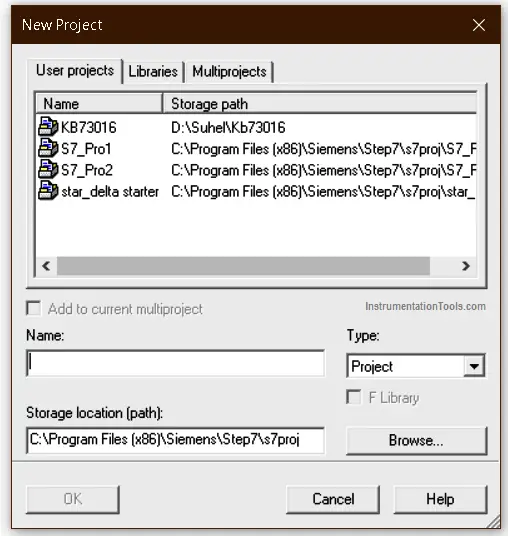
Step 2:
Following window will pop-up. Write the name of the project and hit “ok”.
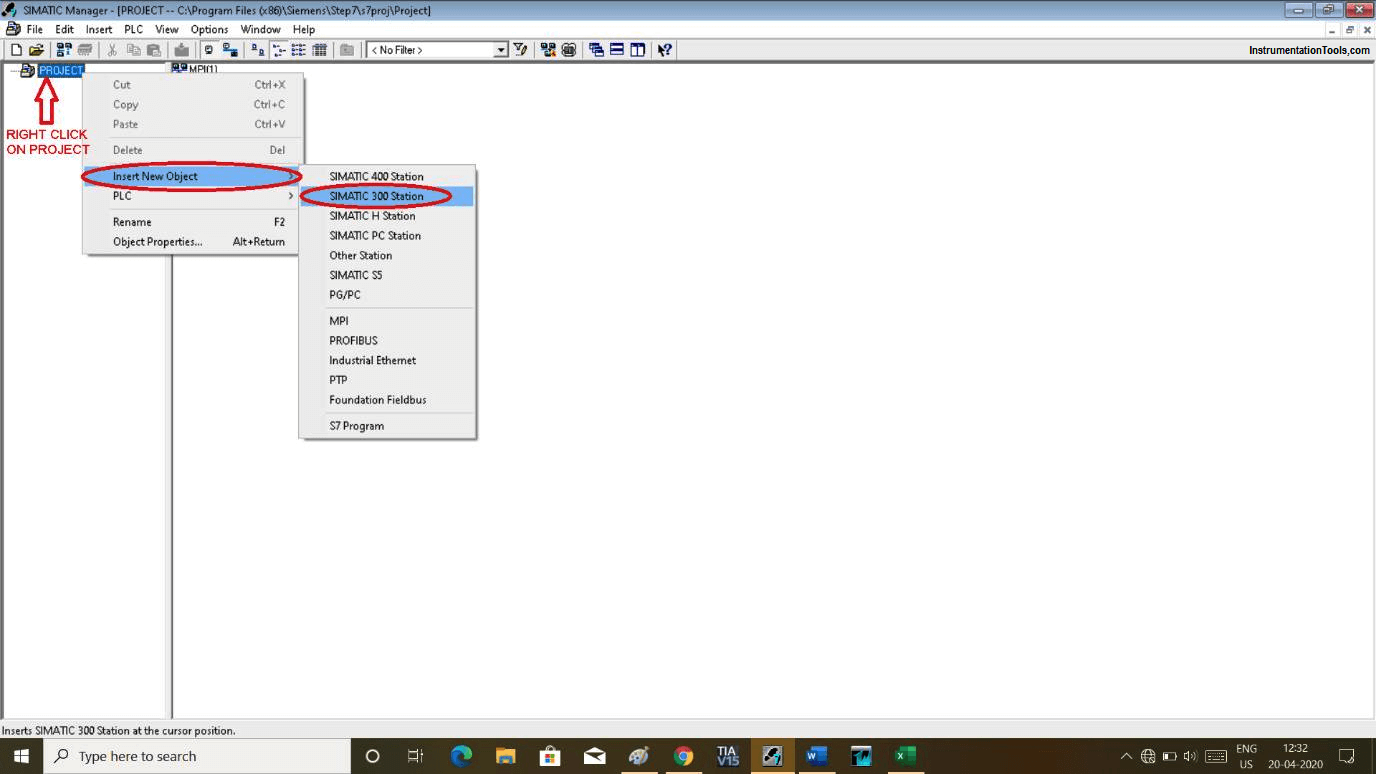
Step 3:
Right-click on “PROJECT” that is the name of the project which I have written in the last window. Go to “insert new object” and select “Simatic 300 station”.
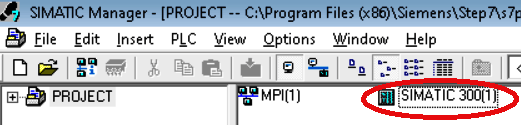
Step 4:
After adding Simatic 300 station it will add as shown in below window.
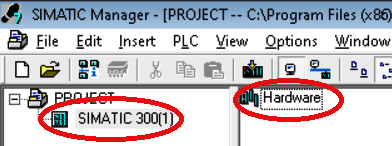
Step 5:
As shown in the above window if you hit double click on Simatic 300 then following window will open. “Hardware” added to the project.
Step 6:
Double click on “Hardware” will pop-up new window as shown below.
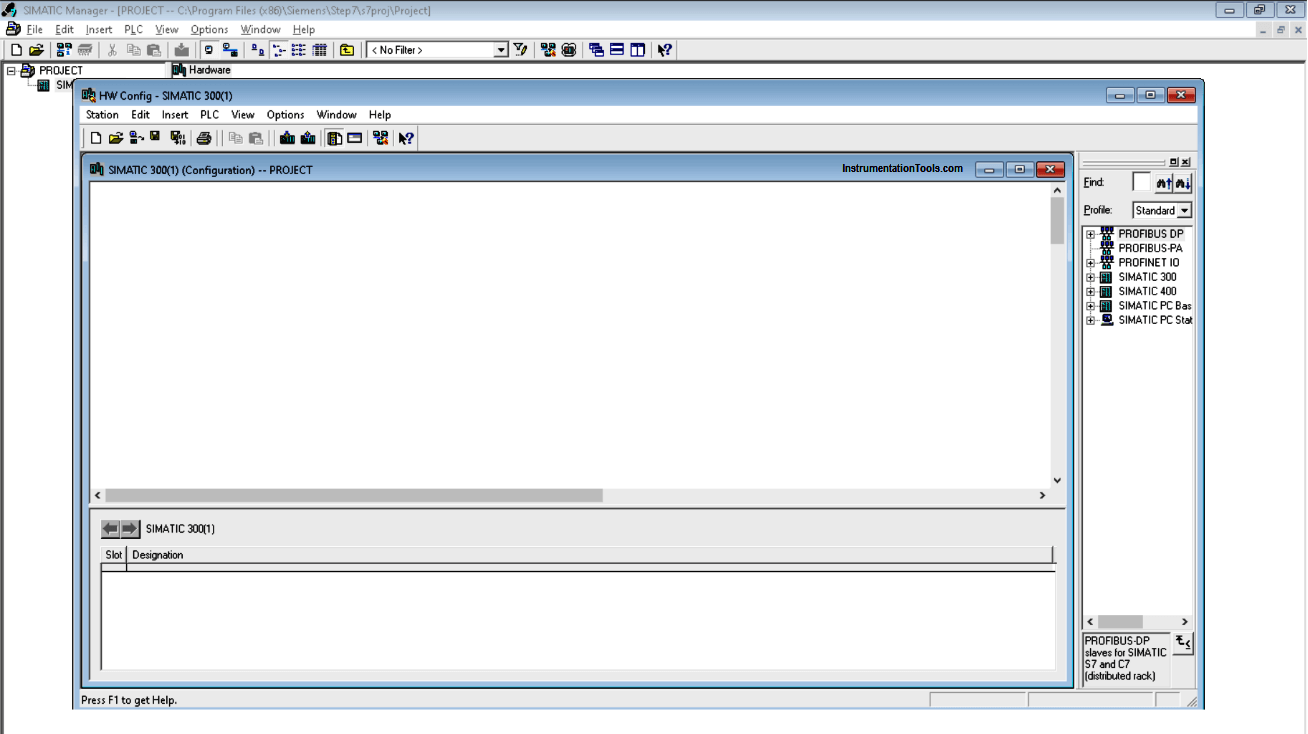
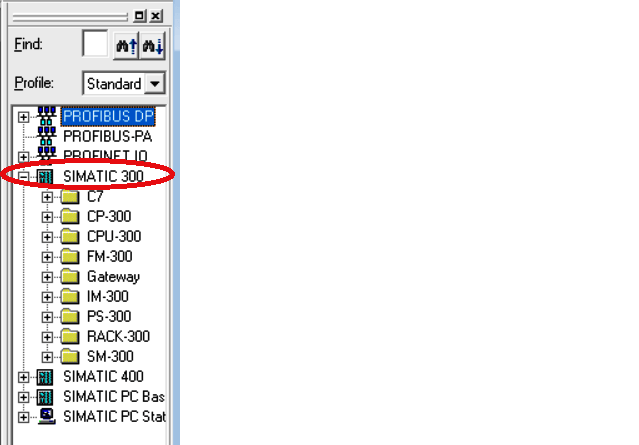
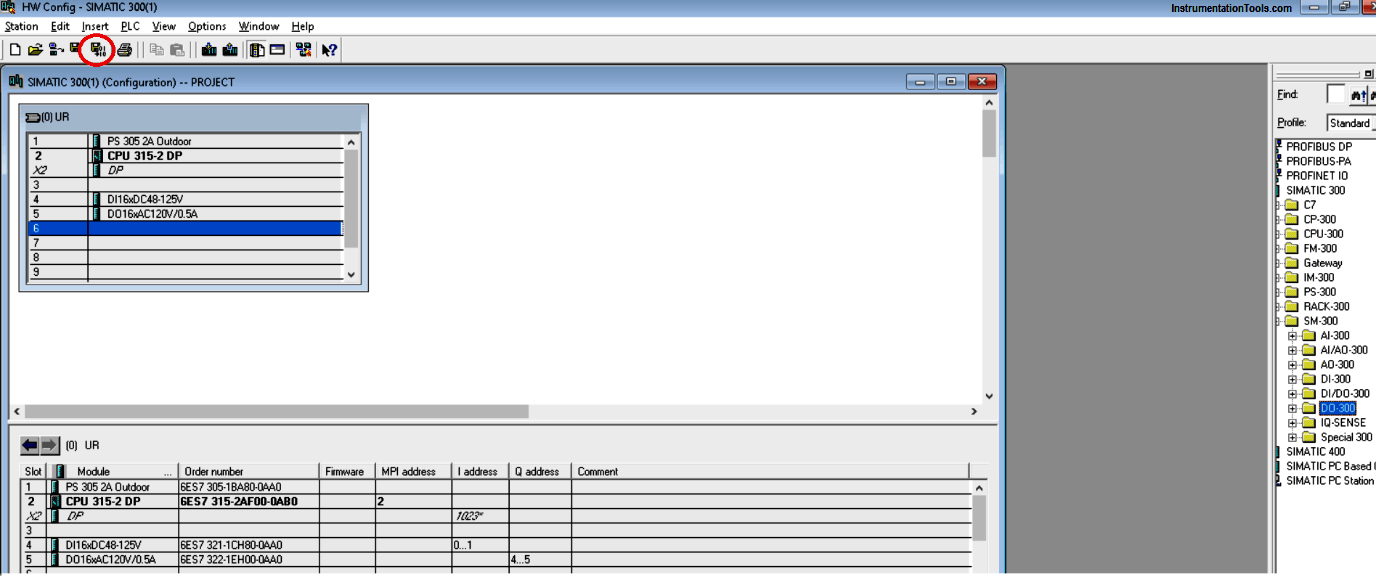
Now here, we have to select Simatic 300 station and expand it. 1st we have to add “rack”.
Step 7:
Now for Siemens PLC after adding rack(rail), in 1st slot we have to add a power supply, in 2nd slot add CPU, 3rd slot is only used for “interface module (IM)”. If you don’t have IM then leave this slot empty. In 4 to 11 slot we can add SM-signal module (input/output module).
Step 8:
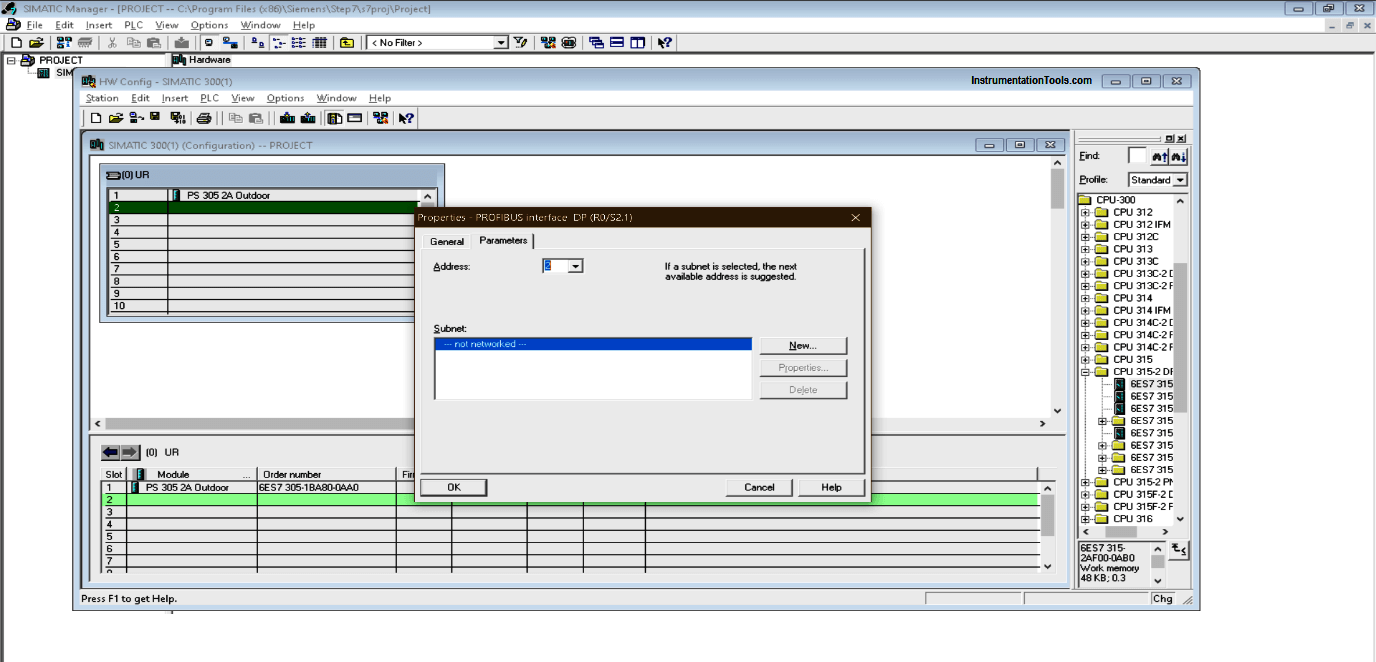
While adding CPU you will receive below pop-up. Here, the default address is “2”, leave as it is and hit “ok”.
Step 9:
As explained in step number 7, add all the block, choose CPU and other elements as per your physical module. For the practical purpose, you can use any CPU.
After adding all element click on the icon as shown in the below window to “save and compile”.
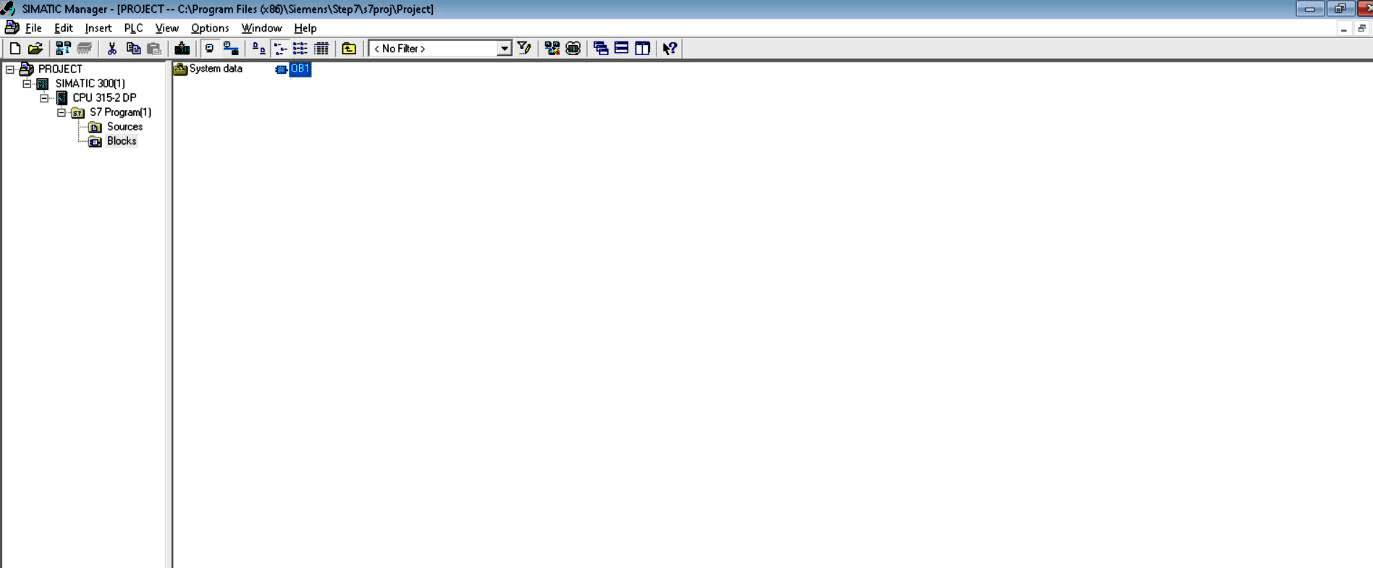
Step 10:
After “save and compile” project go to the main window and expand “CPU”, where you can find “block”. Select block and you can find “OB”.
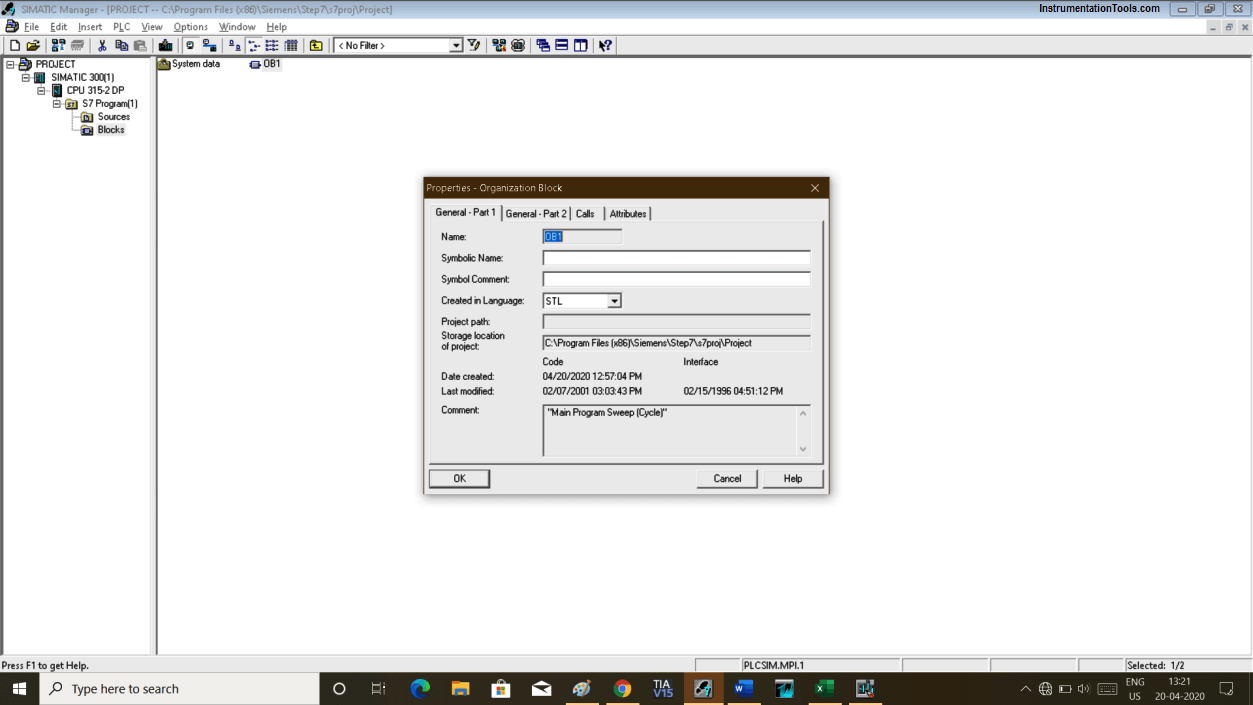
Step 11:
Clicking on “OB” will pop-up below the window. Select Ladder language and hit “ok” to enter in the programming environment.
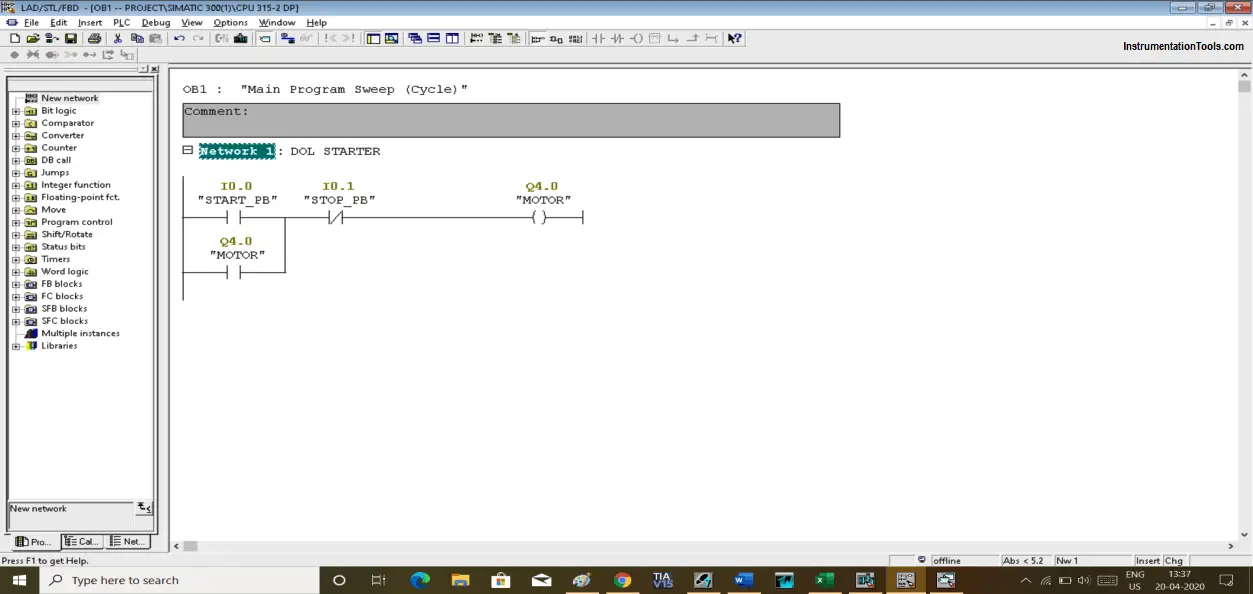
Step 12:
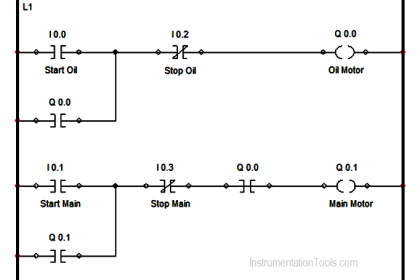
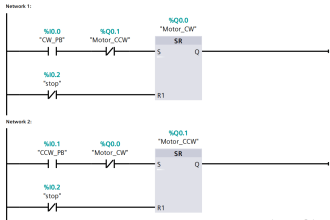
Let write a small program on DOL starter to see the programming environment and its interface.
Following is the program of the DOL starter: pressing I0.0 (PB) will set Q4.0 (MOTOR) and will remain ON despite releasing INPUT due to latching concept. Pressing I0.1(STOP_PB) will stop the Motor.
Author: Suhel Patel
If you liked this article, then please subscribe to our YouTube Channel for PLC and SCADA video tutorials.
You can also follow us on Facebook and Twitter to receive daily updates.
Read Next:
- Troubleshoot PLC Program
- Protect PLC using Password
- PLC Maths Instructions
- JUMP Instruction in PLC
- Siemens S7 1200 PLC
- One-Shot Rising PLC Logic