This article is about creating an application (screen) in HMI using Siemens TIA PORTAL.
We all know how much HMI is useful, it allows us to gather all the data from one location.
We can control processes, can see alarms, trends, see the level of the tanks, and can give a command to control valve to see its operation like what we do with HART to check loop.
So, HMI is all in one place where you can do any stuff just you need have to communicate it with the PLC.
In the above window, you can see an example of HMI how it carries all the information. In red symbol, you can see an error and a lot of another feature you can access within HMI.
Also Read: Programmable Logic Controller
Let’s learn how to create an application, to do that follow the below step as I do.
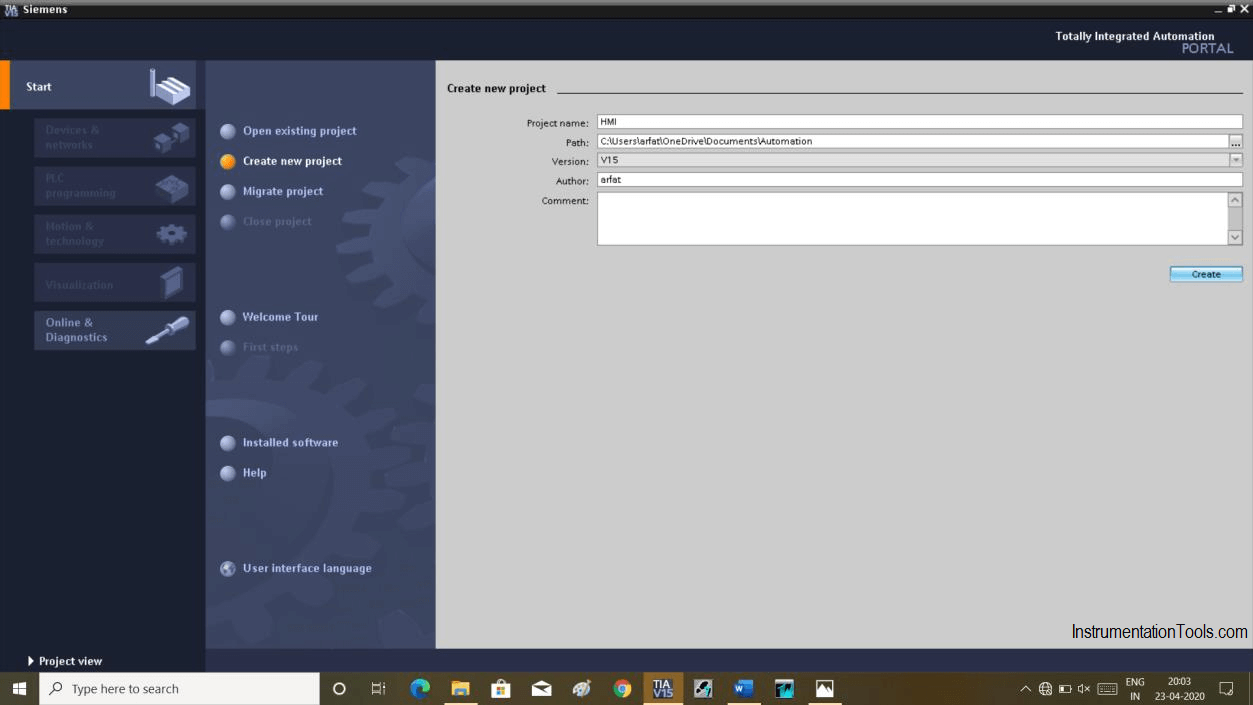
Open TIA PORTAL. Click on “create new project”. Give a name and hit “create”.

Now click on “visualization” and select any one of them.
Here click on “Add new device” and then select “HMI”.
Here, you will get a set of the selection, choose the one you want as per application or for learning purposes.
Here, I have chosen 12” of the display with the following shown order number.
After hitting “ok” the following window will appear. Here, on the left-hand side, you get a selection to edit HMI screens and alarm.
On the right-hand side, you can see many options from where you can create password protection, alarms, recipe, historical data, etc.
Double click on “screen_1” to enter in visualization environment.
Clicking on the screen will appear following the window. As per our selection of 12” of the display, it will show the display of the same size.
To access the full area of the screen you can zoom out the screen by reducing the amount the percentage.
To add pushbutton and pilot lights or other elements, select “Library” on the bottom right side then select “button and switches”
Let’s create a switch and lamp to understand with an example. To create a switch and lamp, select “Library” and choose as shown in the above window.
To give tag name double click on “switch” and give a name in our case” SWITCH_1”. Now double click on the lamp and give the same name as “SWITCH_1” to make it turn on.
Select the “simulation” icon to enter in a simulation environment.
In the simulation window, turning on switch will turn on the lamp.
Author: Suhel Patel
If you liked this article, then please subscribe to our YouTube Channel for PLC and SCADA video tutorials.
You can also follow us on Facebook and Twitter to receive daily updates.
Read Next:
Design a control system for automatic door lock with delay using PLC programming and motion…
In the PLC emergency stop example program, when the emergency button is pressed, the elevator…
This article is about controlling the double-acting pneumatic cylinder movement control with a timer circuit.
In this article, we will review the main responsibility scopes of the instrumentation and electrical…
Learn the daily alarm PLC program using real-time clock instruction as per the required timings…
A Real-Time Clock accurately tracks time from seconds to years and stores the data in…