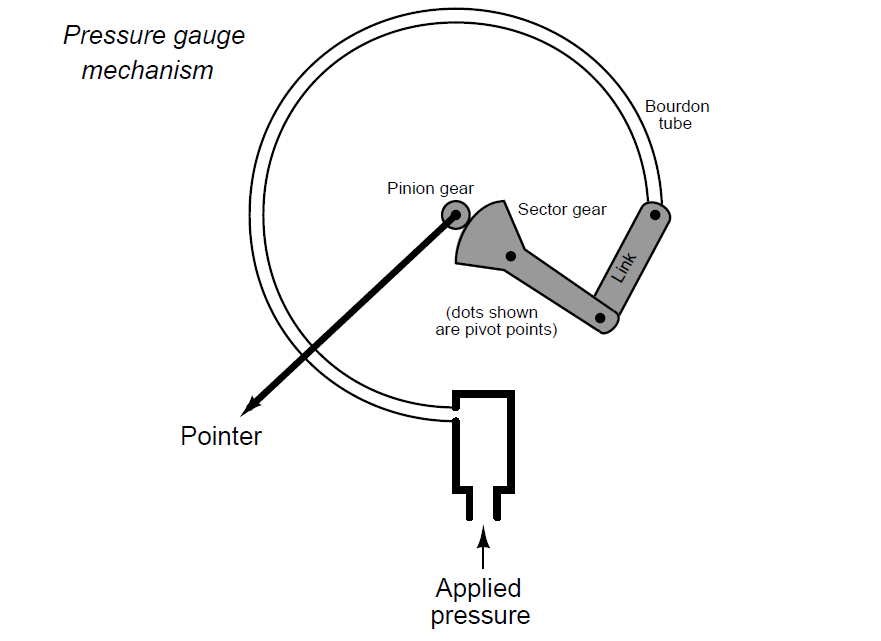
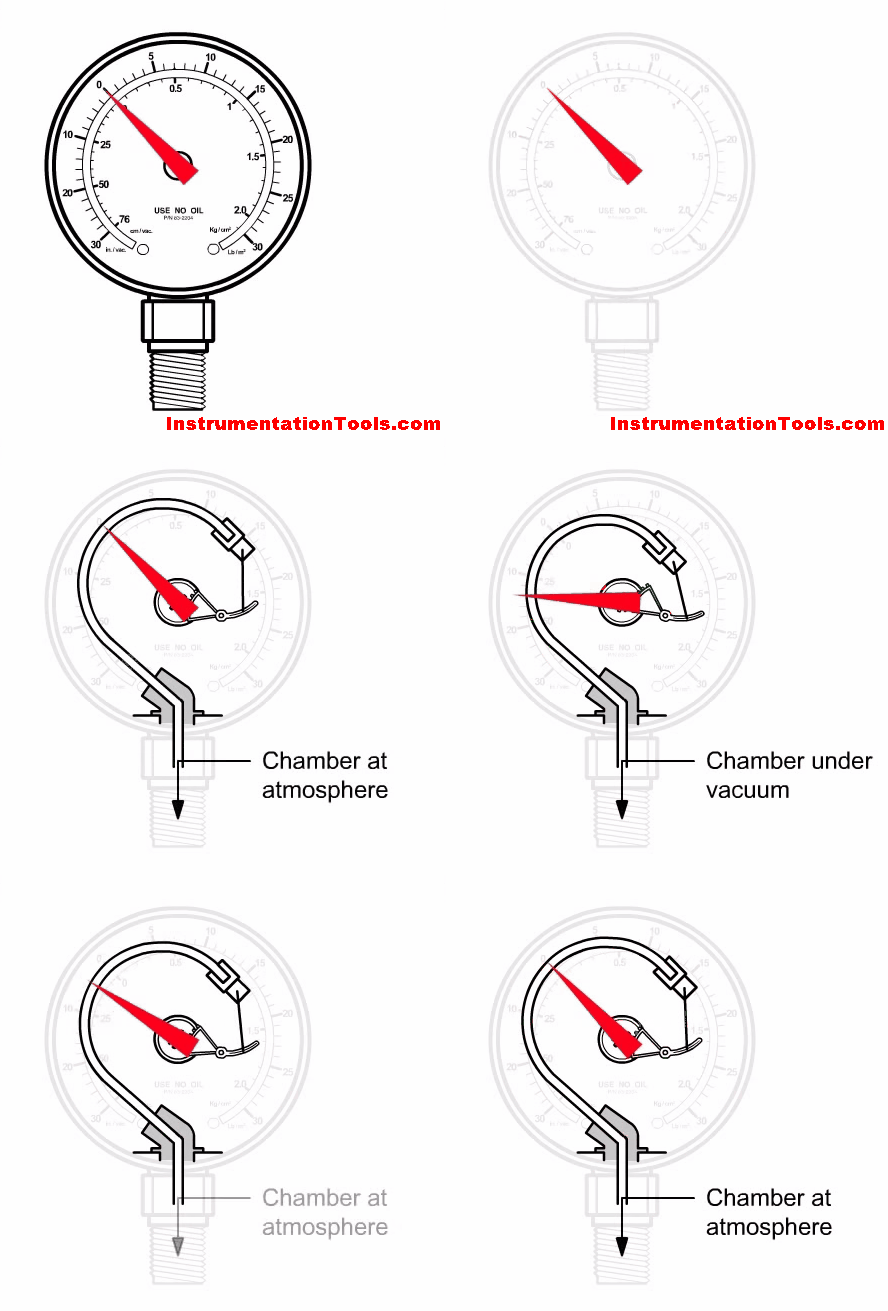
Shown here is a diagram of a standard pressure gauge, based on the pressure-sensing action of a hollow, C-shaped metal tube called a bourdon tube:
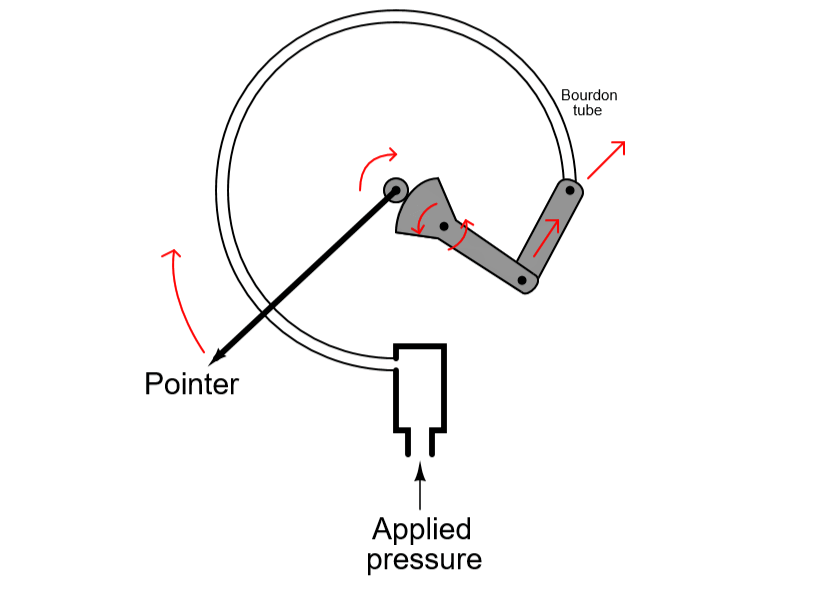
Using arrows, trace the motions of all moving components in this mechanism as an increasing pressure is applied to the fitting at the bottom of the bourdon tube.
Also, describe how the measurement span of this pressure gauge could be changed. In other words, what would have to be moved, adjusted, or altered in this mechanism in order to change the proportionality of applied pressure to pointer movement?
Answer:
The parts in this gauge mechanism would move as such:
Possible things to change to make this pressure-measuring mechanism more sensitive:
- Decrease the spring rate (“stiffness”) of the bourdon tube
- Shorted the arm of the sector gear (the portion to the right of the pivot, joining with the link)
- Increase the sector gear radius
- Decrease the pinion gear radius
More Questions for you:
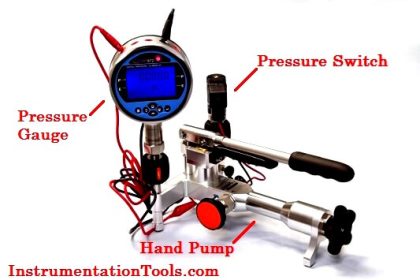
1. What sort of device(s) would you suggest using to apply a precisely known pressure to a gauge for calibration purposes?
2. Suppose a pressure gauge is intended for service in a process measuring liquid pressure. Is it okay to calibrate this gauge on a test bench using compressed air instead of the liquid it will be exposed to in the field? Why or why not?
Share your answers with us through below comments section.
Read Next:
- DeadWeight Tester Questions
- DP Level Measurement Problem
- Valve Questions and Answers
- Pneumatic Load Cell Principle
- What is a Four-wire RTD?
Credits: Tony R. Kuphaldt





pressure gauge calibrated with air and oil(dead weight tester) with air
instrumentation air to connect through the air regulator to insincere the pressure then same pressure to indicate the test (calibrated) gauge this type of test method is good and no deviation maximum
the bourdon tube mainly affected by temperature and also a constant pressure is maintained line for a long time this case also gauges are not responding correctly