Most people are aware of the various measurement capabilities of a multimeter. They broadly understand that you can measure voltages, currents, resistance, frequency, and in some cases temperature.
However, not many people fully understand the power of their multimeter and the various functions that are available to them when considering the world’s number 1 measurement tool. Did you know that there are certain functions that allow you to utilize your multimeter hands-free?
Did you know that there is a big difference in the accuracy you will receive when measuring square waves and pure sinusoidal waves on certain multimeters?
Multimeter Functions
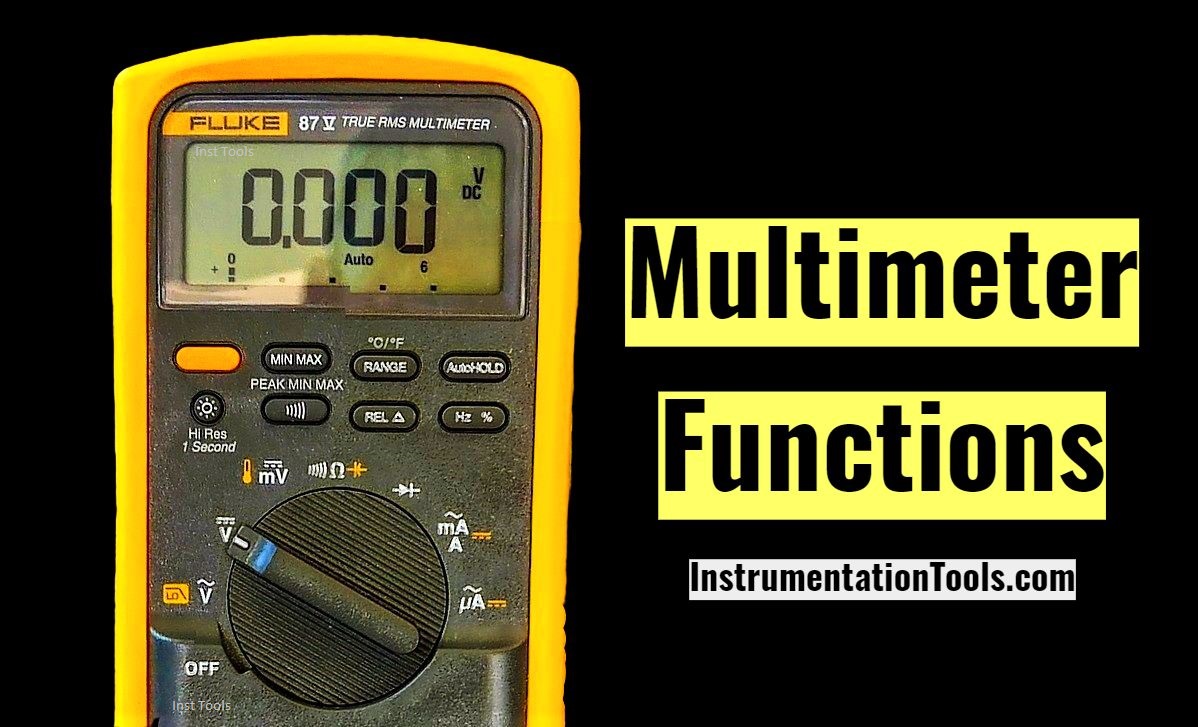
In this article, I will explain the various key functions you will typically find in a digital multimeter. What they do and how to use them effectively in order to get the best out of your measurement tool.
True RMS Mode
All multimeters that are capable of measuring AC voltage and current can provide for RMS (Root mean square) capability. However, not all multimeters are capable of providing TRUE RMS measurement.
In fact, there is such a big distinction that multimeter manufacturers will generally show “TRUE RMS” on the packaging or the multimeter itself to show prospective customers that their measurement tool is capable.
Digging deeper let’s discover why there is such a distinction and what that truly means for you.
In simple terms, the RMS value is the equivalent DC value of the AC waveform.
Many multimeters on the higher end of the price spectrum have the functionality and capability to provide for TRUE RMS measurement.
In trying to understand how an RMS value is calculated the description below is worth noting.
When measuring AC voltages or currents your multimeter performs a calculation whereby it takes the square root of the instantaneous value. This is followed by averaging this value over time and returning the square root of this average.
This is not too much of an issue when you are looking at purely sinusoidal AC waveforms. Your typical RMS measurement will produce very similar results whether it be a TRUE RMS or the standard RMS measurement.
The difference in measurement accuracy occurs when you are measuring AC signals and waveforms that do not depict or produce a purely sinusoidal signal.
Applications, whereby non-sinusoidal waves are found, include computers, HVAC systems, solid-state electronic devices, and variable speed drives to name a few. You will also find non-sinusoidal waves when measuring ramp up and ramp down signals of various 3 phase motors.
TRUE RMS measurement ensures that no matter what the actual AC waveform looks like (i.e. square wave, triangular wave, or a signal with harmonic components) you will always get the most accurate measurement reading.
For example, a standard RMS multimeter can provide a reading that is 10% out when measuring a square waveform as opposed to the TRUE RMS multimeter which typically has a measurement accuracy of between ± (0.5 % + 2 counts) for a frequency of 50 Hz and up to ± (2.0 % + 4 counts) for frequencies in the 1 kHz to 5 kHz region.
Learn more about digits and counts over here.
If you use your multimeter in applications that require precise AC measurements, then a TRUE RMS multimeter would be the perfect fit for you
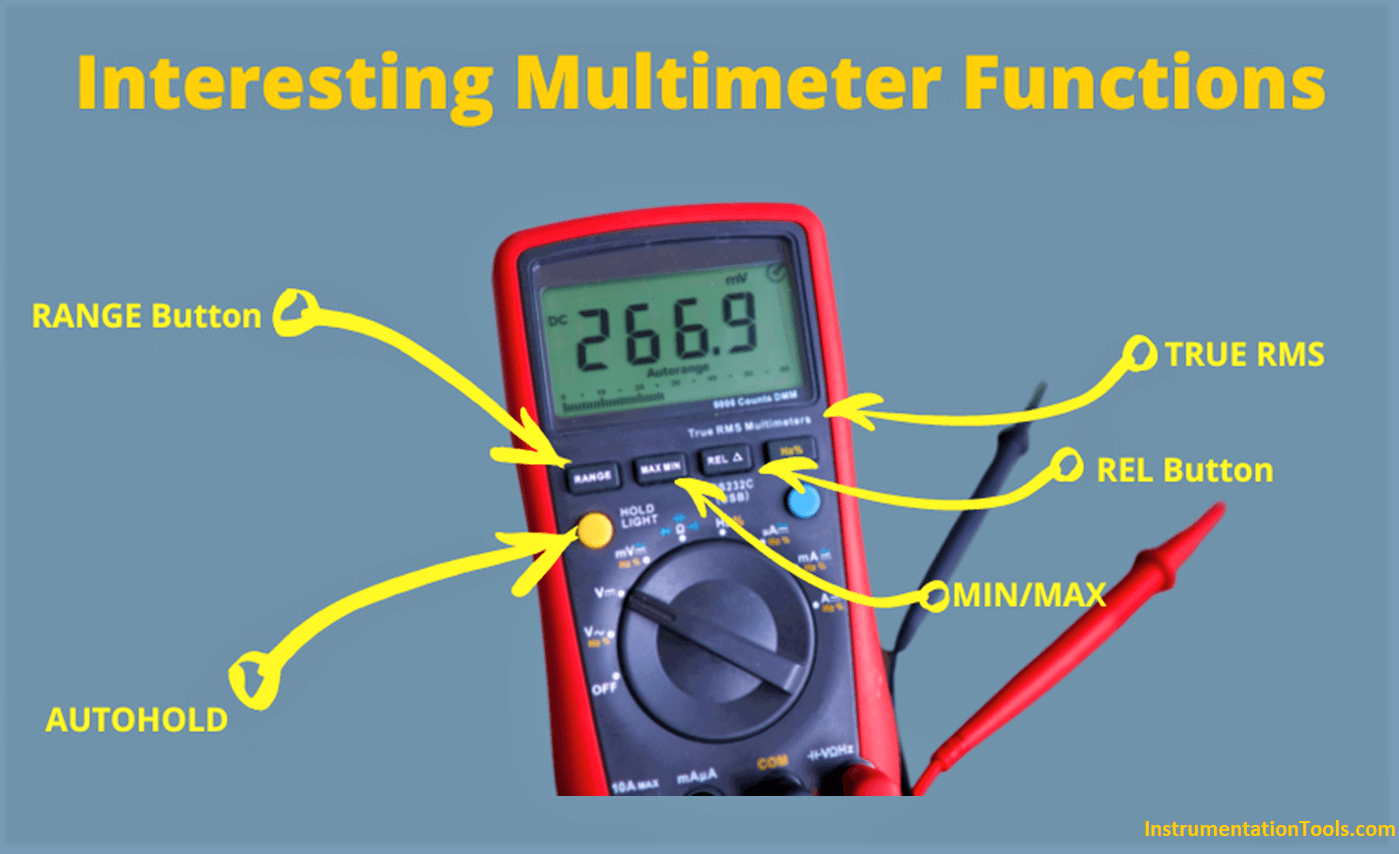
Min/Max Hold
One of the often underutilized functions on a multimeter is the MIN/MAX hold function. This function is very useful when performing a diagnostic or troubleshooting exercise on a working/live circuit.
These typically include high-stress environments, where the operator needs to be very vigilant of their surroundings and cannot fully apply focus onto the LCD display of their multimeter.
The ability to apply the MIN/MAX hold gives the operator an opportunity to focus on capturing a series of continuous values which assist them in finding the minimum and maximum values, instead of focusing on the screen.
This feature comes in very handy when you want to capture the maximum ramp up current of a motor during the transient phase for example. This typically takes a couple of milliseconds.
You will be able to capture the maximum with this function whereby your eye will struggle to see the correct value.
How this function works is actually quite simple. When you press the MIN/MAX hold button the multimeter begins a counter and records measurement values on the chosen parameter (voltage, current, resistance, etc).
It compares the current measurement value with the historical MINIMUM and MAXIMUM values within the database. When it comes across a value that is lower than the MIN value that value replaces the MIN value.
As you can imagine vice-or-versa. When it comes across a value higher than the MAX value then the max value is replaced.
What is really good about this function is that you can measure intermittent values and continuous values over a long period of time. It provides for true flexibility no matter your working or measurement environment.
One thing to consider as well is that you can typically change the sampling rate. However, as you sample faster the less accurate your overall reading can become.
These sampling rates differ from multimeter to multimeter so check the datasheet to understand exactly how much accuracy you will be losing depending on your sampling speed.
However typical of high-end multimeters you will often find sampling rates of 100 milliseconds to about 250 microseconds.
Auto Hold function
The auto-hold function is another one of the multimeter functions that are not used to their potential.
What this function basically does is capture the present stable onscreen reading and freeze that value. This technique is incredibly useful for anyone measuring electronic circuits that require very precise measurements. The top electronic multimeters typically have this functionality embedded within them from the manufacturers.
For example, let’s say you want to measure the resistance of an amplifier circuit. The reading could come out as 2.456 Ω. One option and this is what most people do is remember the value in their head and write it down from memory.
Although that is an option, it is not really necessary as you could use the AutoHold function to freeze the value of the screen.
Another application for this measurement is if you want to test the voltage or current of an element with changing conditions such as temperature. The autohold function will capture every new stable reading and freeze it on screen.
One thing that is very important to note and this often is displayed in multimeter datasheets or user manuals is that the AutoHold function should never be used to test if a circuit has power/no power. It will generally not work when the circuit signal is jumpy or unstable.
For an explanation on multimeter safety read our guide over here.
REL Mode
The REL mode basically zeros your multimeter reading at whatever point you are currently measuring. This point then becomes the new RELATIVE measurement point for the next reading.
A good example of this would be to measure the voltage drop that you find within your house from the mains supply distribution board and the various wall sockets through out house.
If you measure for example 230 Vac and press the REL button. What will happen is that when you go to a different measurement point (i.e. a wall socket ) and measure the voltage over there let say it comes back as 224V, your multimeter will give a reading of 6V to show the change (delta) or relative voltage of your current measurement to the measurement capture by the REL Mode.
RANGE Button
This button is very useful when considered together with an auto-ranging multimeter. These multimeters differ from the manual ranging multimeter in that the measurement tool automatically picks up what range you should be measuring.
This reduces the hassle of needing to remember to set the range of your reading to a specific point i.e. 20V or 200V, auto ranging does all of this for you so that you can focus on what you are measuring as opposed to what measurement range you could be expecting.
There are however certain moments and times when you actually want to set the range of measurement yourself. The RANGE button allows you to do this manually.
There are a couple of reasons why you would want to set the measurement range yourself.
- Your multimeter will record values so much faster as opposed to the autoranging setting. The reason for this is due to the fact that the multimeter takes some bandwidth in finding the correct range before actually taking a reading.
- If you know you are expecting certain voltages (i.e. in an electronic circuit – typically 5V). You can setup you multimeter to provide more or less resolution based upon your required measurement accuracy.
The RANGE button practically gives you the opportunity to move your auto-ranging multimeter into a manual ranging operation for the benefits described above.
Autoranging vs manual ranging can be viewed as a trade-off between measurement speed and ease of use. Learn more about multimeters in general over here.
Conclusion
As you can see there is so much to the world’s favorite measurement tool than what meets the eye. If you practice and use these different functions you will realize just how much more productive and pleasurable using your multimeter will become.