RJ45 cable is used for connect the ALL HMI and engineer station through a switch to communicated each other. It is used to download the any modification and which is made in graphics in engineering station.RJ45 cable also used for communicate the printer with computer.
Required tool and materials:
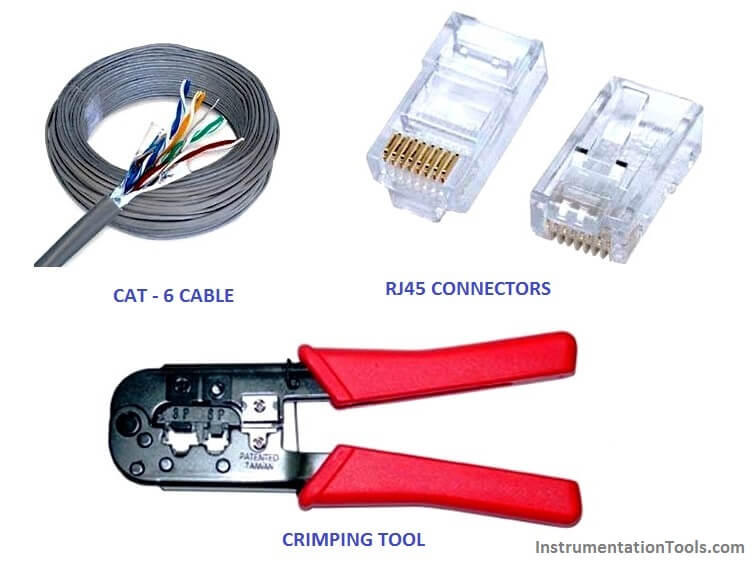
Introduction: There are four pairs of wires in an Ethernet cable, and an Ethernet connector (8P8C) has eight pin slots. Each pin is identified by a number, starting from left to right, with the clip facing away from you.
There is two kinds of Ethernet cable is used for communication.
Straight Through cable:
STRAIGHT THROUGH Ethernet cables are the standard cable used for almost all purposes, and are often called “patch cables”. It is highly recommend you duplicate the color order as shown on the left. Note how the green pair is not side-by-side as are all the other pairs. This configuration allows for longer wire runs.
Important Instruction: Always remember that both end connector clip facing away from you when check the color.
CROSSOVER CABLES –
The purpose of a Crossover Ethernet cable is to directly connect one computer to another computer (or device) without going through a router, switch or hub.
Procedure to make RJ45 cable :
Step 1: Cut into the plastic sheath about 1 inch (2.5 cm) from the end of the cut cable. Do not cut deep which may cause damage the insulation of core.
Step 2: Unwind and pair the similar colors. Pinch the wires between your fingers and straighten them out in a sequence of color as u want to make cable (Straight cable or cross over cable). The color order is important to get correct
Step 3: A straight cut across the 8 wires to shorten them to 1/2 Inch (1.3 cm) from the cut sleeve to the end of the wires by crimping tool. Carefully push all 8 unstrapped colored wires into the connector. Plastic sleeve should be inserted proper in connector.
Wrong way: The plastic sleeve is not inside the connector where it can be locked into place. The wires are too long. The wires should extend only 1/2 inch from the blue cut sleeve. The wires do not go all the way to the end of the connector. The wires are too short.
Crimping the cable: Carefully place the connector into the Ethernet Crimper and cinch down on the handles tightly. The copper splicing tabs on the connector will pierce into each of the eight wires. There is also a locking tab that holds the plastic sleeve in place for a tight compression fit. When you remove the cable from the crimper, that end is ready to use.
Test the cable: Check the continuity of both connectors each other .Check the cable threw a cable tester or ping from a computer. To check the cable through computer connects both connector in two computers for cross cable and straight cable connect through a switch then ping the computer.
Source : groundcontrol
Electrical Drives control the motion of electric motors. Motion control is required in industrial and…
PLC ladder logic design to control 3 motors with toggle switch and explain the program…
VFD simulator download: Master the online tool from the Yaskawa V1000 & programming software for…
The conveyor sorting machine is widely used in the packing industries using the PLC program…
Learn the example of flip-flop PLC program for lamps application using the ladder logic to…
In this article, you will learn the STAR DELTA programming using PLC controller to start…


View Comments
These are very useful information for making RJ45. RJ45 connectors is a standardized physical network interface for connecting telecommunications or data equipment. Thanks for sharing..!!
Really helping article to crimping an RJ45 Connector correctly proper wiring for Ethernet Cables Cat5/Cat5e or Cat6 Cables. Thanks for the information. It was helpful for crimping several connectors today.
Very useful article for people who are usually confused about some technical terms and installation procedures. Thanks for sharing it.
It would be a pleasure to share that http://www.bncables.com is helping people for a good ethernet future. Ask or get any kind of information about ethernet cables.
Rj45 is the key for successful Ethernet.