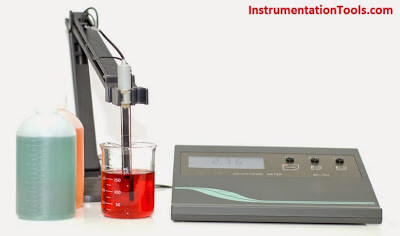
A pH meter calibration is performed by measuring a series of reference standards, so-called pH buffers that have known and accurate pH values at different temperatures.
Choose the appropriate buffered standards that will bracket the expected values at the sampling locations. If the water body’s pH is unknown, then three standards are needed for the calibration: one close to seven, one at least two pH units below seven, and the other at least two pH units above seven. Instruments that will not accept three standards will need to be re-calibrated if the sample’s pH is outside the initial calibration range.
Calibration Procedure:
1. Allow the buffered standards to equilibrate to the ambient temperature.
2. Fill calibration containers with the buffered standards so each standard will cover the pH probe and temperature sensor.
3. Remove probe from its storage container, rinse with deionized water, and remove excess water.
4. Select measurement mode. Immerse probe into the initial standard (e.g., pH 7 buffered solution).
5. Wait until the readings stabilize. If the reading does not change within 30 seconds, select calibration mode and then select “pH”. Enter the buffered standard value into instrument.
6. Remove probe from the initial standard, rinse with deionized water, and remove excess water.
7. Immerse probe into the second standard (e.g., pH 4 buffered solution). Repeat step 5.
8. Remove probe from the second standard, rinse with deionized water, and remove excess water. If instrument only accepts two standards, the calibration is complete. Go to step ‘II. Otherwise continue. .
9. Immerse probe in third buffered standard (e.g., pH 10 buffered solution) and repeat step 5.
10. Remove probe from the third standard, rinse with deionized water, and remove excess water.
11. Select measurement mode, if not already selected. To ensure that the initial calibration standard (e.g., pH 7) has not changed, immerse the probe into the initial standard. Wait for the readings to stabilize. The reading should read the initial standard value within the manufacturer’s specifications. If not, re-calibrate the instrument. If re-calibration does not help, the calibration range may be too great. Reduce calibration range by using standards that are closer together.
12. The calibration is complete. Rinse the probe with deionized water and store the probe according to manufacturer’s instructions.
13. Record the calibration information on the calibration log sheet.

View Comments
Very comprehensive and complete pH calibration procedure, thank you.
Just one final step : the Buffer solutions need to be discarded after the procedure, not stored for further use.
In many Industrial plants, the 4, 7 and 10pH buffers are used again, which is not a good idea .