This article explains how to establish communication and perform an online simulation between the FX3U-14MT Lollette PLC and the EasyBuilder Pro software. In the industrial world, HMIs (Human Machine Interfaces) are often integrated with PLCs to control parameters and execute commands. Weintek is one of the most widely used HMI brands today, with EasyBuilder serving as the software for designing user interfaces. EasyBuilder Pro includes an “Online Simulation” feature that allows users to simulate the HMI interface directly with the PLC via a PC, without requiring a physical HMI device.
Required Devices
The required devices are listed below.
PLC FX3U-14MT Lollette
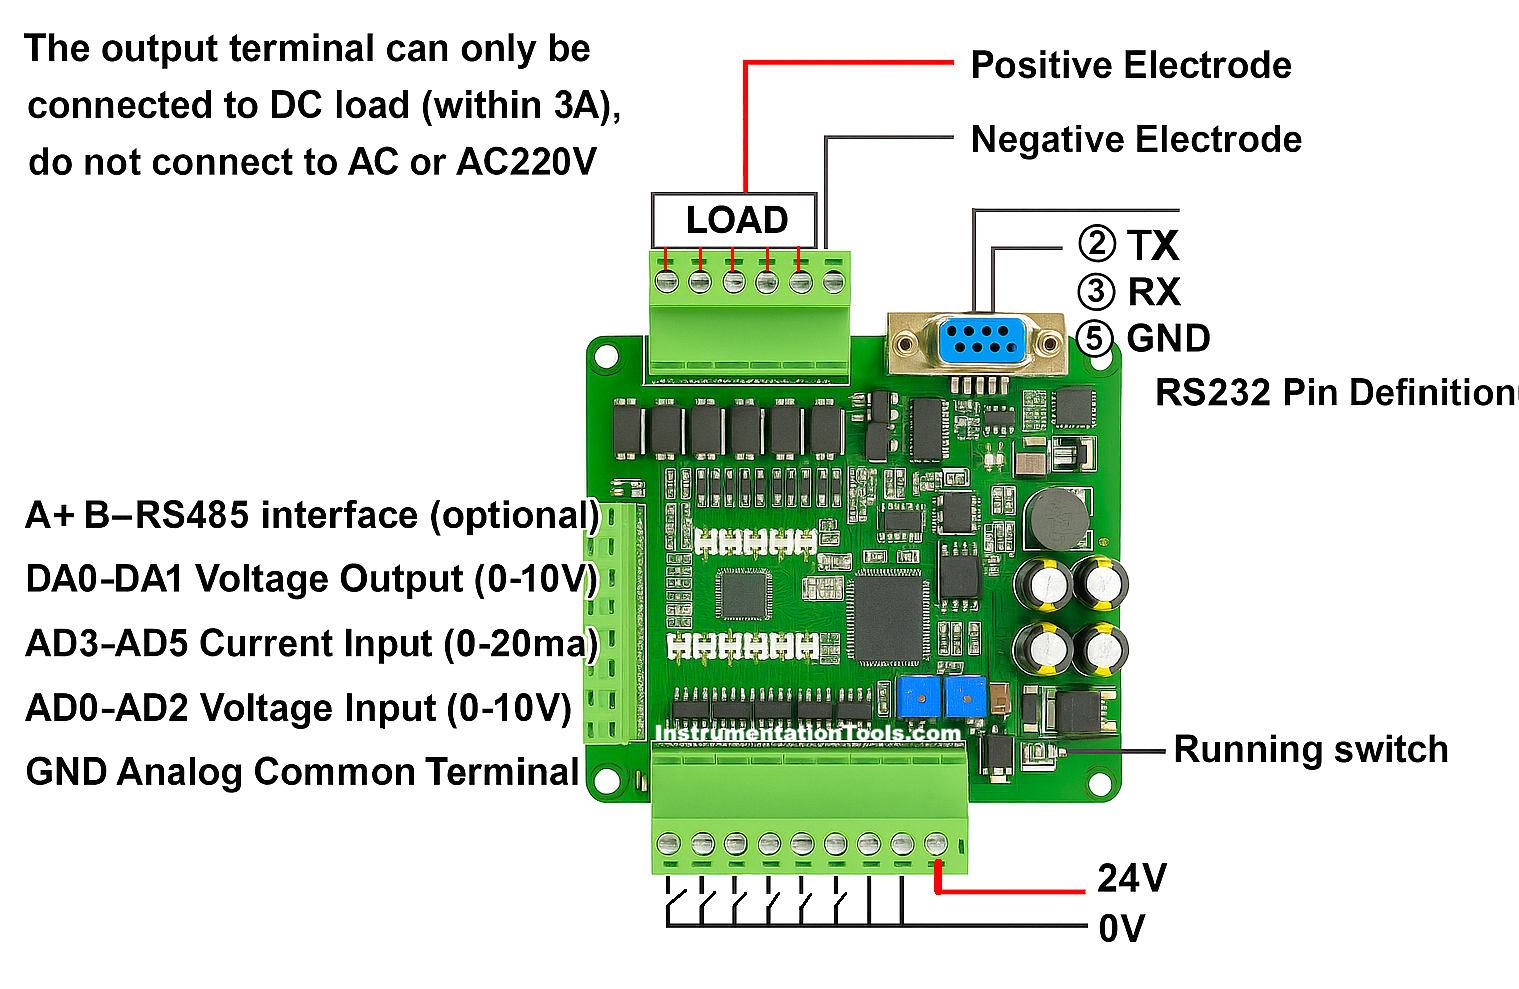
This PLC can be programmed using Mitsubishi GX Works2 and features 8 digital inputs, 6 transistor outputs, 3 analog inputs (AI), 3 analog outputs (AO), a 24V DC power supply, and a DB9 RS232 port for communication with a maximum speed of 38.4 Kbps. Due to its limitations in communication speed and the number of I/O points, this PLC is not suitable for heavy industrial applications. It is more appropriate for educational purposes or small-scale projects.
Easy Builder Pro Software
EasyBuilder Pro is the software used to design user interfaces (HMI) on HMI devices made by Weintek. It allows users to create visual displays, configure communication with various types of PLCs, and add control and parameter monitoring functions. The software is equipped with both offline and online simulation features, enabling users to test their designs without the need for physical HMI hardware.
GX Works2 Software
GX Works2 is the official programming software from Mitsubishi Electric, used to create, edit, monitor, and debug programs for MELSEC series PLCs, such as FX3U, FX5U, Q-Series, and L-Series.
USB to Serial RS232 Converter
A USB to Serial RS-232 cable is an adapter that converts a USB port on a PC into an RS-232 serial port, allowing modern devices without built-in serial ports to connect with industrial equipment that only supports RS-232 communication.
Mitsubishi FX3U PLC
In the video below, we show you the test setup and simulation result of Mitsubishi PLC.
1. Prepare
a) Provide the PLC with a 24 VDC power supply.
b) Connect the PLC to the PC using a USB to Serial RS-232 cable.
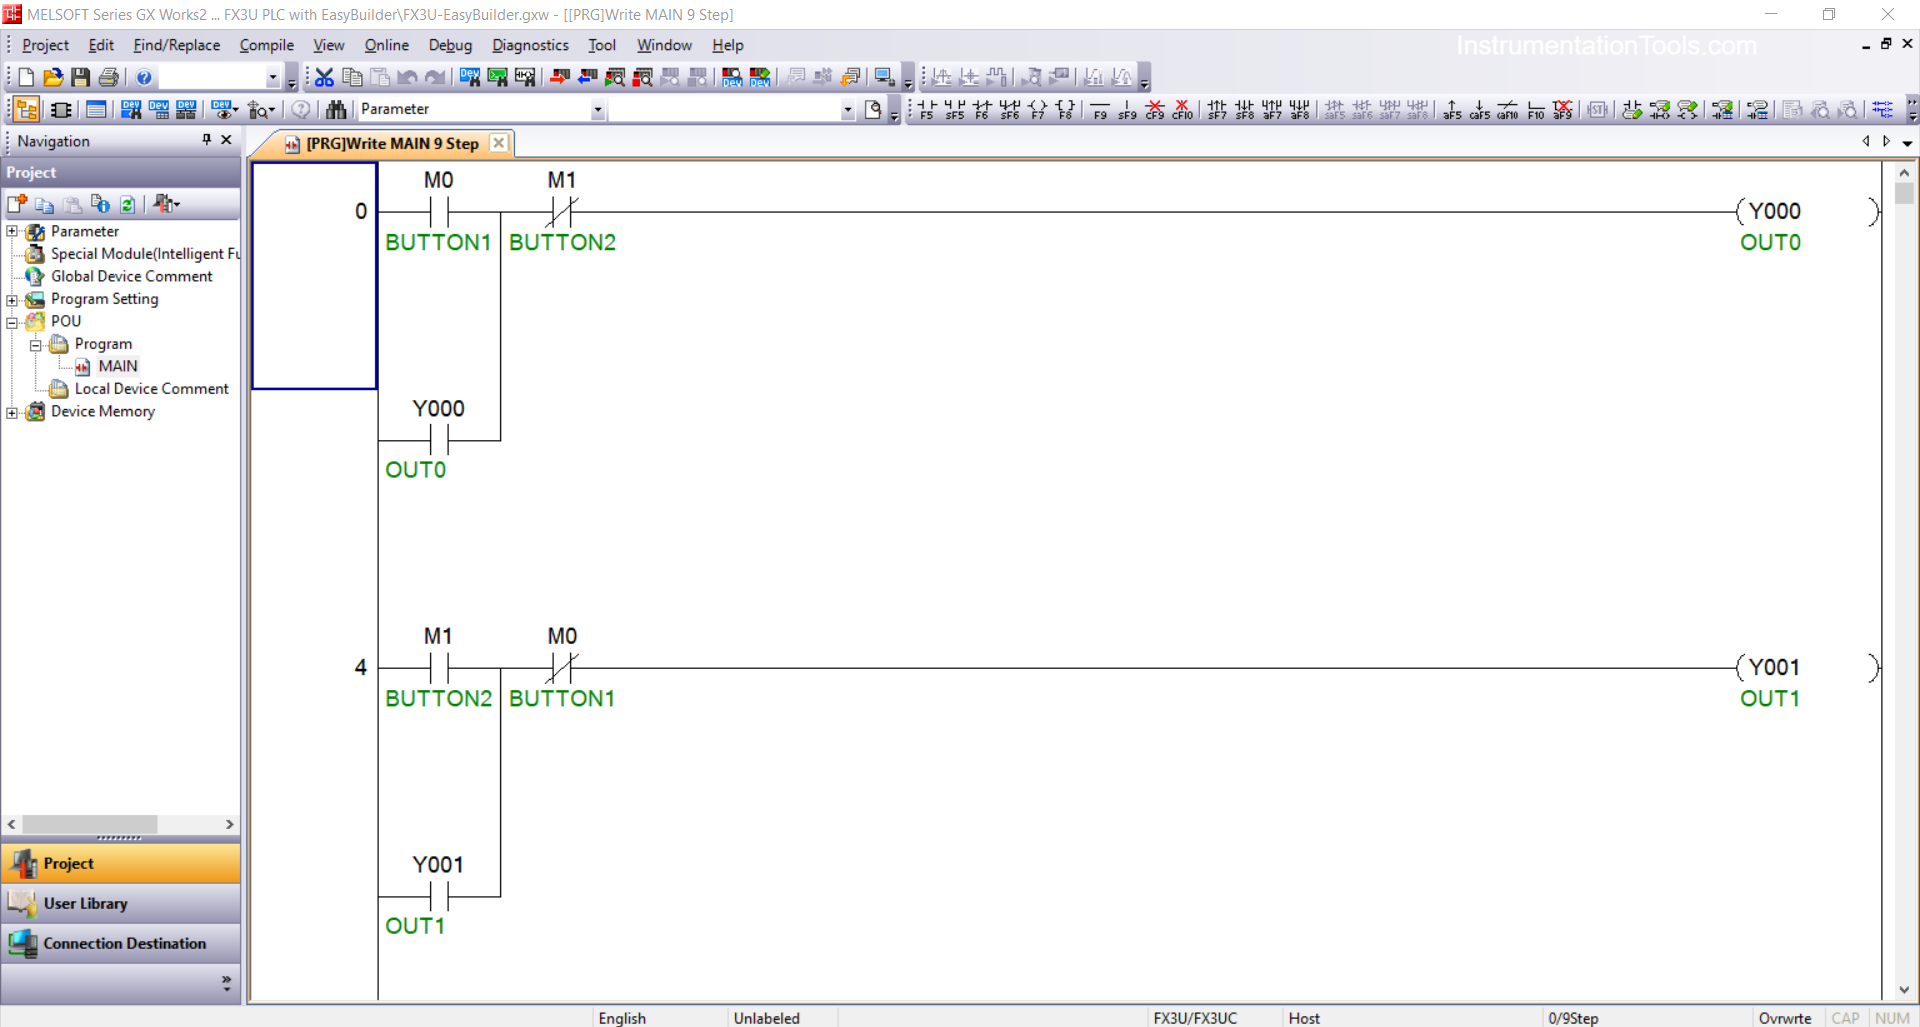
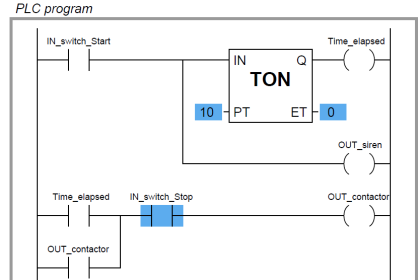
2. Write the PLC Program
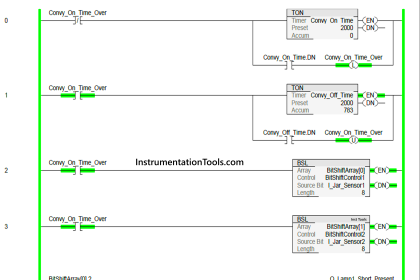
1. Create the program you want to simulate. An example is shown below.
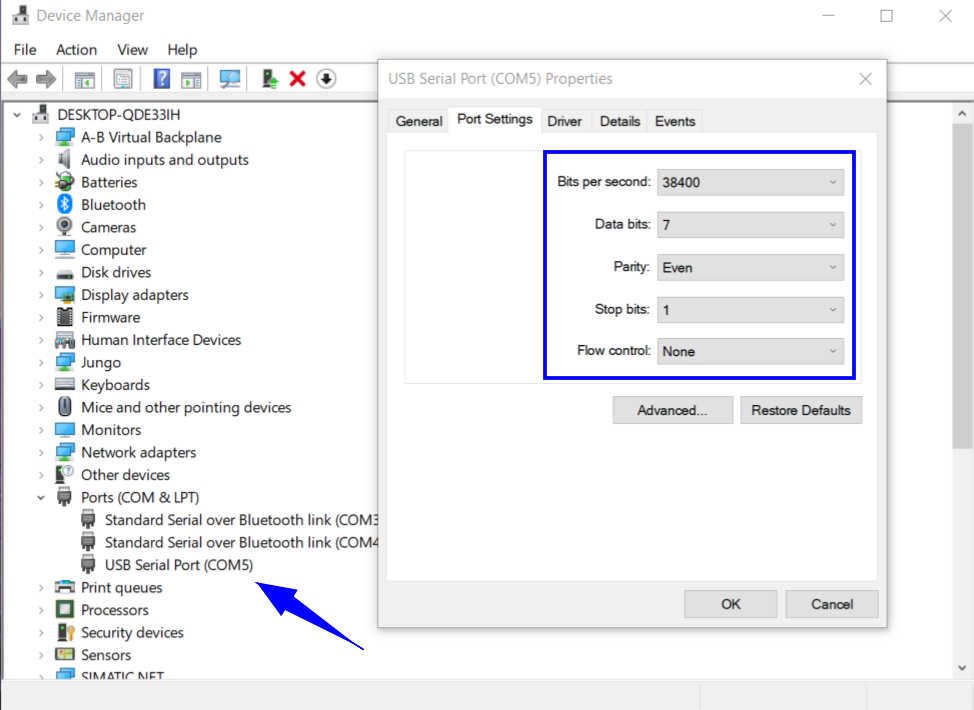
2. Ensure the PLC connection is active by checking the communication port connected to the PC via Device Manager.
In the example below, the USB to Serial RS-232 adapter is connected to Port 5, with the following settings: Bit Rate: 38.4 Kbps, Data Bits: 7, Parity: Even, and Stop Bits: 1.
Make sure these settings match the configuration used on the PLC device.
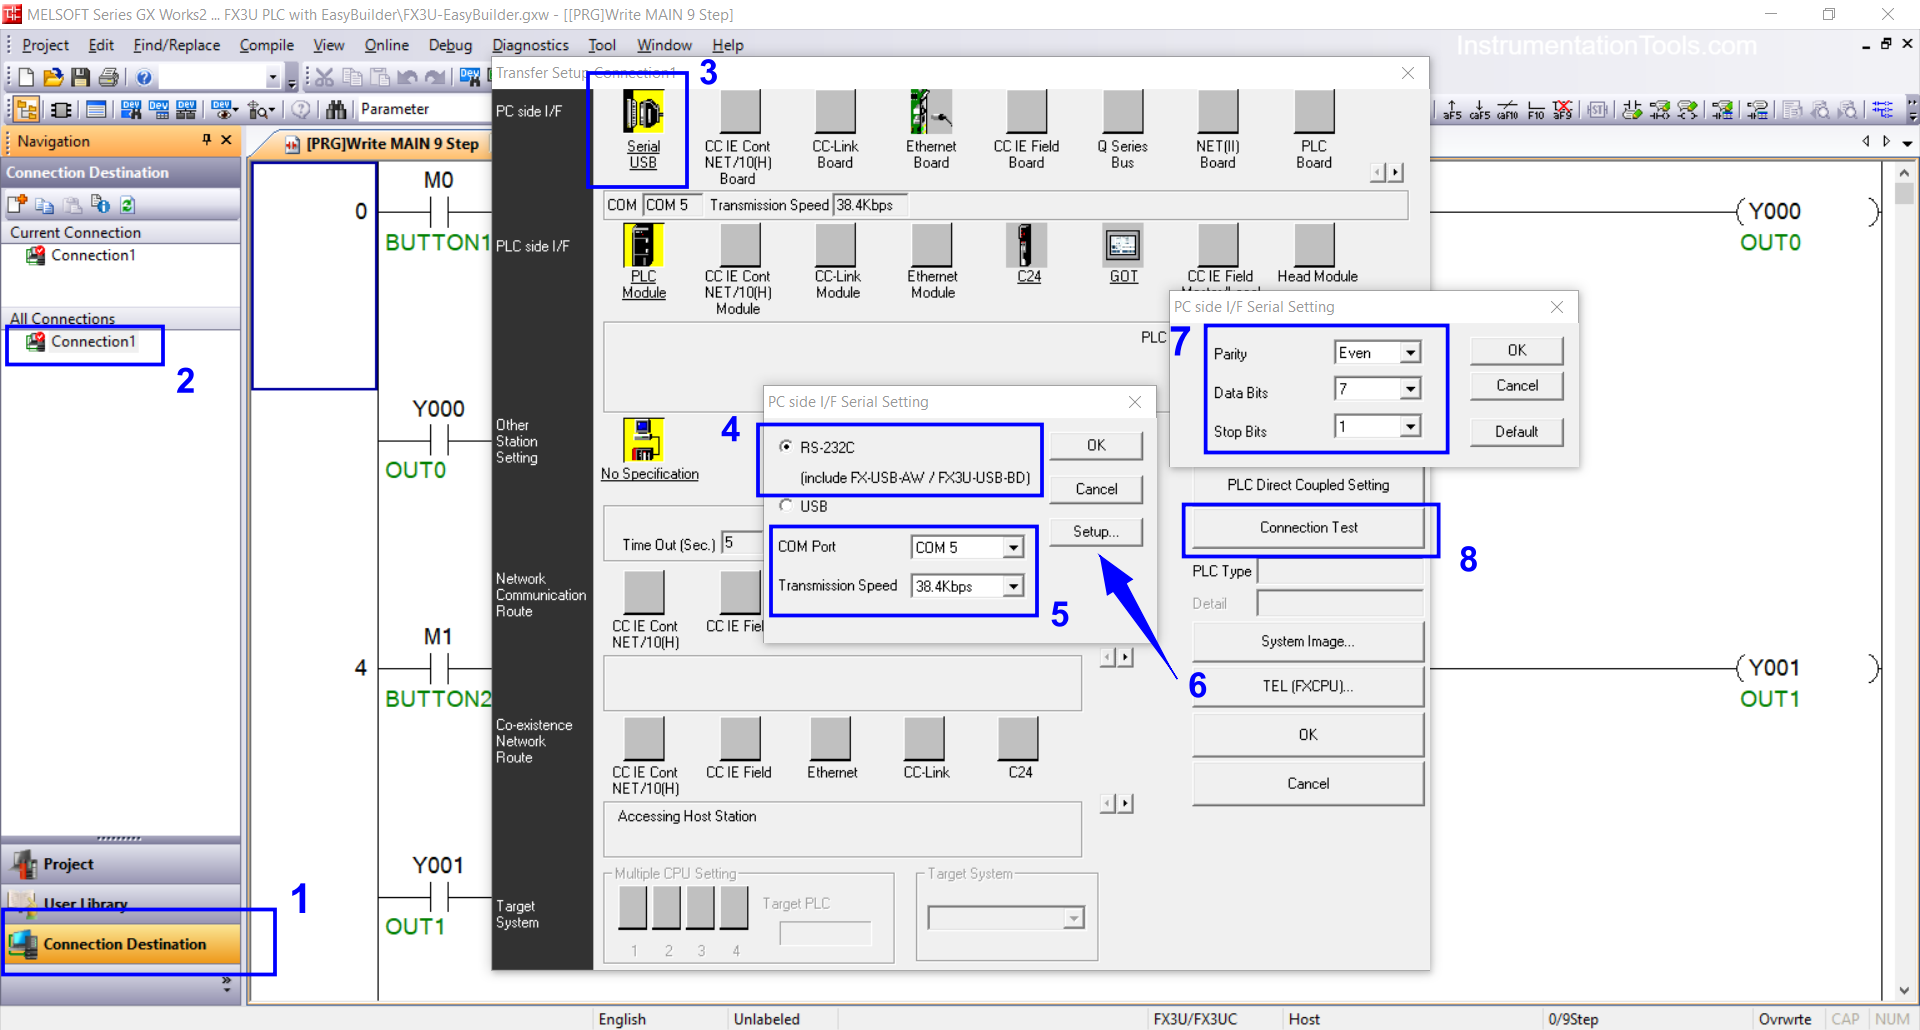
3. Open the menu Connection Detection → Connection1 and set the communication parameters as follows:
Select the Serial USB interface with type RS-232C, specify COM Port 5, set the Transmission Speed to 38.4 Kbps, then in the Setup, configure Parity: Even, Data Bits: 7, and Stop Bits: 1.
Verify the connection by clicking Connection Test — if a notification appears saying “Successfully Connected with the FX3U/FX3UC CPU”, it means the connection between the PC and PLC has been successfully established.
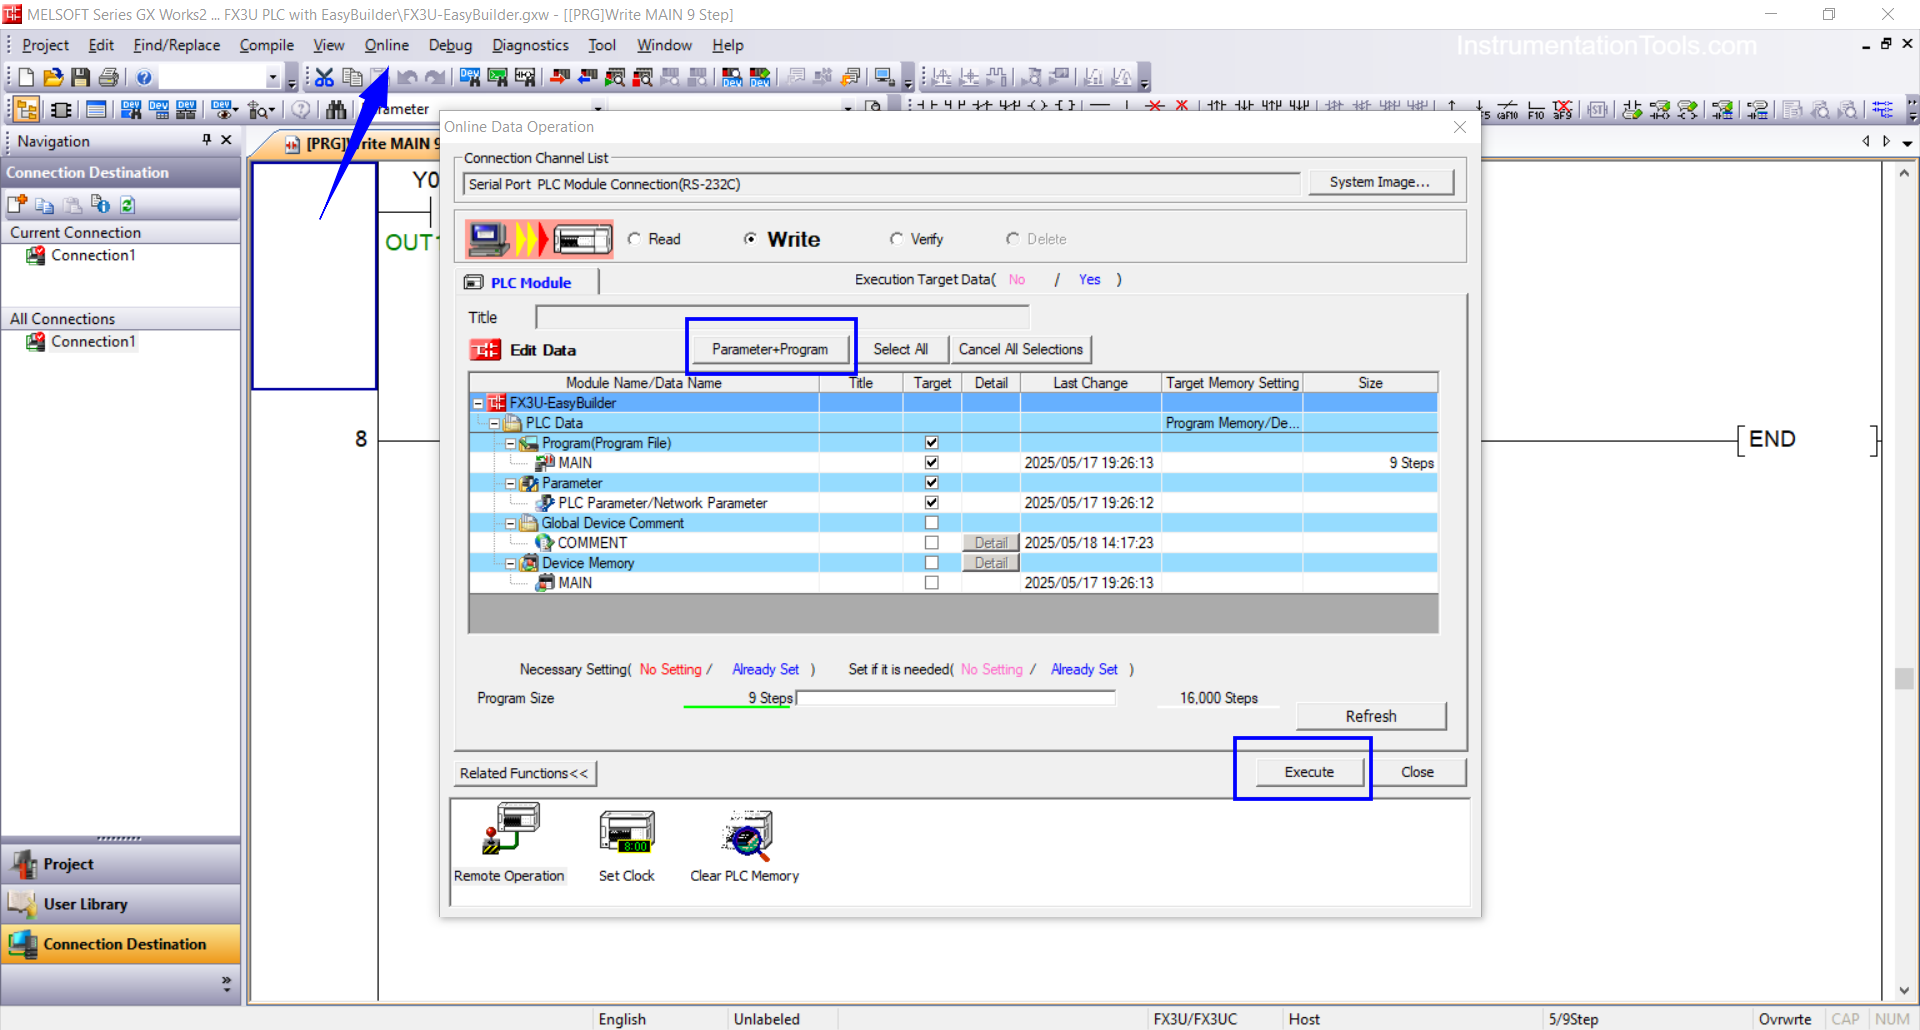
4. After the connection is established, click the “Online” menu and select “Write to PLC”.
5. Specify the program section to be transferred (“Parameter + Program”) → press “Execute”. When a confirmation pop-up appears indicating that the transfer was successful, the program has been uploaded to the PLC memory and is ready to run.
EasyBuilder Pro Online Simulation
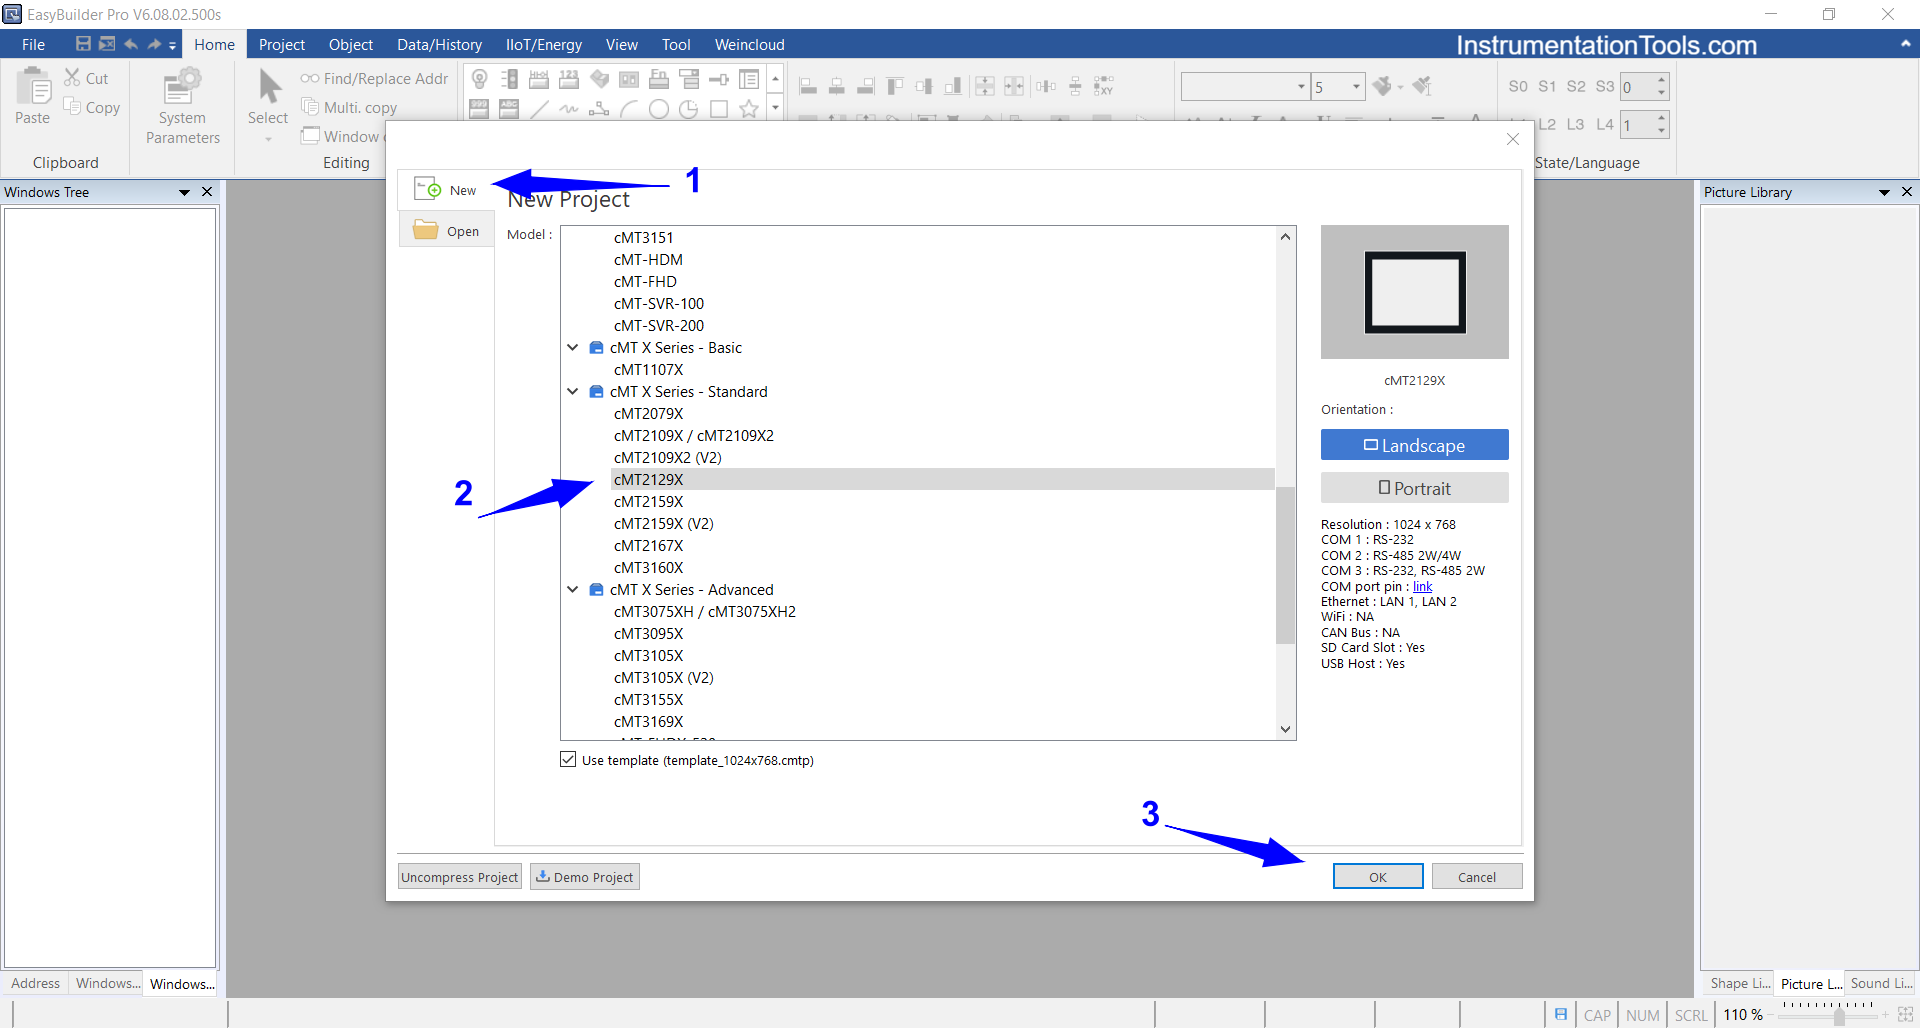
1. Open EasyBuilder Pro and create a new project. Click → New → select the HMI type used → OK.
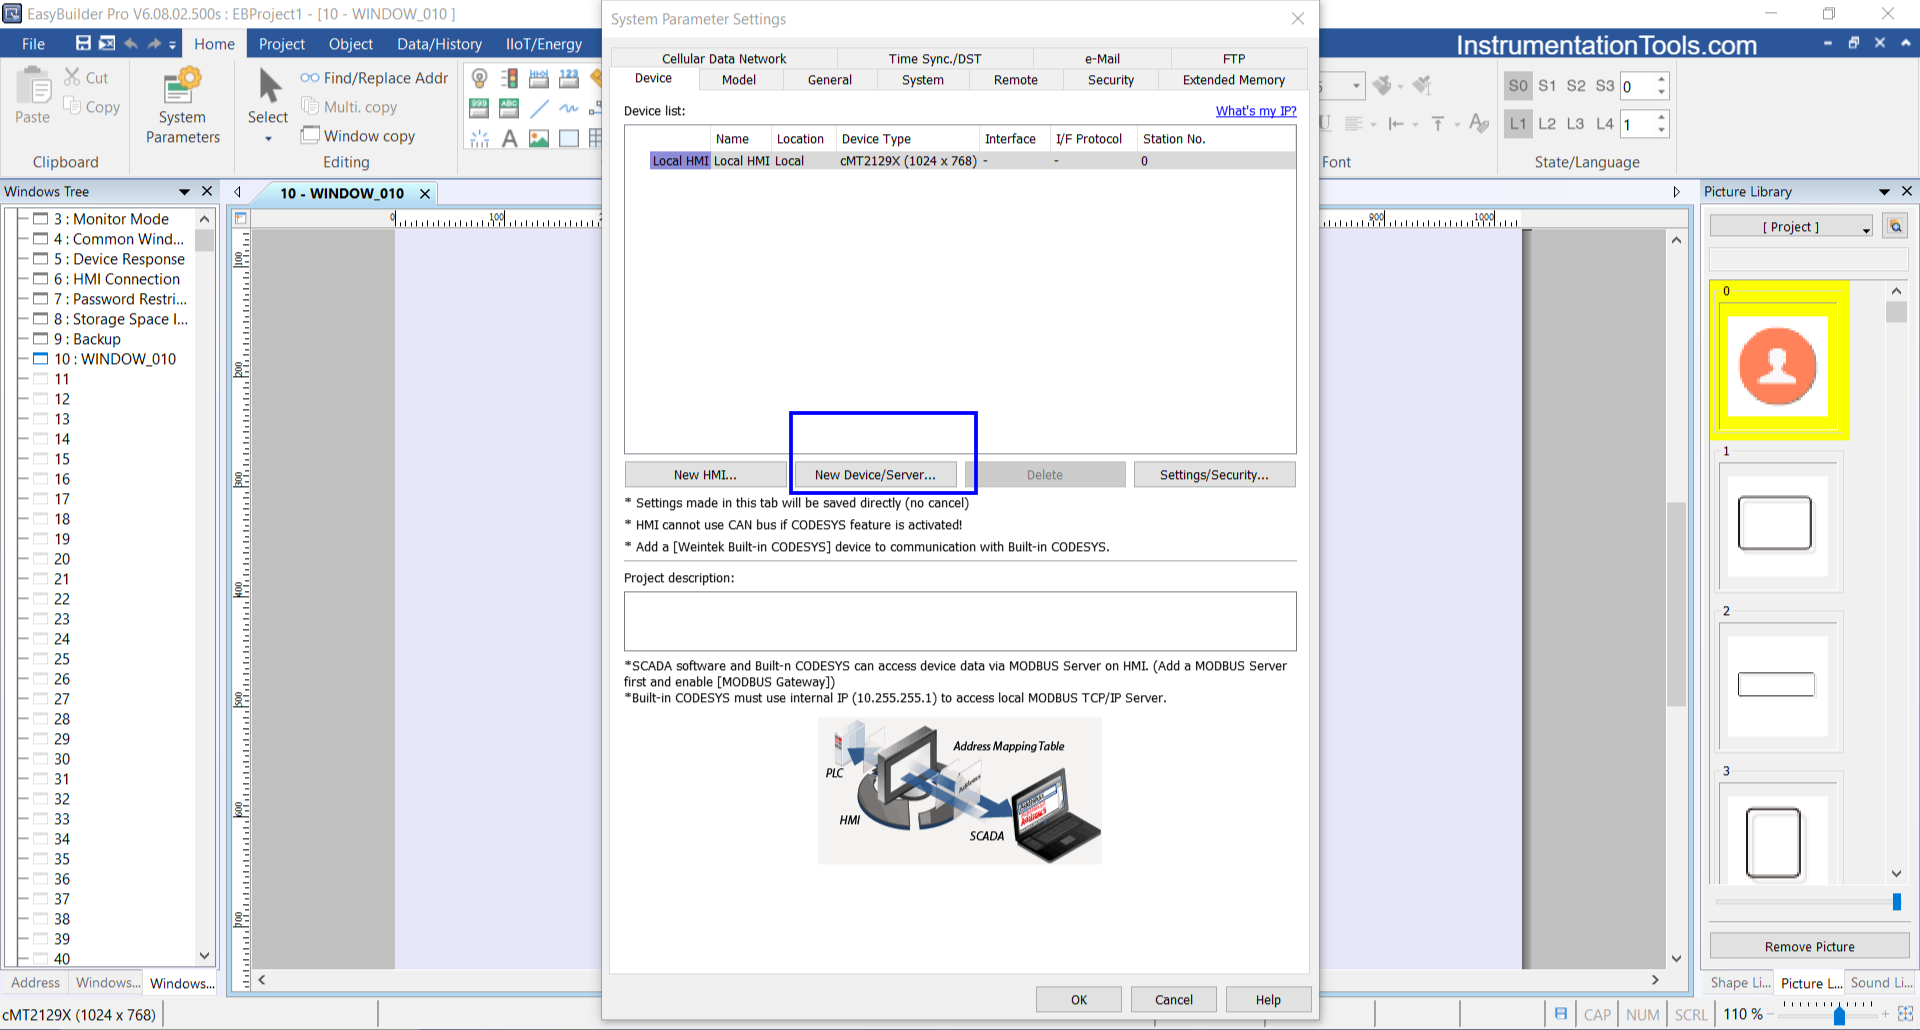
2. In the “System Parameter” pop-up menu, click → New Device/Server.
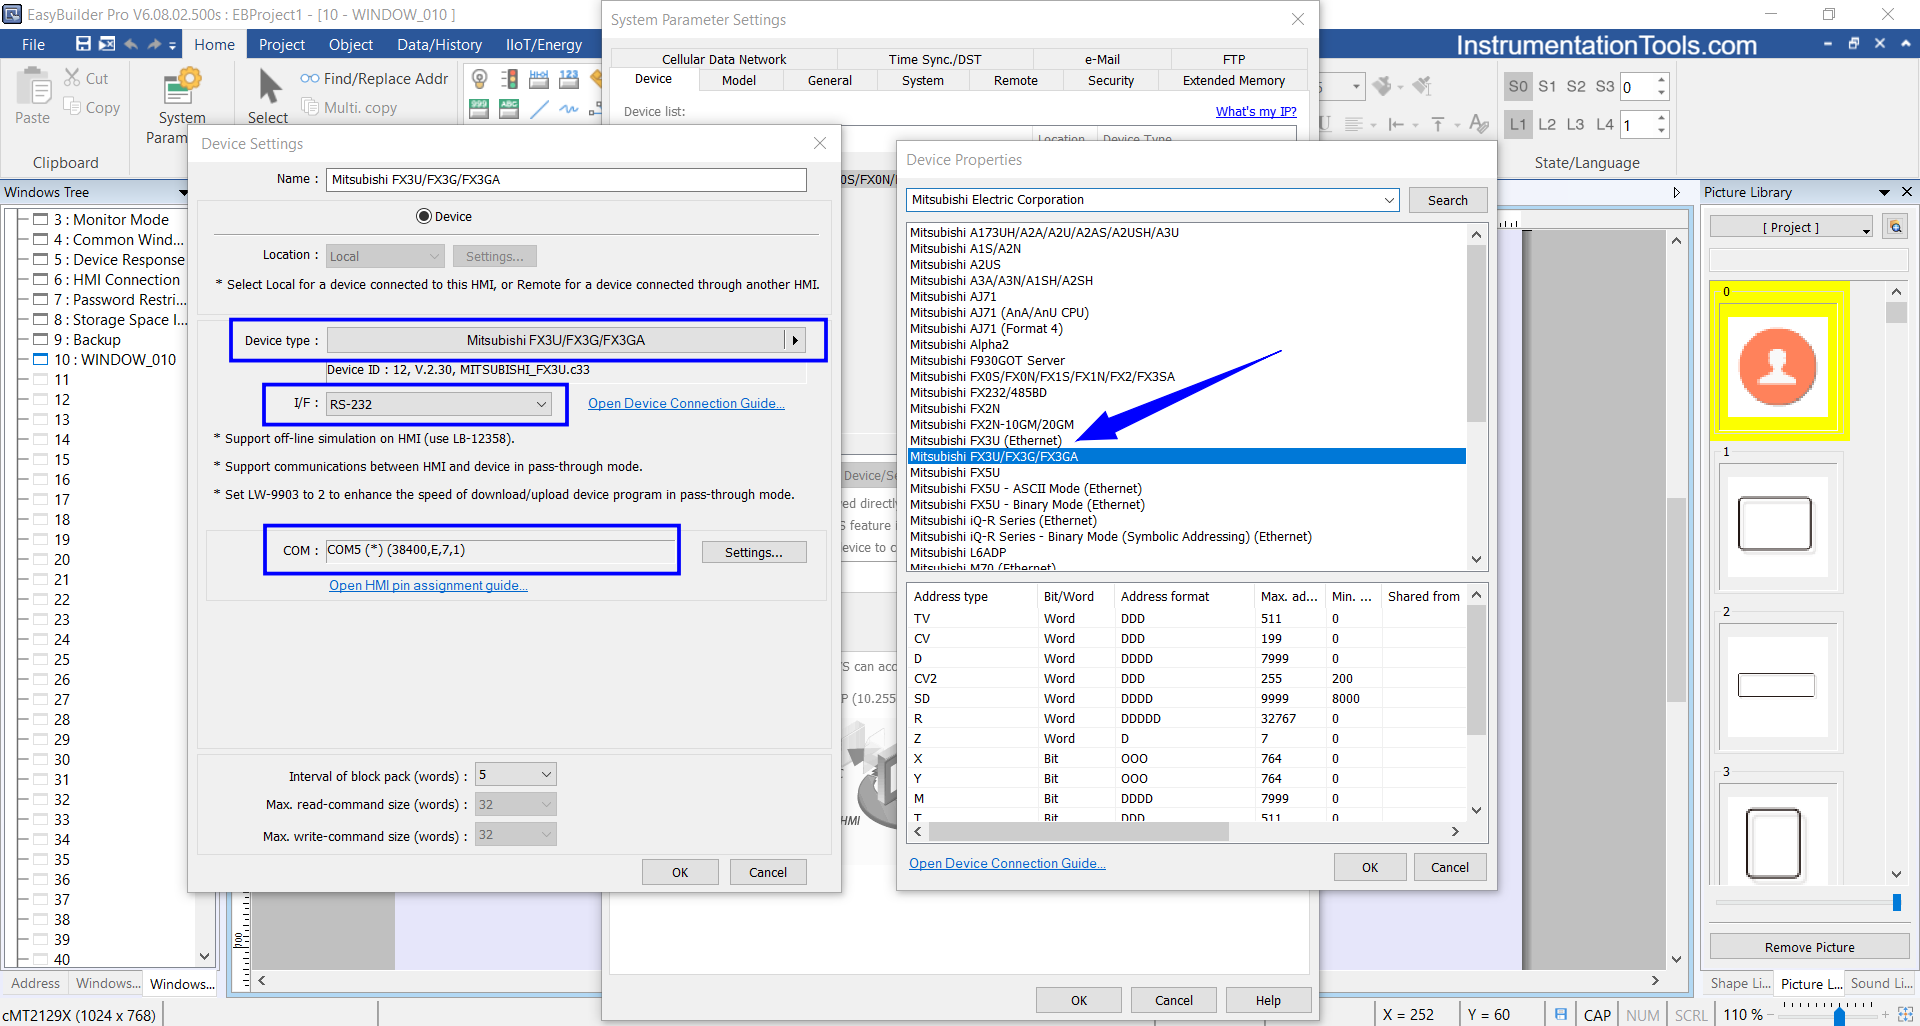
3. Set the parameters: Port → “RS-232”, COM → “COM5(*)(38400,E,71)”, Device type → “Mitsubishi FX3U/FX3G/FX3GA” → click “OK”.
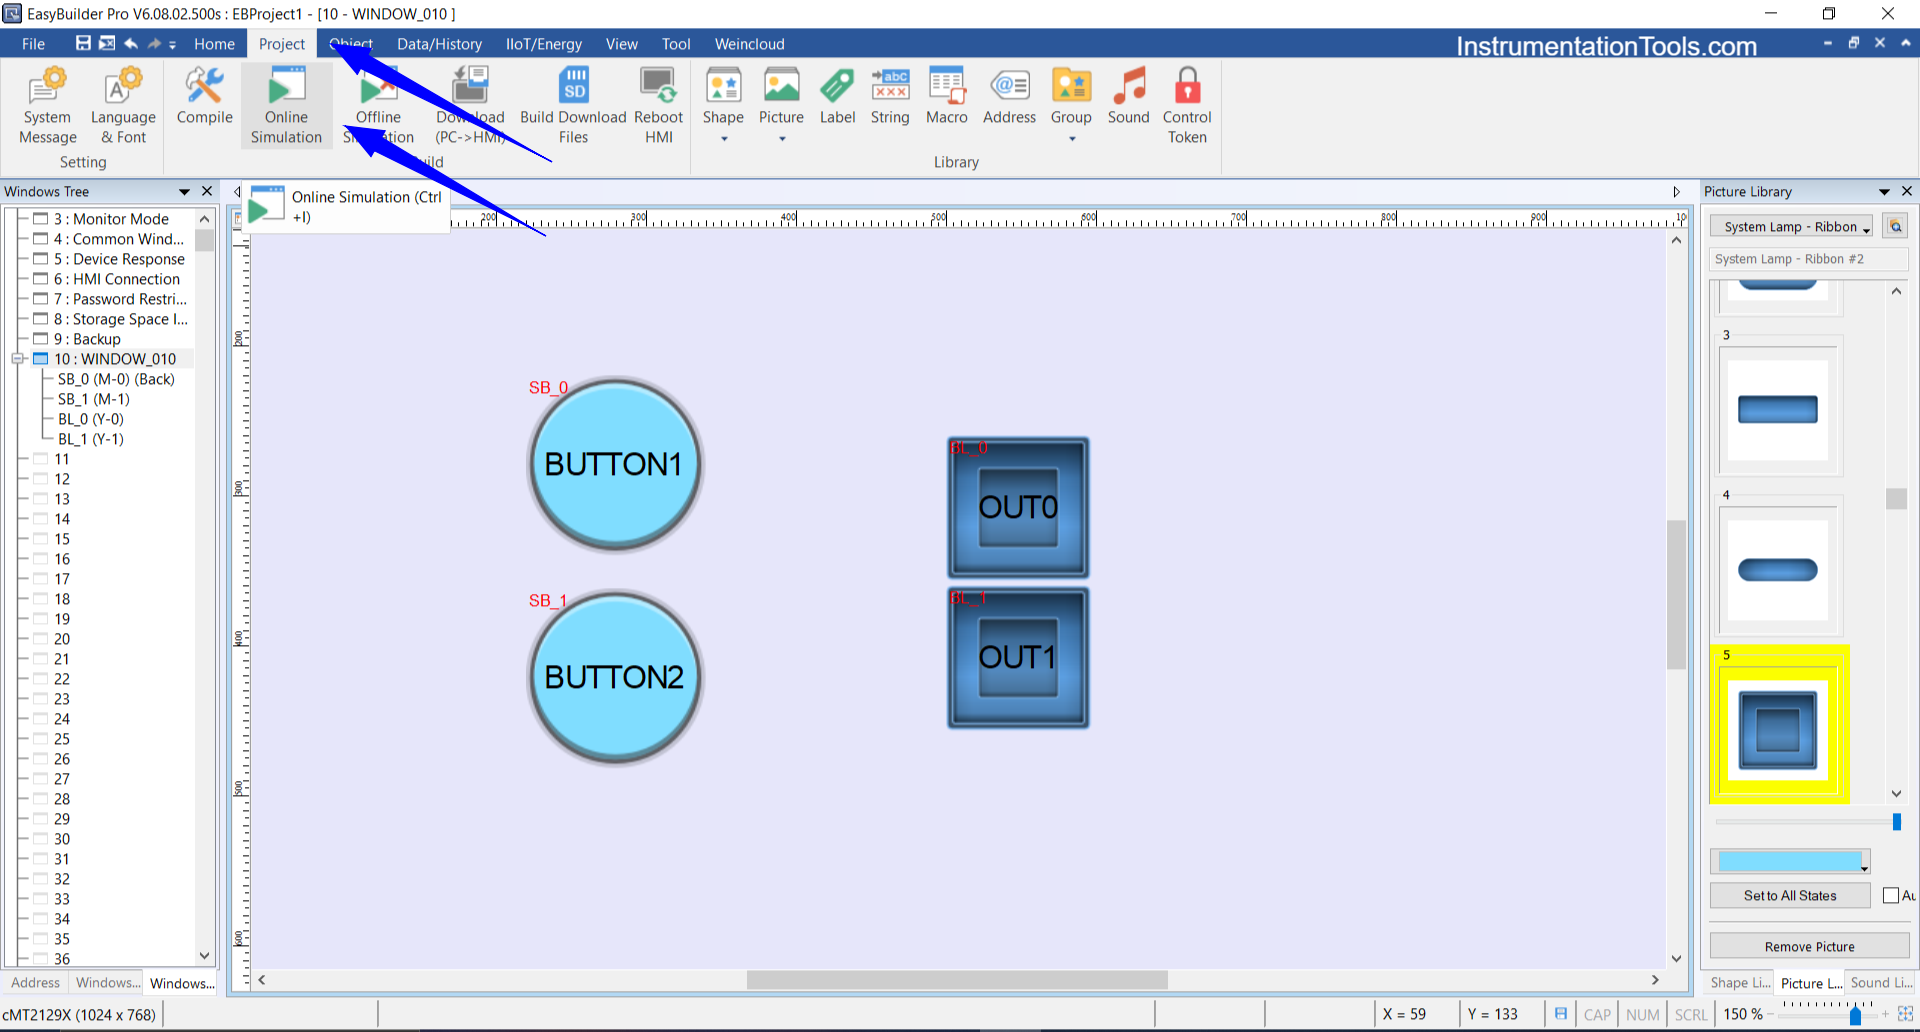
4. Create the interface design using the input and output address parameters according to the PLC program you’ve created. Click the “Project” menu → select “Online Simulation”.
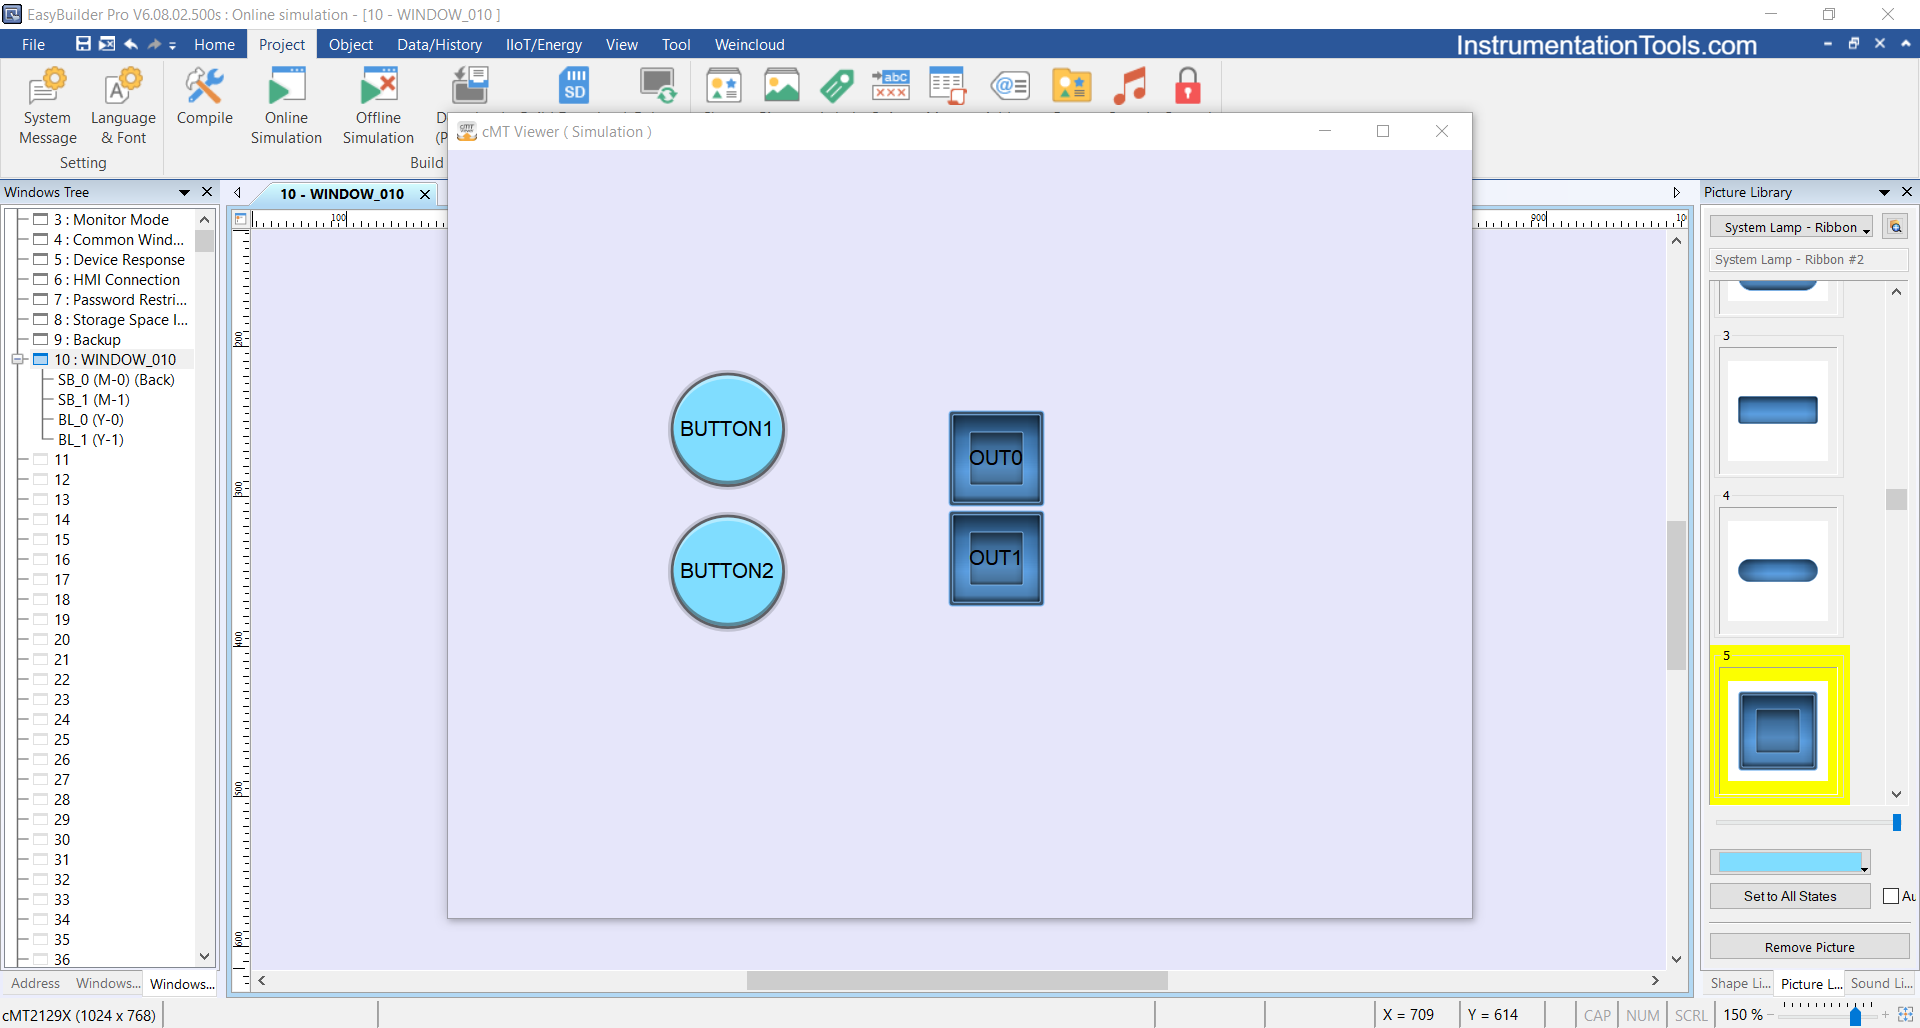
5. Wait, and the simulation screen will appear as shown below. The connection is successful, and the PLC is connected to EasyBuilder Pro.
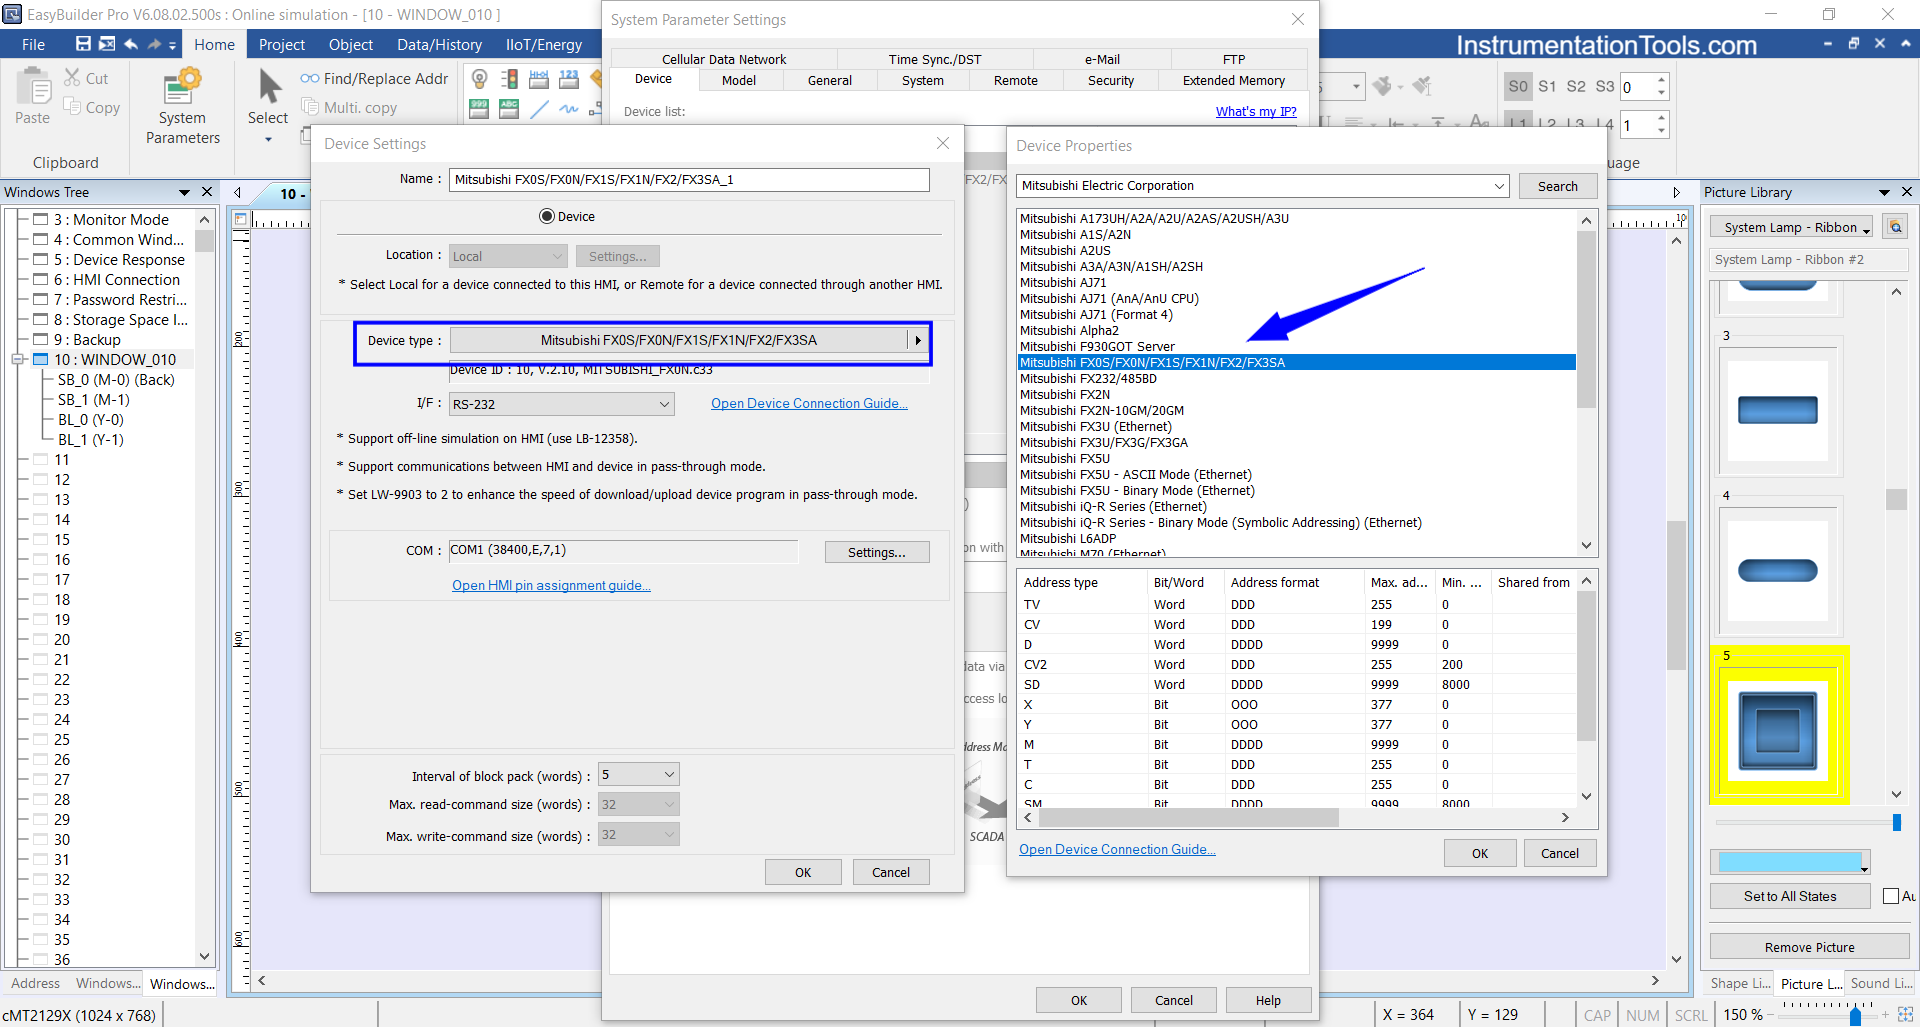
6. If the “Device Not Responding” notification appears in EasyBuilder Pro, it indicates that the connection between the PLC and HMI has failed.
The solution is to change the Device Type in the “System Parameter” of EasyBuilder Pro (e.g., from “FX3U/FX3G/FX3GA” to “FX0S/FX0N/FX1S/FX1N/FX2/FX3SA”), as some models like FX3U-14MT may have compatibility bugs.
Read Next:
- Analog Input in Mitsubishi FX3U PLC
- Siemens Motor Forward Reverse PLC Logic
- Compare Remote I/O and Distributed I/O Systems
- Liquid Flow Control Loop Controller Action
- Traffic Light Auto and Manual PLC Automation


very good